
Welcome to July’s

I’m calling it T-Shirt to Squee-Shirt
This month I wanted to try something that would be very accessible for my readers. After all everyone has a old T-shirt and everyone has a pair of scissors. So the “SQUEE-Shirt” was hatched! Well, to be fair, folks have been hacking up their clothing for some time now from distressed designer jeans with their artful rips and frayings, to “deconstructed” classics and the grunge fad.
So let’s have some fun! I bought several T-shirts in some very juicy colors. I figured at $2 bucks a pop I could indulge in a rainbow of yummy shades. And the option of layering was in the back of my mind as well.
BTW, this would be a great project for tweens!
Here is my panorama of possibilities…

I started with a big (wide) cut in the back in the shape of a triangle. I folded the fabric in half and made the cuts.

 If you make the cuts closer together you will get a finer weave–farther apart (easier) you will have a more open weave. But be sure not to cut too closely or the fabric will fray and you won’t have a strong thread/cut to weave.
Start weaving from the back to front. (I accidentally deleted the beginning weaving pics, so this is taken when I am half-way through. Sorry.) No worries just begin at the top with the first cut, lift it up, and then take up the thread/cut just in front and pull it through the lifted back one. 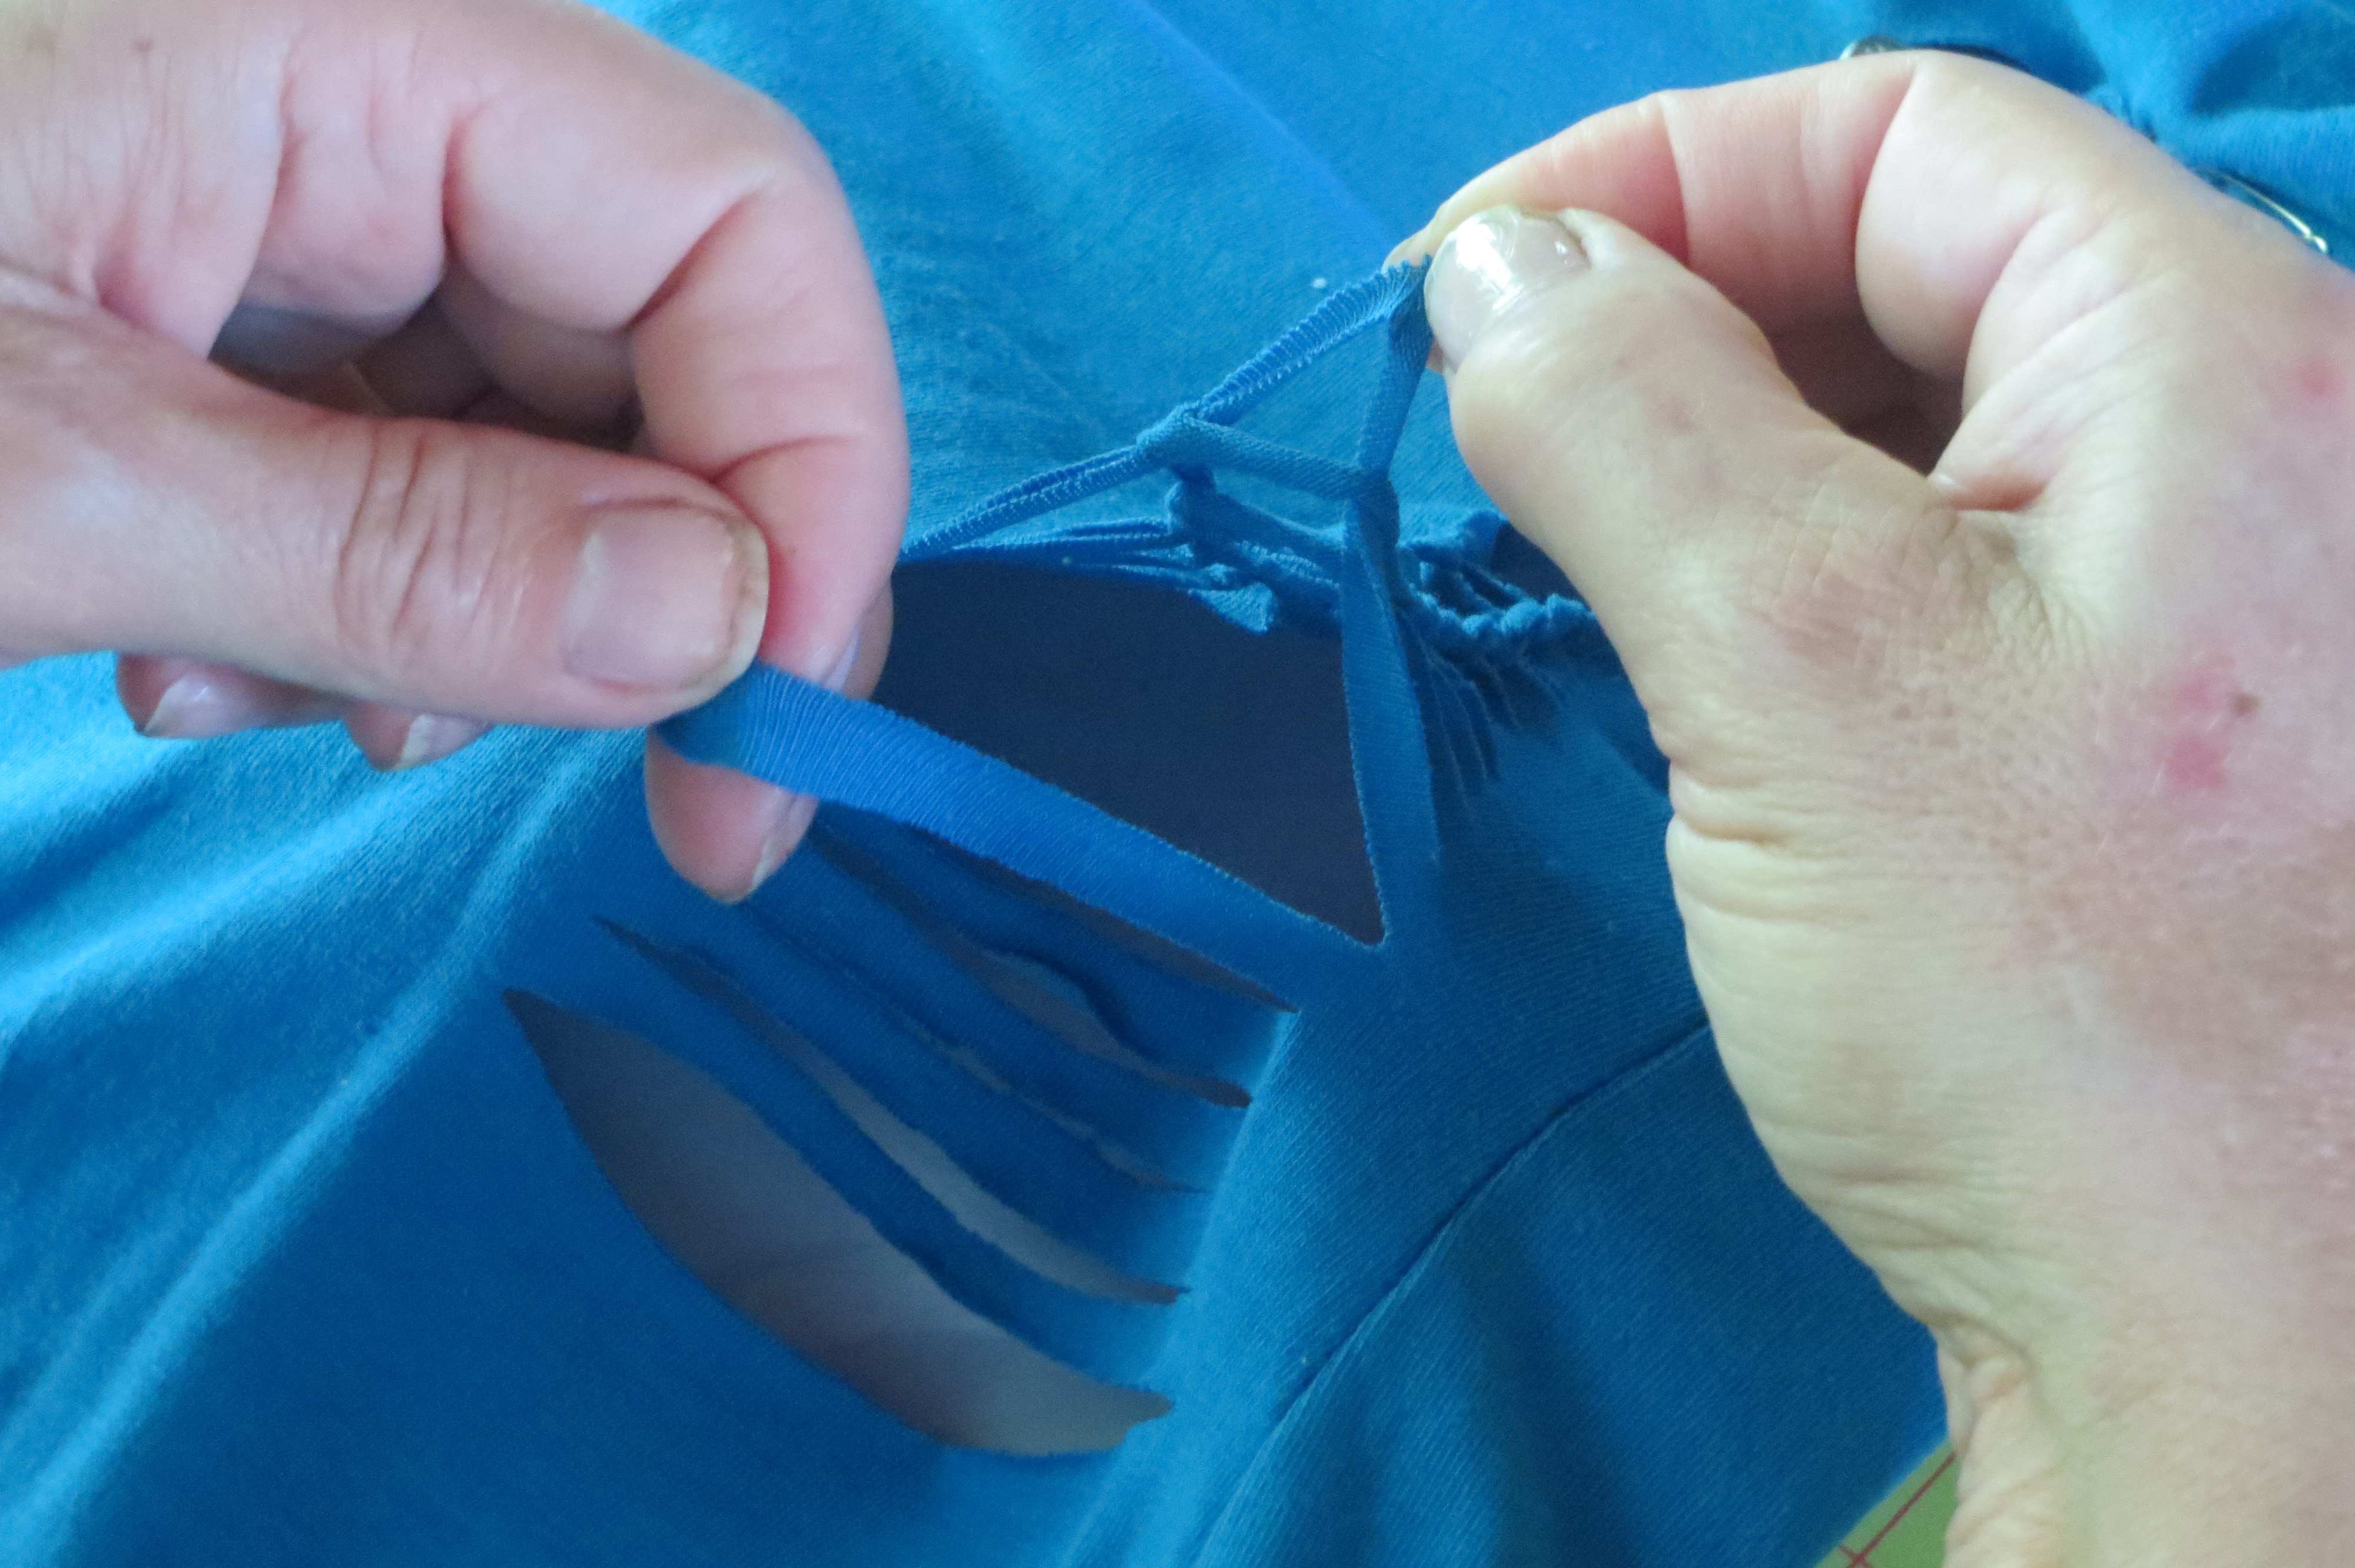 Drop the back one. Once you do that you will have a LOOP, or a “door” so that the next cut will go “through the door”. Again, once you have your “new loop” drop the old one. And so you progress till you come to the last (front) cut and are left with a final LOOP.
(Or two loops in this picture because I have done a double braid.)
 You can either stitch this down with needle and thread. OR: You can cut a thin strip of t-shirt material, and then cut a little hole just at the end and thread the strip through the LOOP and then through the hole and tie it off in a knot.
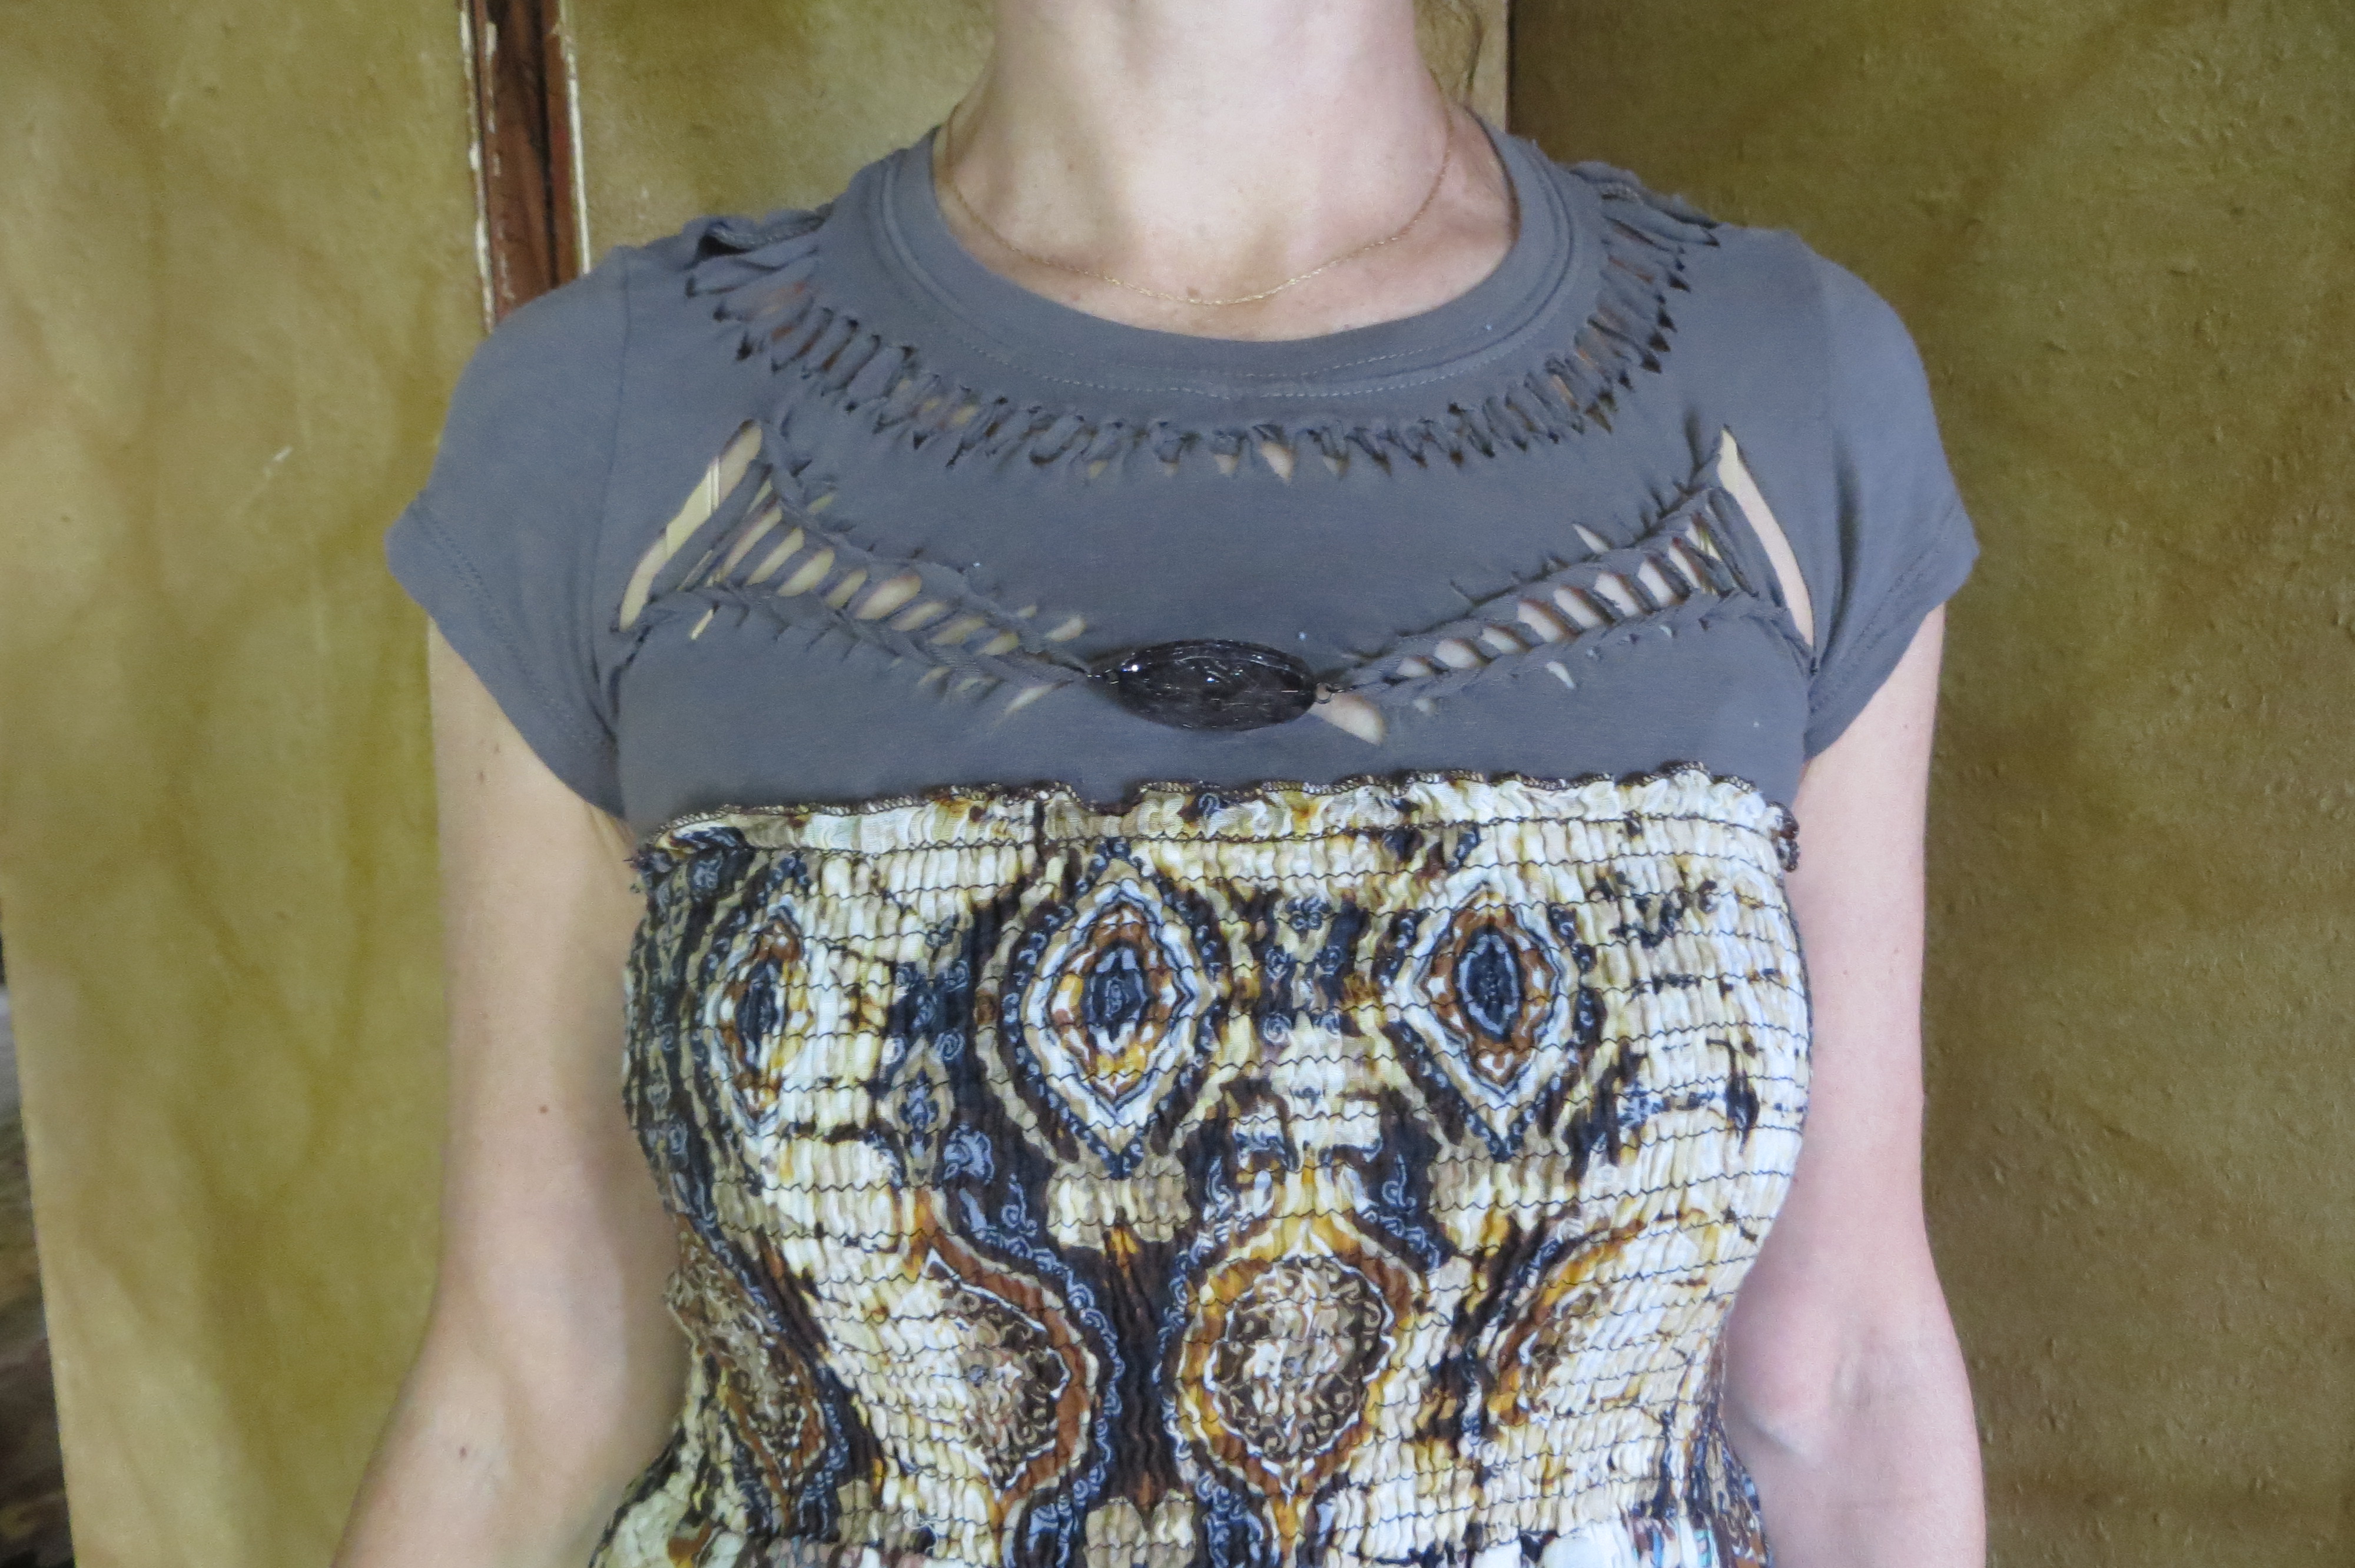
OR: Add a chain loop with a bead.
 There are any number of ways to secure the end. Just know you MUST secure it somehow or it will unravel. BUT, If you hate what you’ve done and want to start over, just let the loop go and pull the sides and POOF! You will get a fresh start!
More advanced: You can also do double and triple braids. Simply “comb” the weave out to the sides 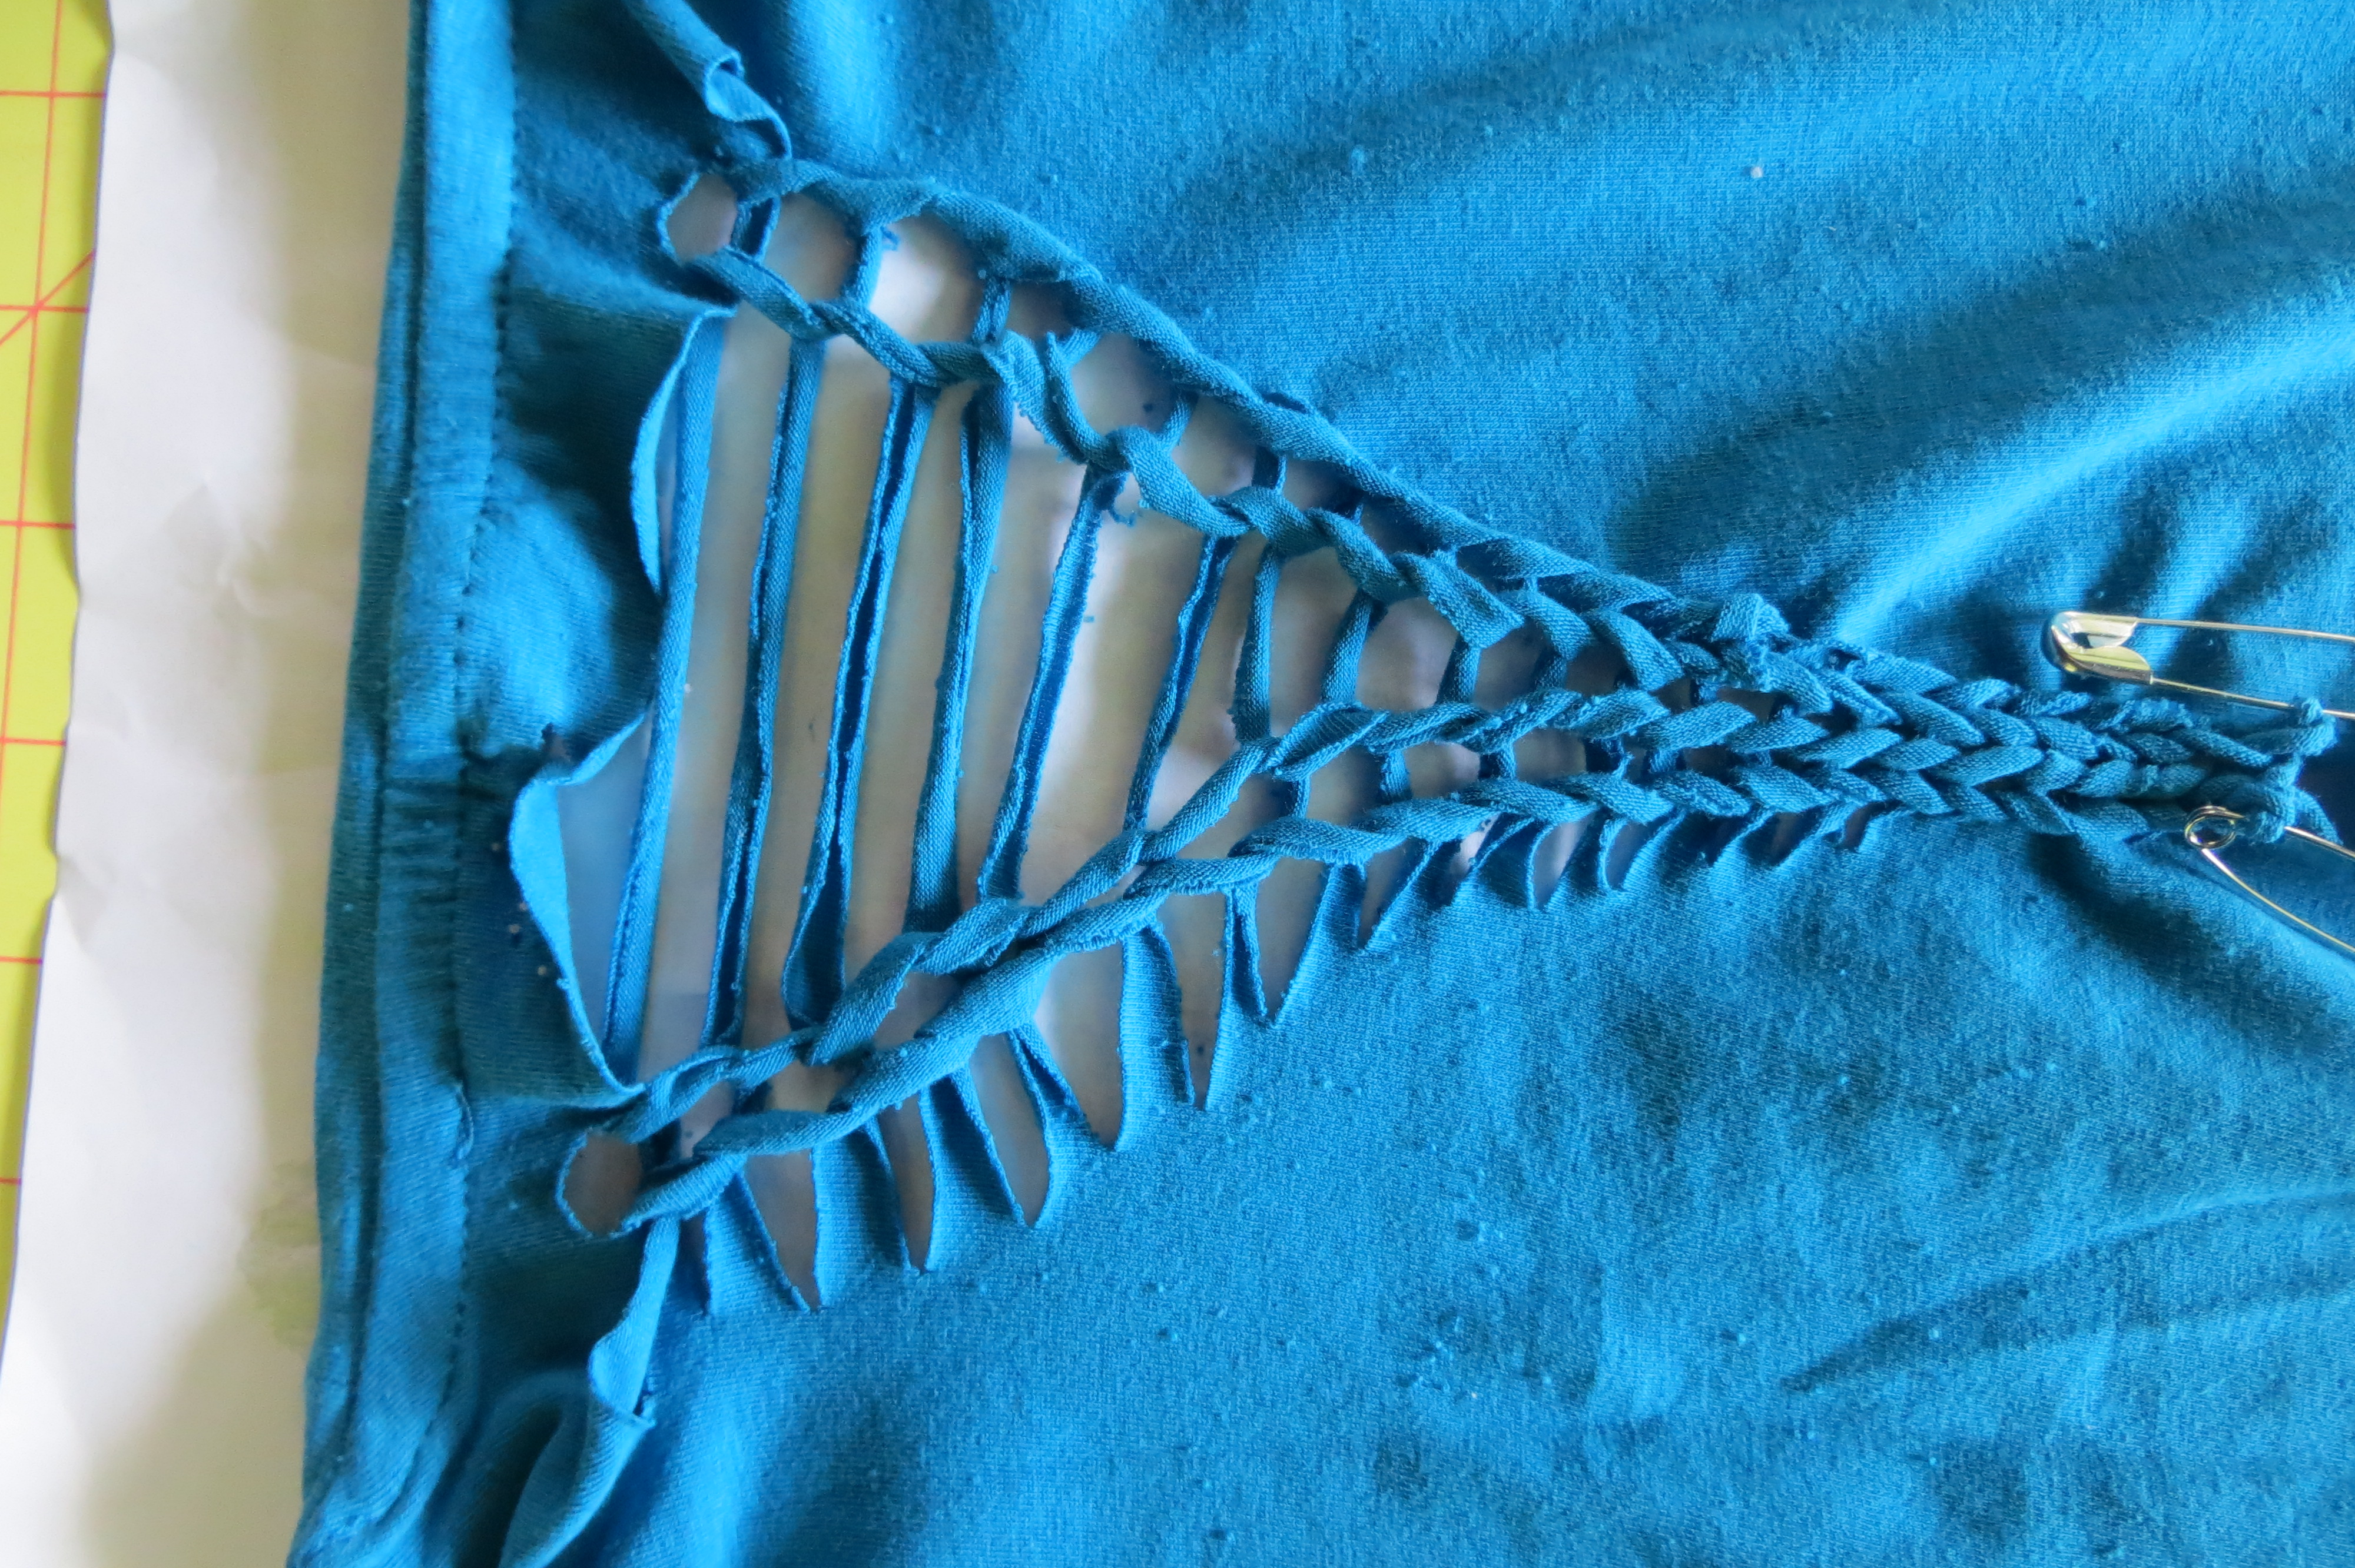 and begin a new braid right down the middle. NOTE: the narrower the cut channel, the trickier it is to weave.
You might want to use a tool. I made a little hook with a paper clip. 
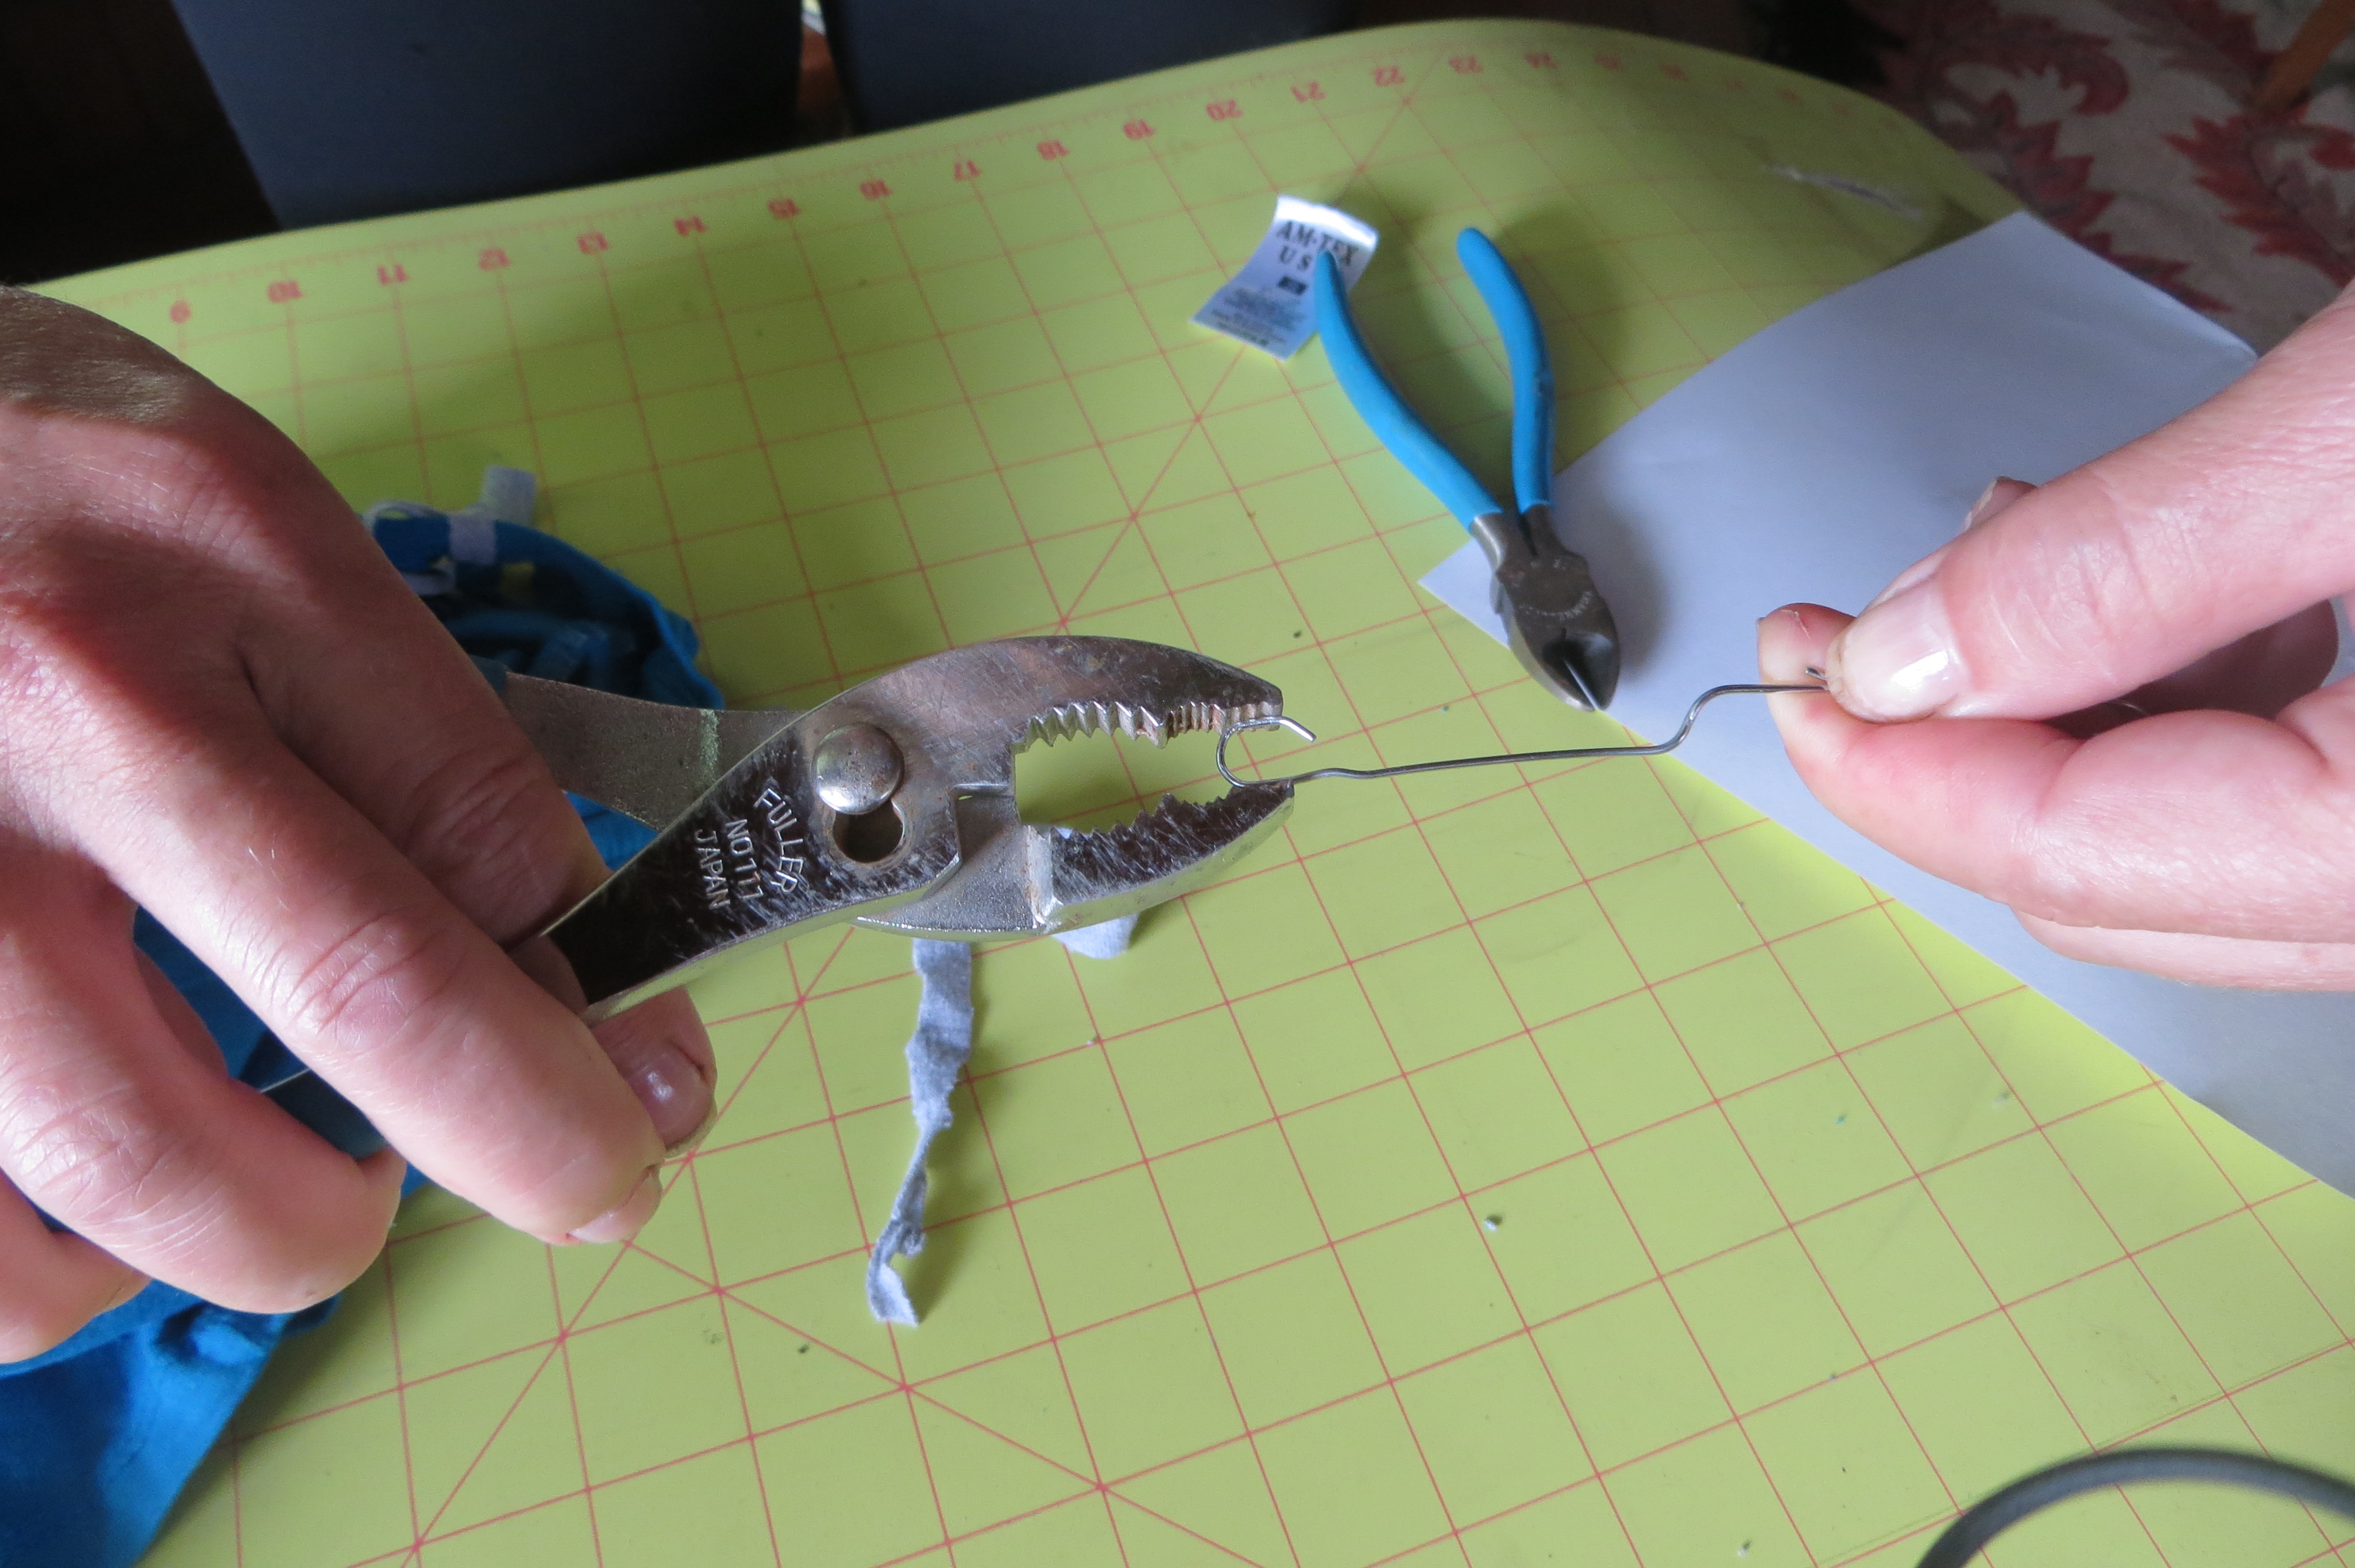 (A large crochet hook would work well but I didn’t have one on hand). Simply use the hook to “fish” for the cut “thread” in front of your loop
  and pull the fished thread through.
  This tool helps when weaving in a narrow channel.
Tips and Things I learned:
- Best not to have a cut on the tip of your finger when doing this project. Ouch!

- If you want to mark the shirt with either pencil or Taylor’s chalk turn it inside out first, mark on the inside, cut on the inside and then turn it right-side-out to weave.

- If you want to subtler (flatter) weave, braid on the inside (wrong side of the shirt).
- It’s easier to weave from back to front. So simply turn the shirt to position it this way.
- Sharp scissors are a must!
- Folding the fabric in half and cutting into the fold helps keep the cuts even.
 Using straight pins will stabilize your cuts (keeping the fabric together and the cuts even is key).
- You can always expand your weaving area by simply extending the cuts on the sides (even after you have woven.)


So here are some results. The point is to play around. If you “mess up” all you’ve lost is a bit of time and an old T-shirt!


 (You can enlarge the pictures by mousing over and clicking.)


My goodness! wherever did you get this idea? The result is good, but looks like a lot of work, and too complicated for my old brain. Love, Mom
LikeLike
Great idea
LikeLike
Yet again, I have a Bangkok anecdote prompted by this… we were sitting by the pool, in new jeans each–I think we’d been shopping–and you explained to me how to “work” a pair of jeans to look (appropriately) worn–I think it involved sandpaper, and you said so ours would look “cool, like Jenny’s.” Ah, youth.
LikeLike