This month I wanted to try something that would be very accessible for my readers. After all everyone has a old T-shirt and everyone has a pair of scissors. So the “SQUEE-Shirt” was hatched! Well, to be fair, folks have been hacking up their clothing for some time now from distressed designer jeans with their artful rips and frayings, to “deconstructed” classics and the grunge fad.
So let’s have some fun! I bought several T-shirts in some very juicy colors. I figured at $2 bucks a pop I could indulge in a rainbow of yummy shades. And the option of layering was in the back of my mind as well.
BTW, this would be a great project for tweens!
Here is my panorama of possibilities…
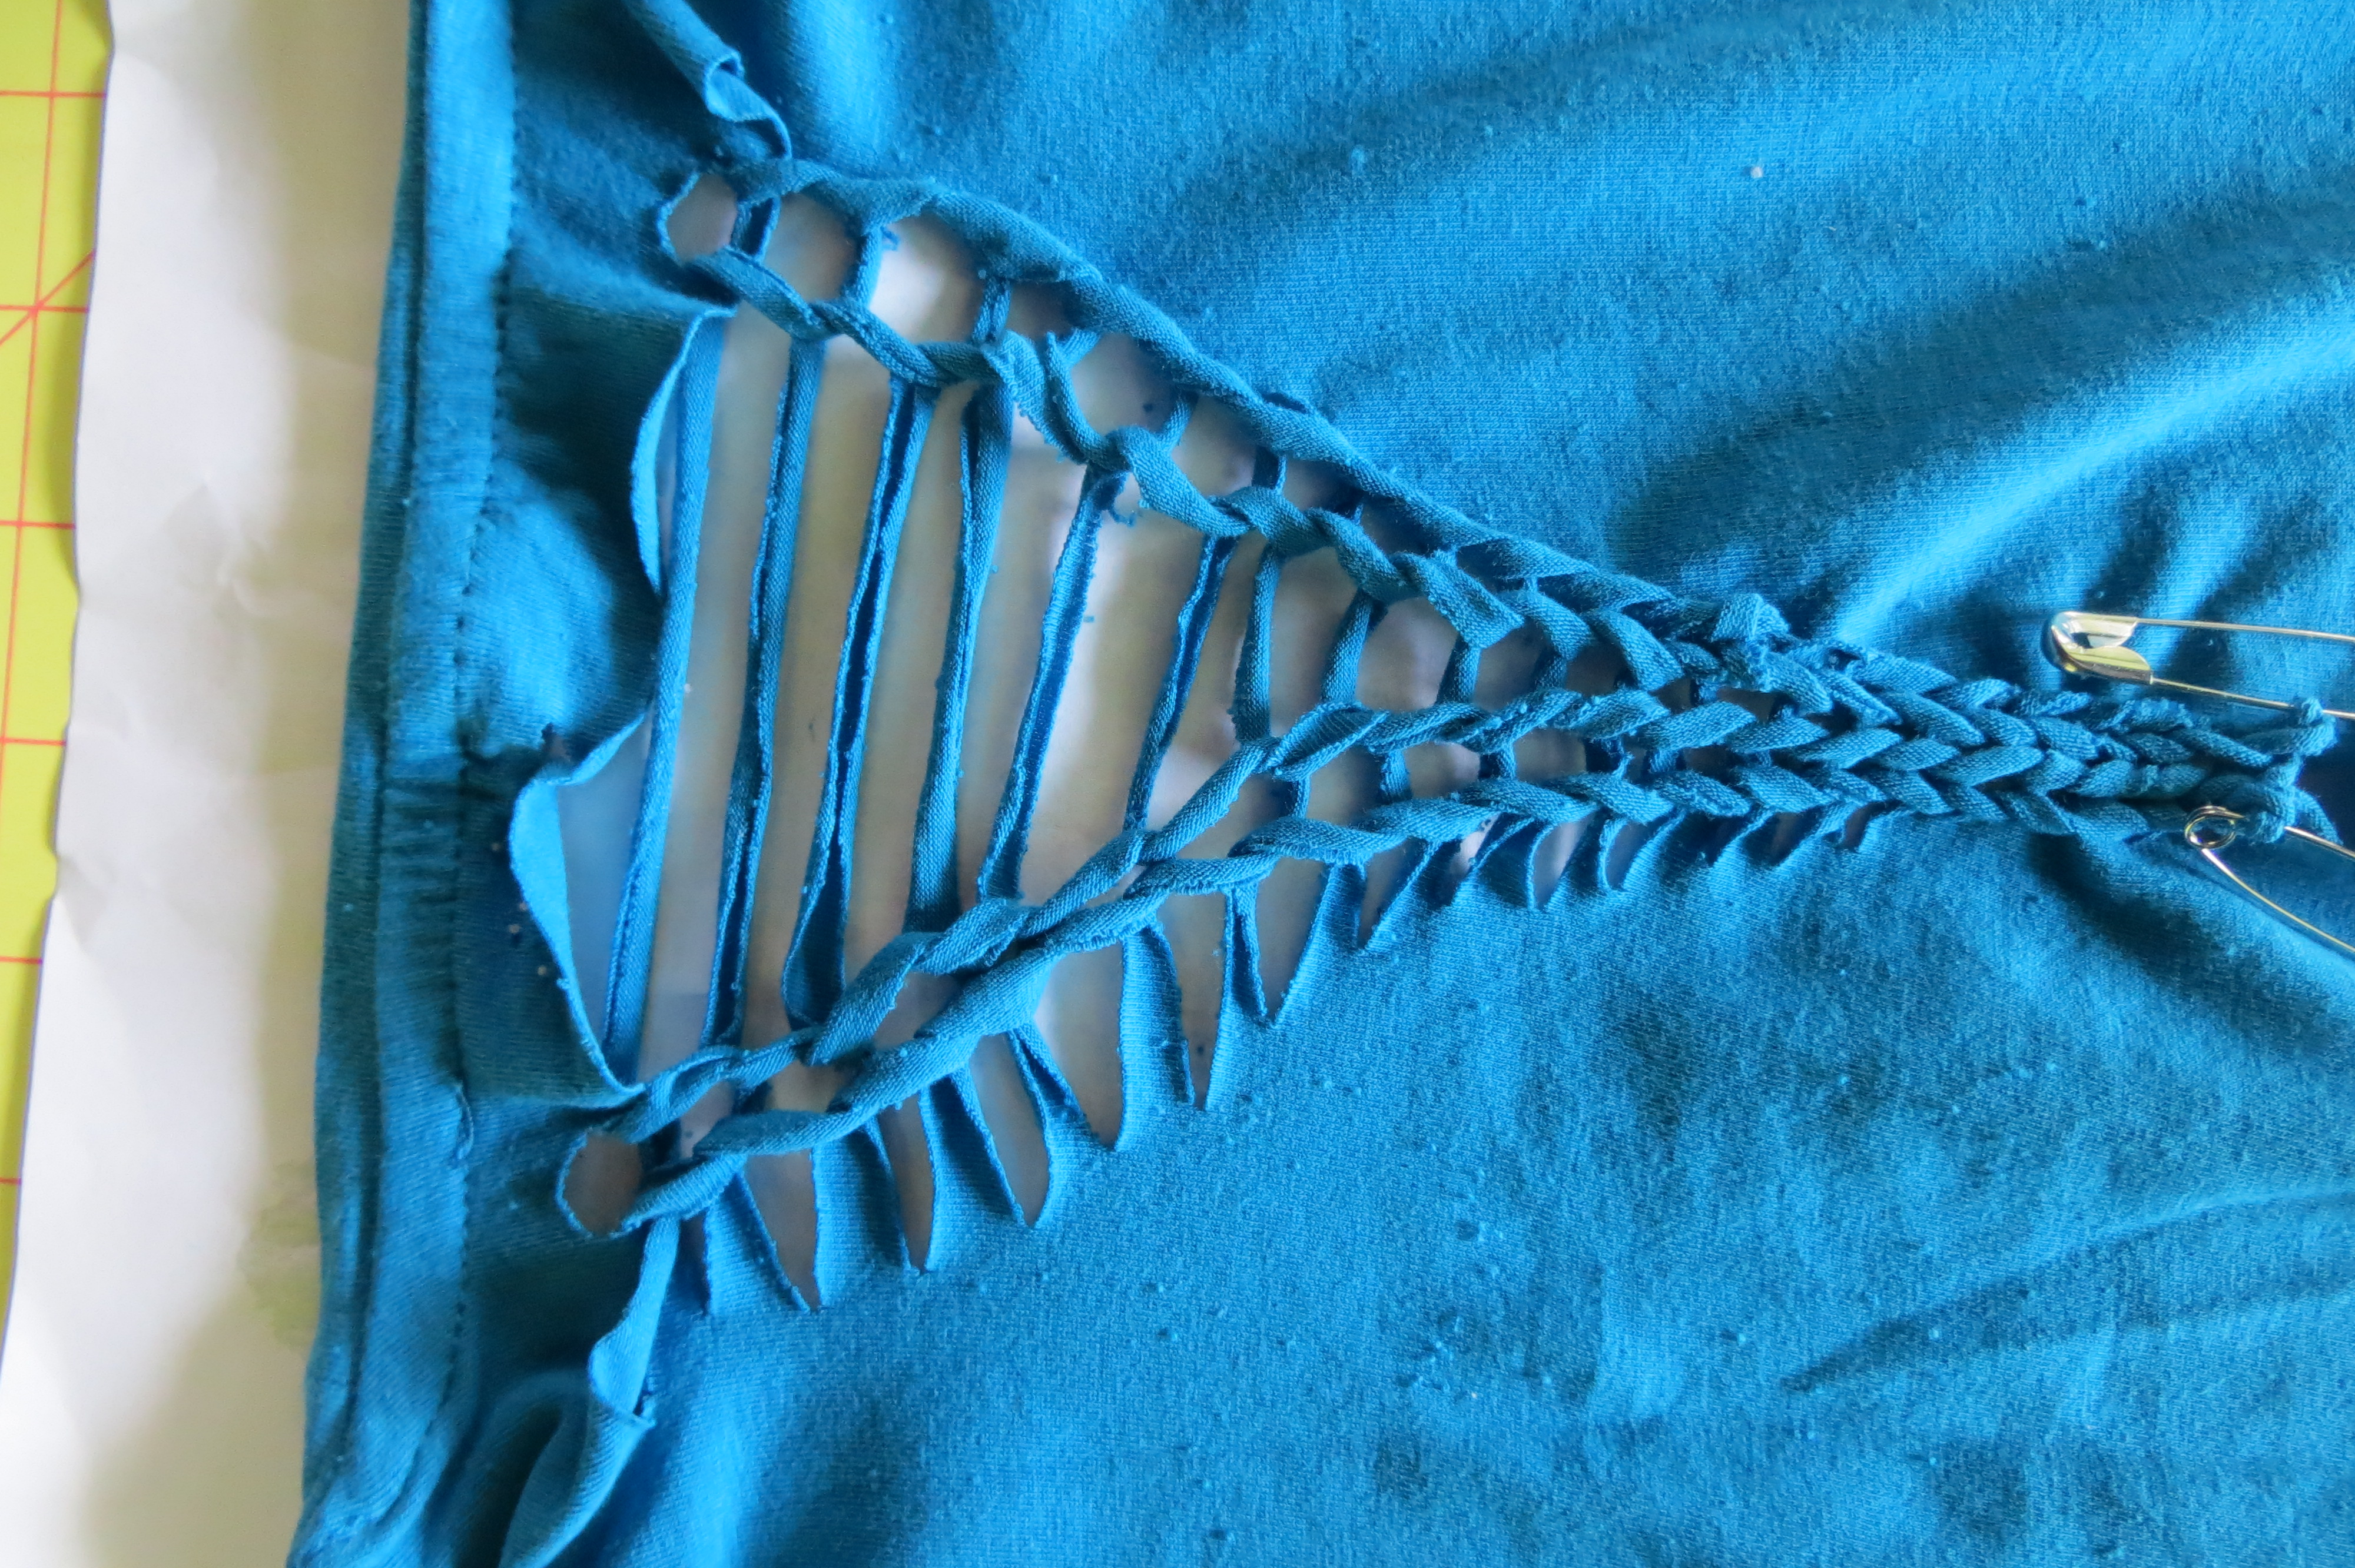
I started with a big (wide) cut in the back in the shape of a triangle. I folded the fabric in half and made the cuts.
If you make the cuts closer together you will get a finer weave–farther apart (easier) you will have a more open weave. But be sure not to cut too closely or the fabric will fray and you won’t have a strong thread/cut to weave.
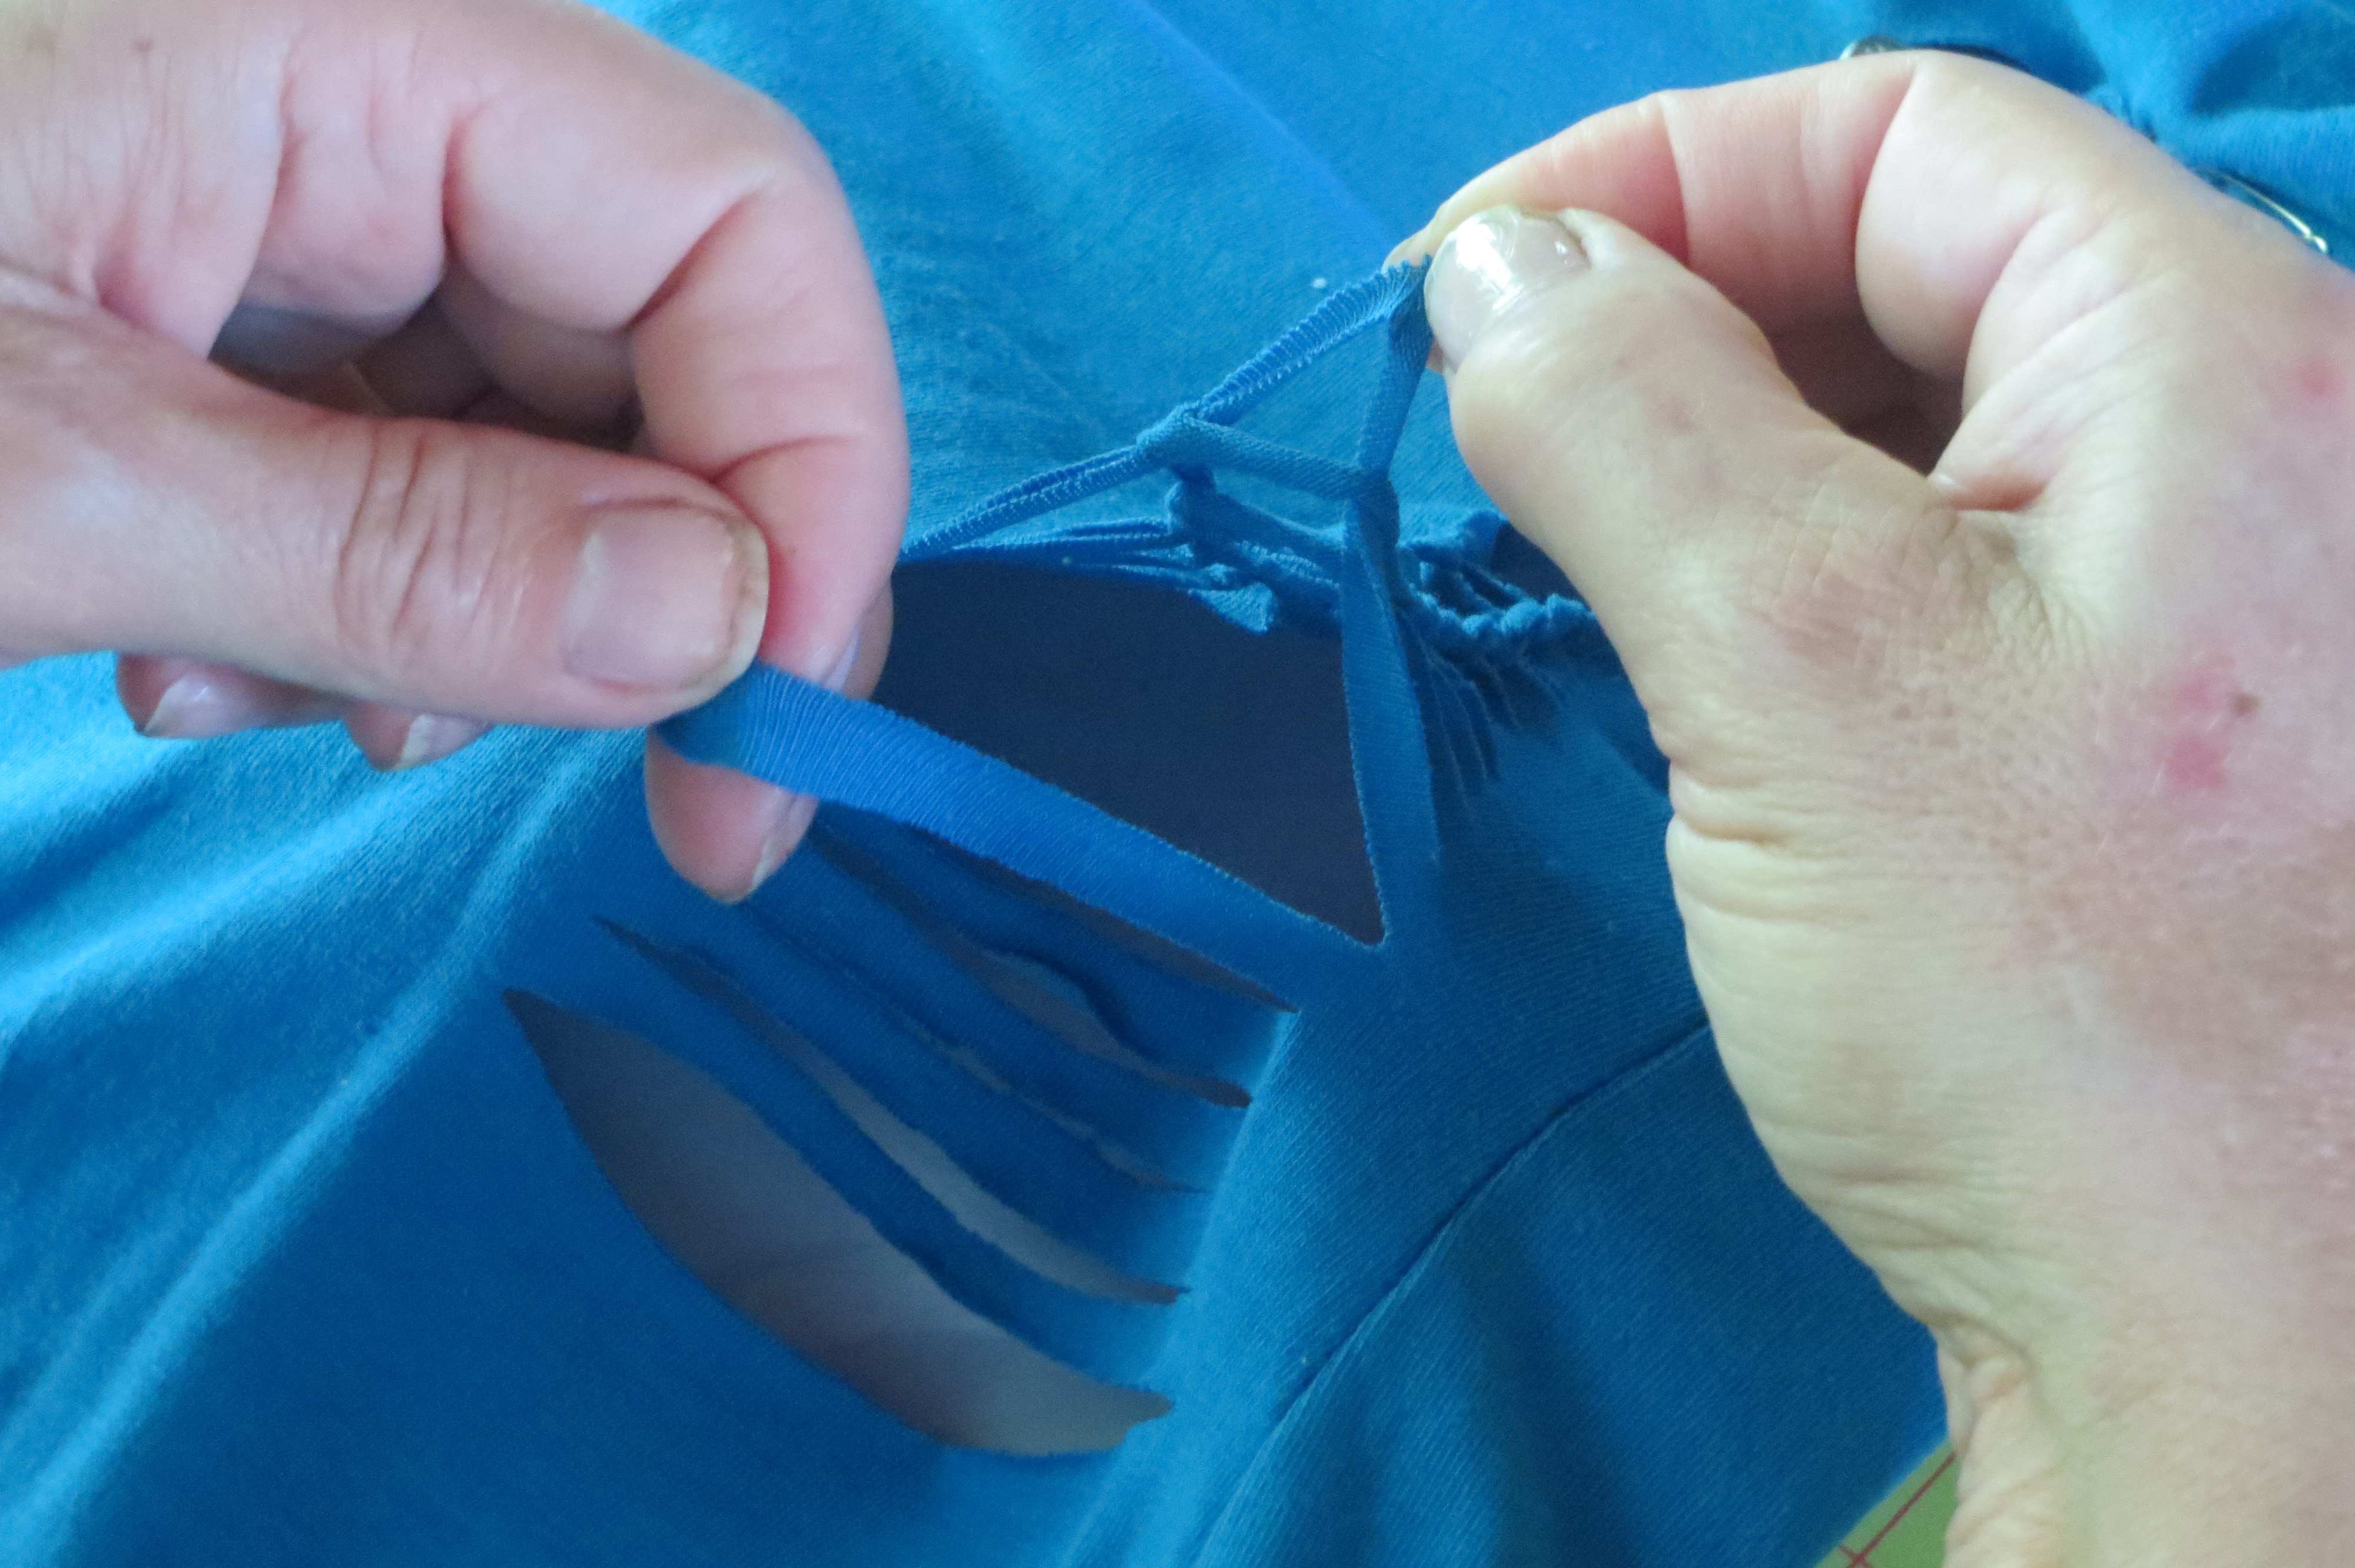
Start weaving from the back to front. (I accidentally deleted the beginning weaving pics, so this is taken when I am half-way through. Sorry.) No worries just begin at the top with the first cut, lift it up, and then take up the thread/cut just in front and pull it through the lifted back one. Drop the back one. Once you do that you will have a LOOP, or a “door” so that the next cut will go “through the door”. Again, once you have your “new loop” drop the old one. And so you progress till you come to the last (front) cut and are left with a final LOOP.
(Or two loops in this picture because I have done a double braid.)
You can either stitch this down with needle and thread. OR: You can cut a thin strip of t-shirt material, and then cut a little hole just at the end and thread the strip through the LOOP and then through the hole and tie it off in a knot.
OR: Add a chain loop with a bead.
There are any number of ways to secure the end. Just know you MUST secure it somehow or it will unravel. BUT, If you hate what you’ve done and want to start over, just let the loop go and pull the sides and POOF! You will get a fresh start!
More advanced: You can also do double and triple braids. Simply “comb” the weave out to the sides and begin a new braid right down the middle. NOTE: the narrower the cut channel, the trickier it is to weave.
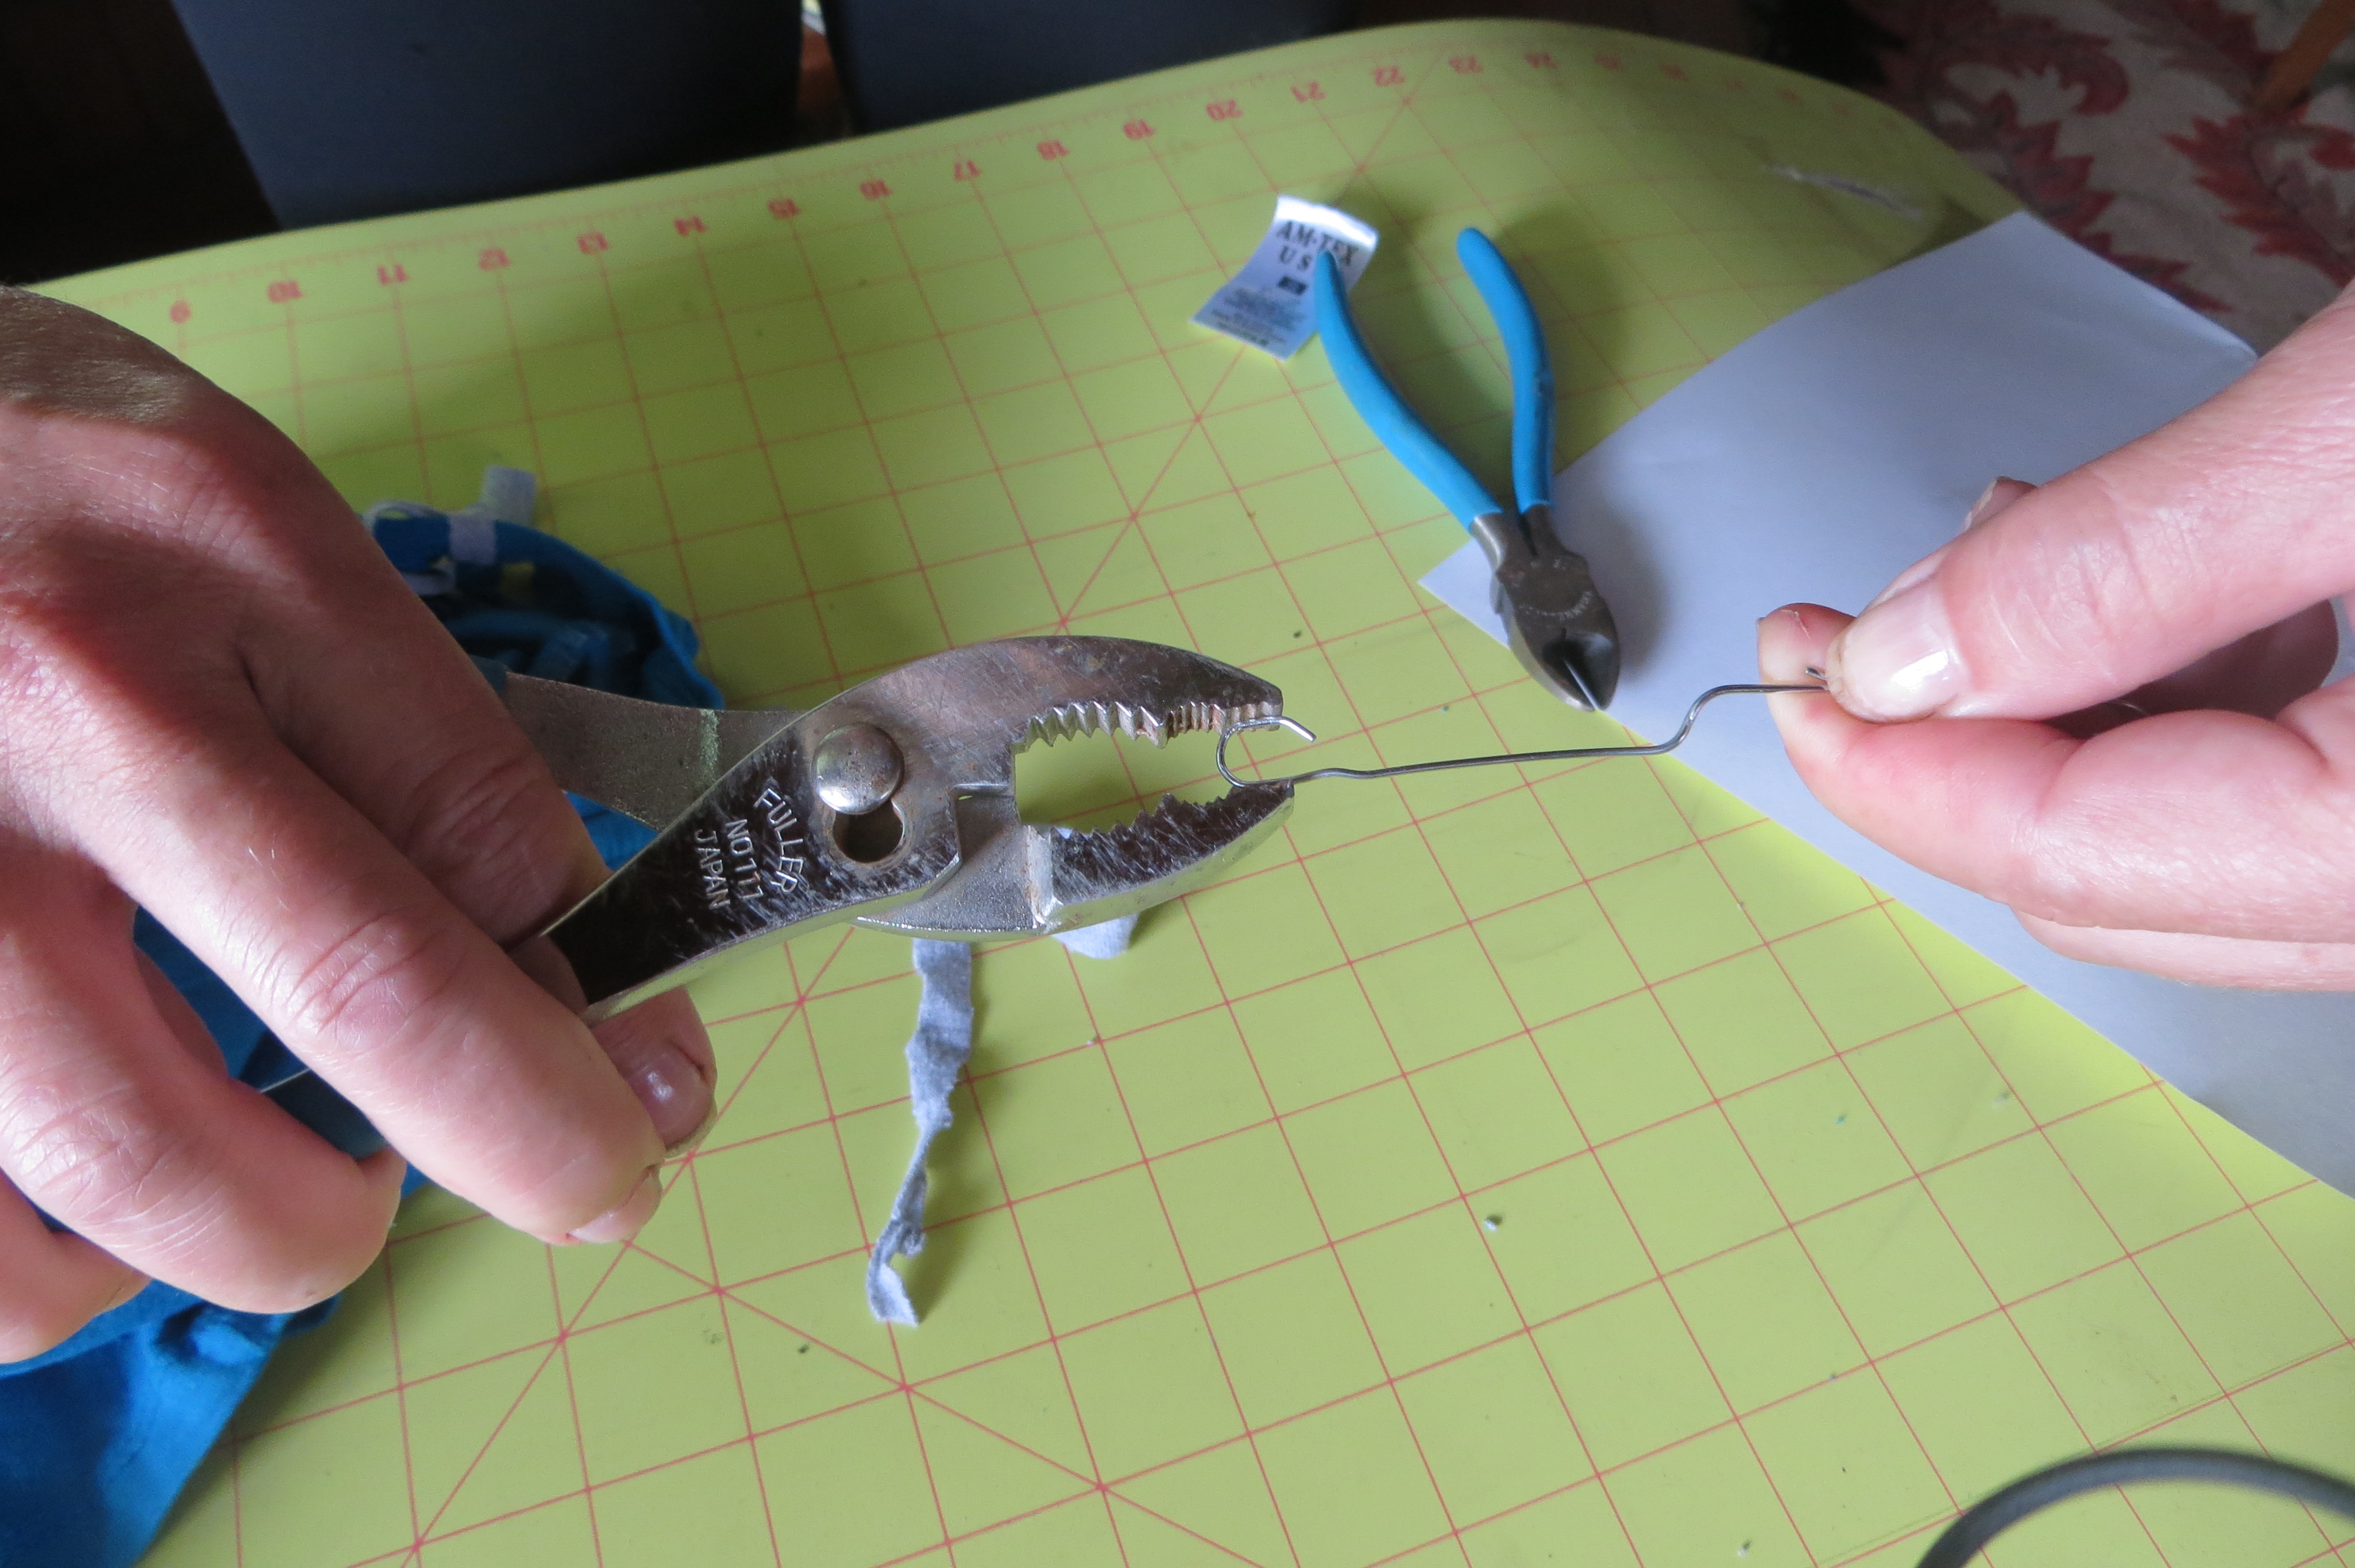
You might want to use a tool. I made a little hook with a paper clip. (A large crochet hook would work well but I didn’t have one on hand). Simply use the hook to “fish” for the cut “thread” in front of your loop and pull the fished thread through. This tool helps when weaving in a narrow channel.
Tips and Things I learned:
Best not to have a cut on the tip of your finger when doing this project. Ouch!
If you want to mark the shirt with either pencil or Taylor’s chalk turn it inside out first, mark on the inside, cut on the inside and then turn it right-side-out to weave.
If you want to subtler (flatter) weave, braid on the inside (wrong side of the shirt).
It’s easier to weave from back to front. So simply turn the shirt to position it this way.
Sharp scissors are a must!
Folding the fabric in half and cutting into the fold helps keep the cuts even. Using straight pins will stabilize your cuts (keeping the fabric together and the cuts even is key).
You can always expand your weaving area by simply extending the cuts on the sides (even after you have woven.)
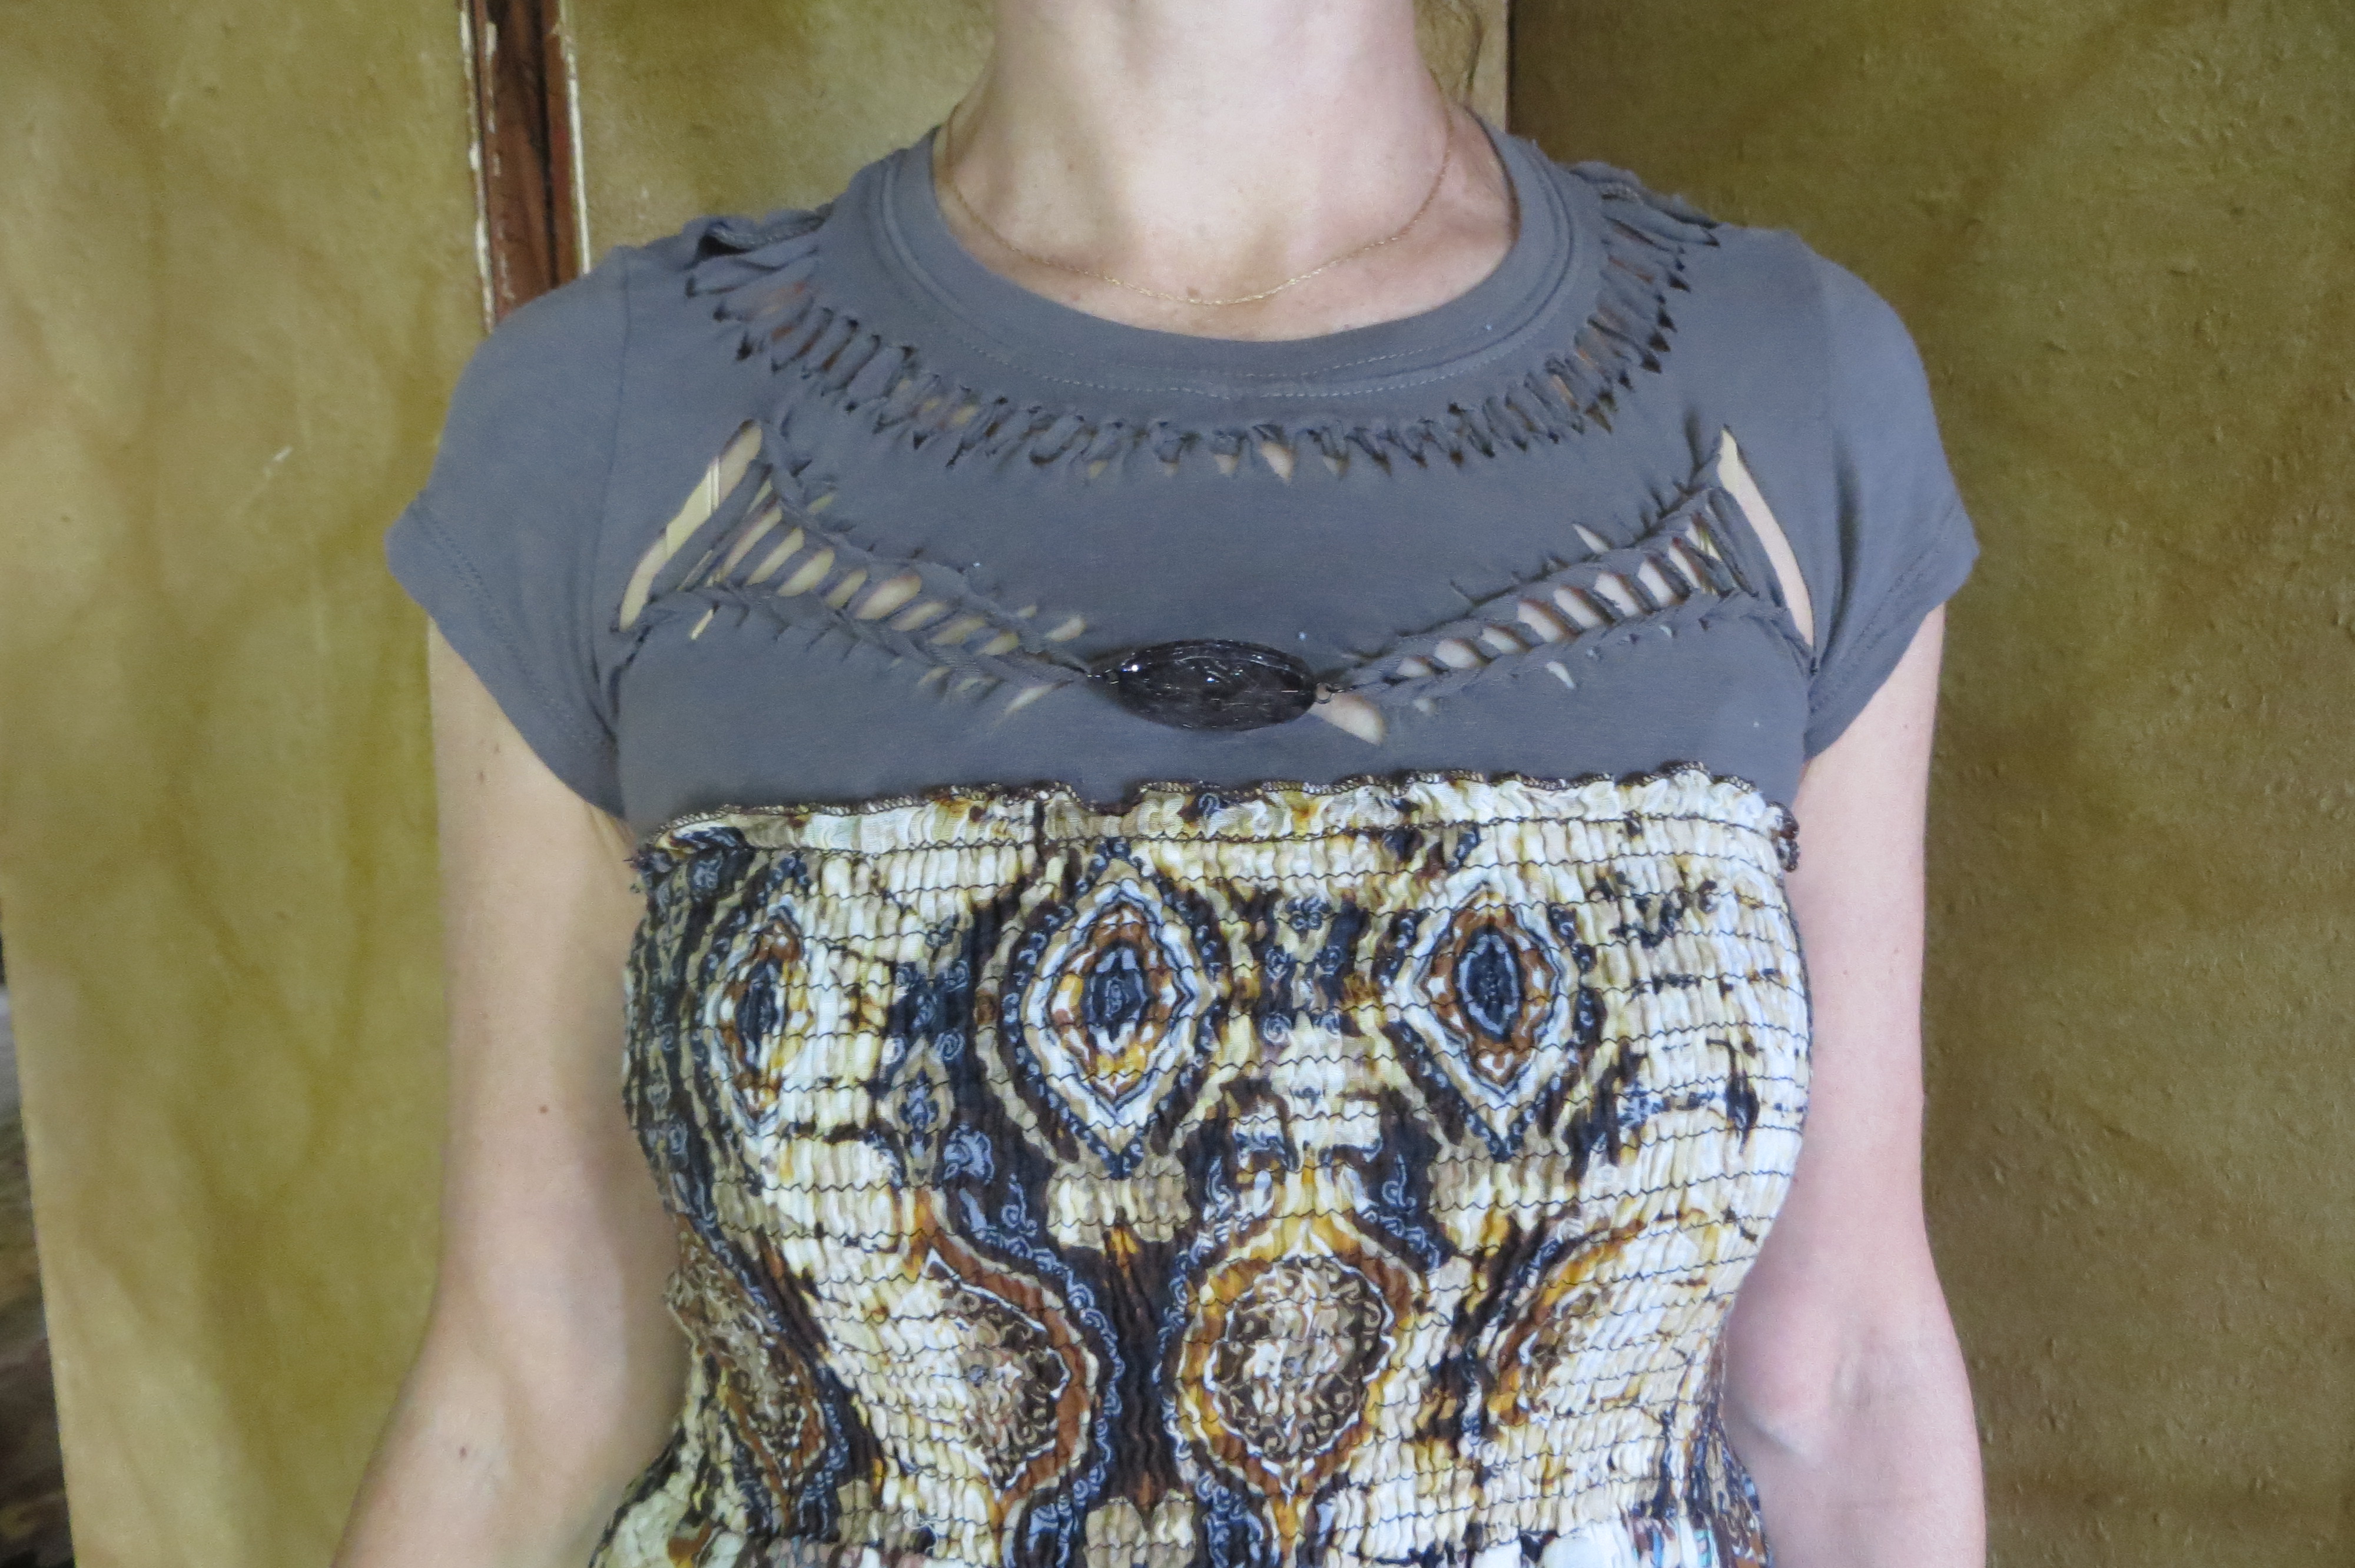
So here are some results. The point is to play around. If you “mess up” all you’ve lost is a bit of time and an old T-shirt!
(You can enlarge the pictures by mousing over and clicking.)
Thanks for stopping by!
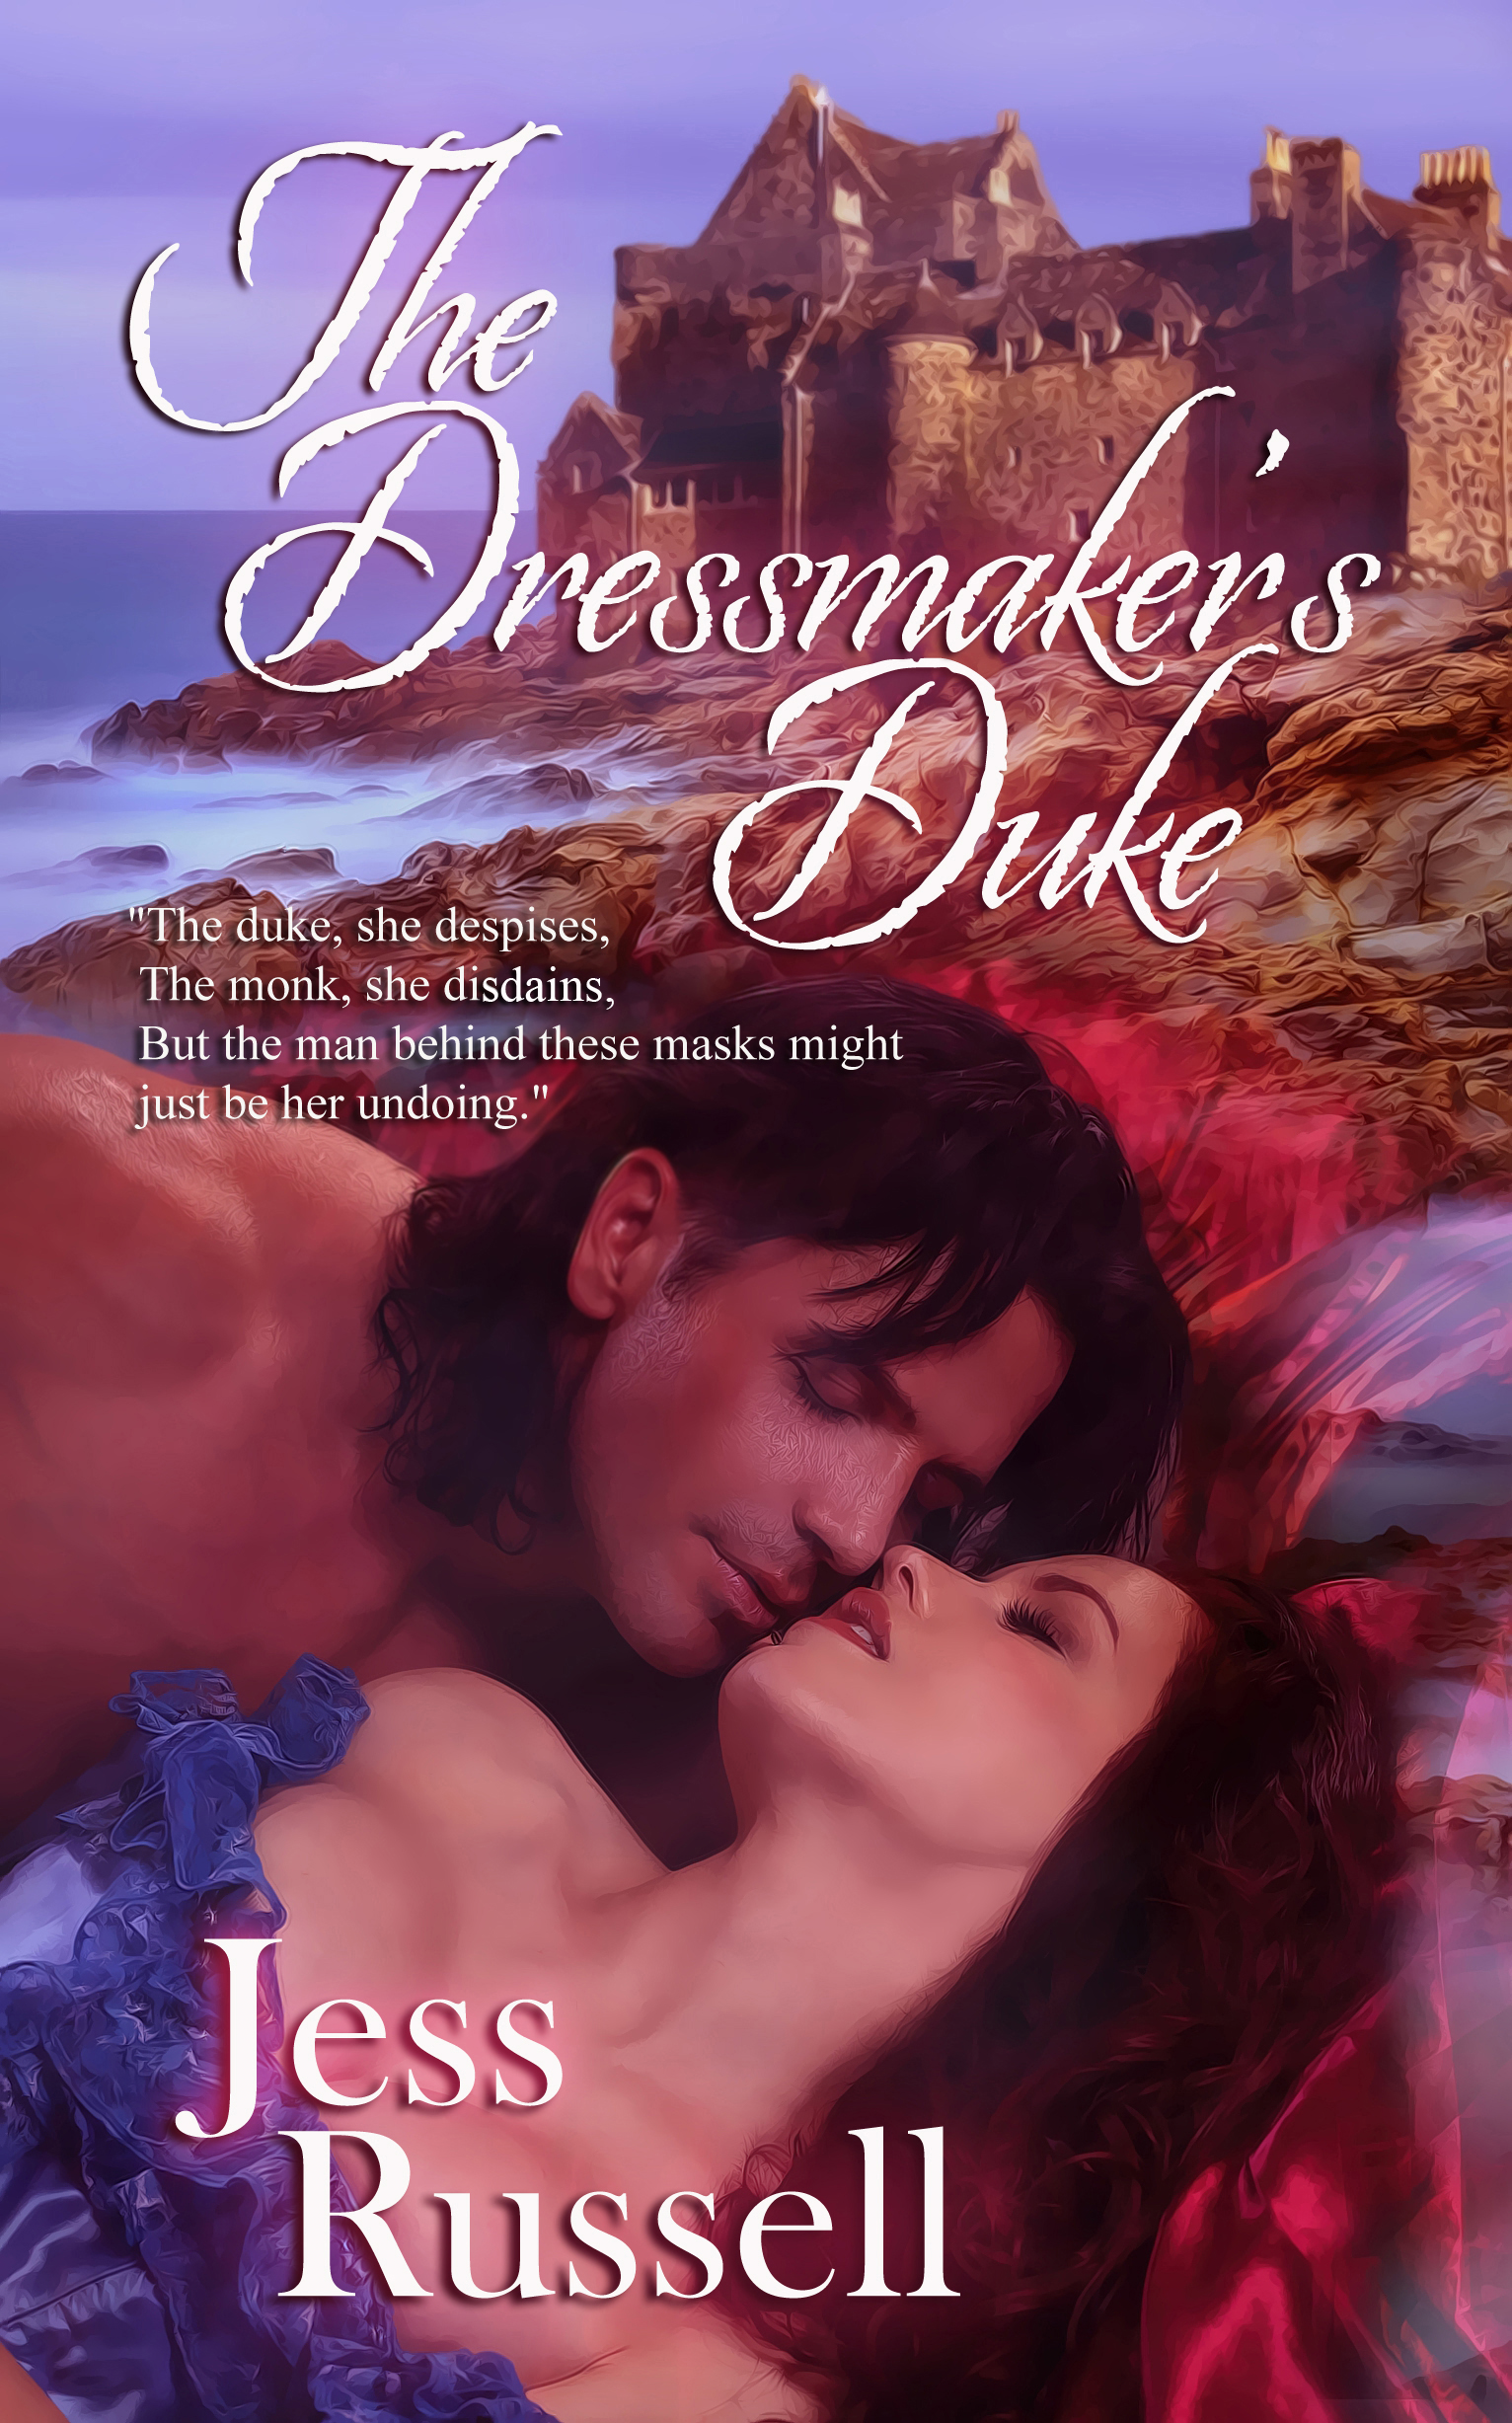
As always my book, The Dressmaker’s Duke is available at:
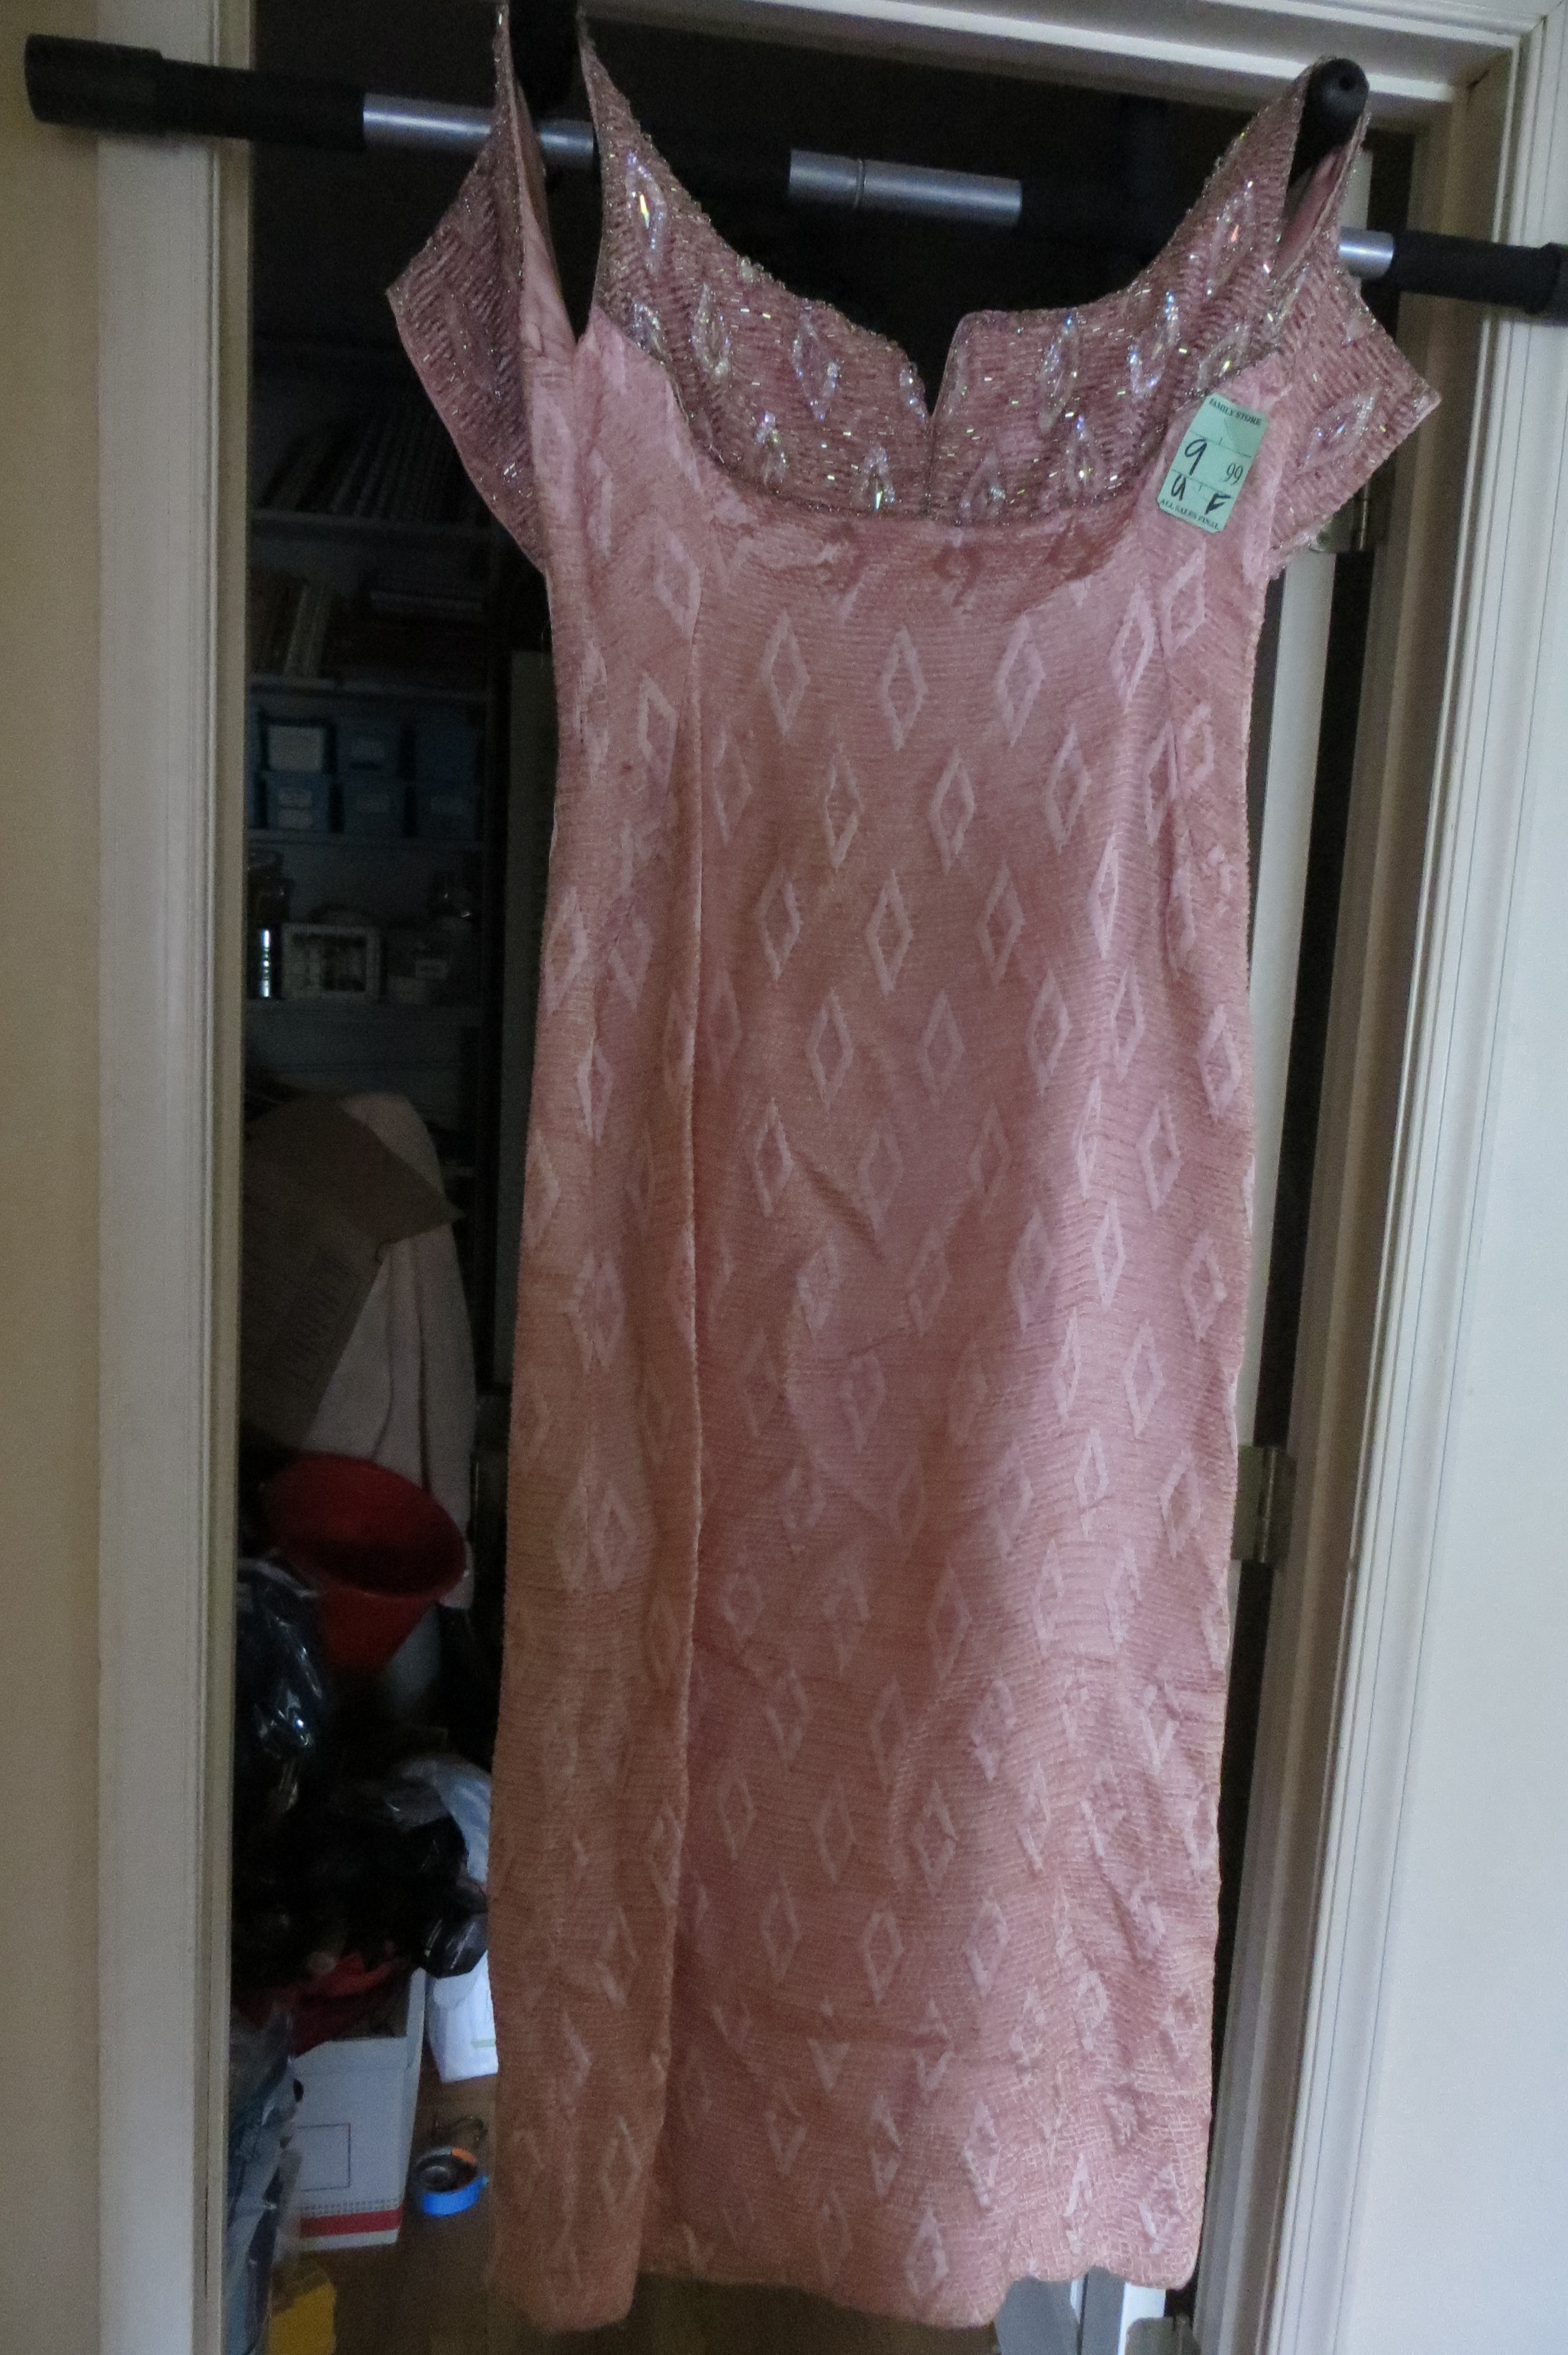
This find is really a diamond in the rough. The “diamonds” and beading were what attracted me to this potentially fabulous Frock.
Here it is:
I actually love this Ballet pink color. It happens to be very flattering on most complexions. Below you can the hem is pretty trashed and (hard to see) in the above photo but it’s big on me. So the first thing I do is chop off the nasty hem and some of the skirt.
Next I wash it. Now this can be tricky. I have a suspicion it’s going to shrink. It is handmade so there is no label to tell me what it’s made of (chenille and ??) Actually it doesn’t really matter because I am not going to spend the money to dry clean it. So, as a test, I wash the skirt bit I’ve chopped off in cool water with Woolite.
Tip: When at all possible try to test the fabric before committing the whole garment to the suds.
Sure enough, the fabric shrinks a good bit. I can tell because the lining does NOT shrink while the pink fabric does. (You can often stretch the garment as its drying to try and get it to stay true to size, but it doesn’t always work.)
I’m not so worried about the shrinkage because the dress is too big so I’m thinking it may even save me some time.
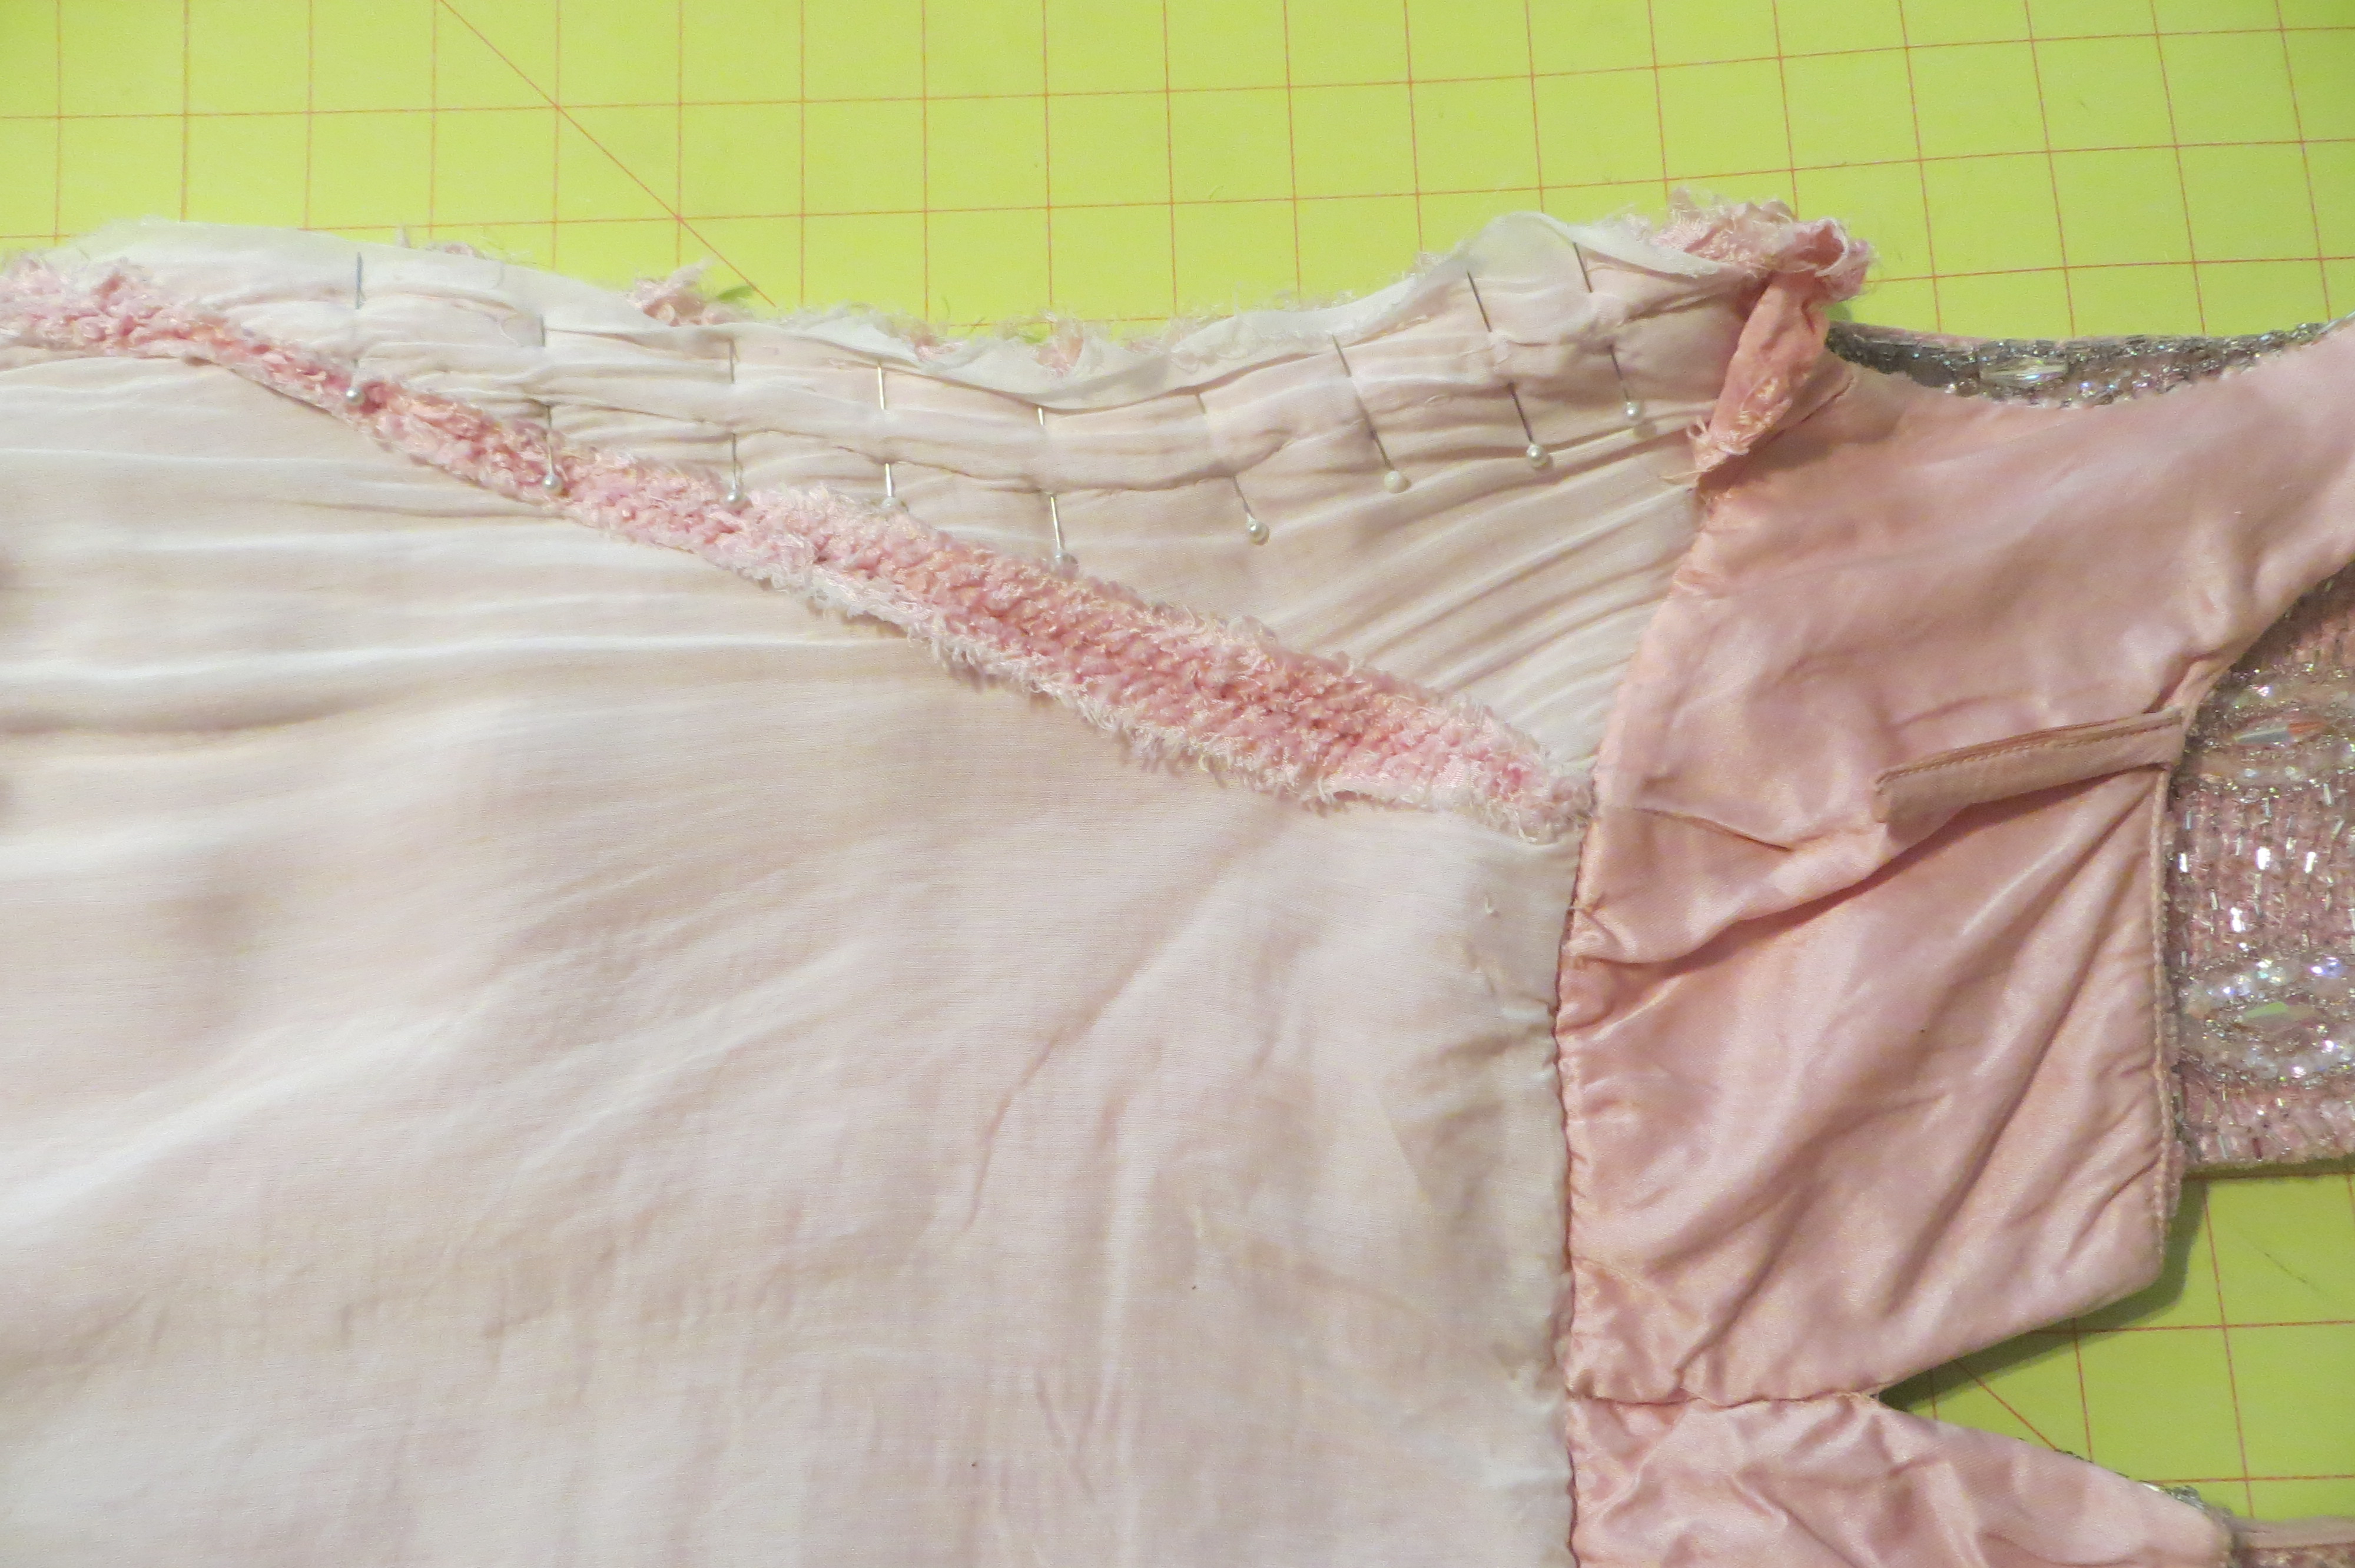
So, I take the plunge and PLUNGE! You can (sort of) see the shrinkage. I am pinching the lining that is “extra” now after washing. I did put the dress on while it was damp to make sure it was not too tight. (Have you ever done this with tight jeans? Same concept.)
I still need to take in the sides some. I baste a new seam and then go ahead and stitch it on the machine. This dress has several darts as well as seams. This is great because I can “sculpt” the dress by nipping and tacking at any of these points.
I trim and clip the new seam.
Then all I have to do is mark a hem and hand-stitch it in place.
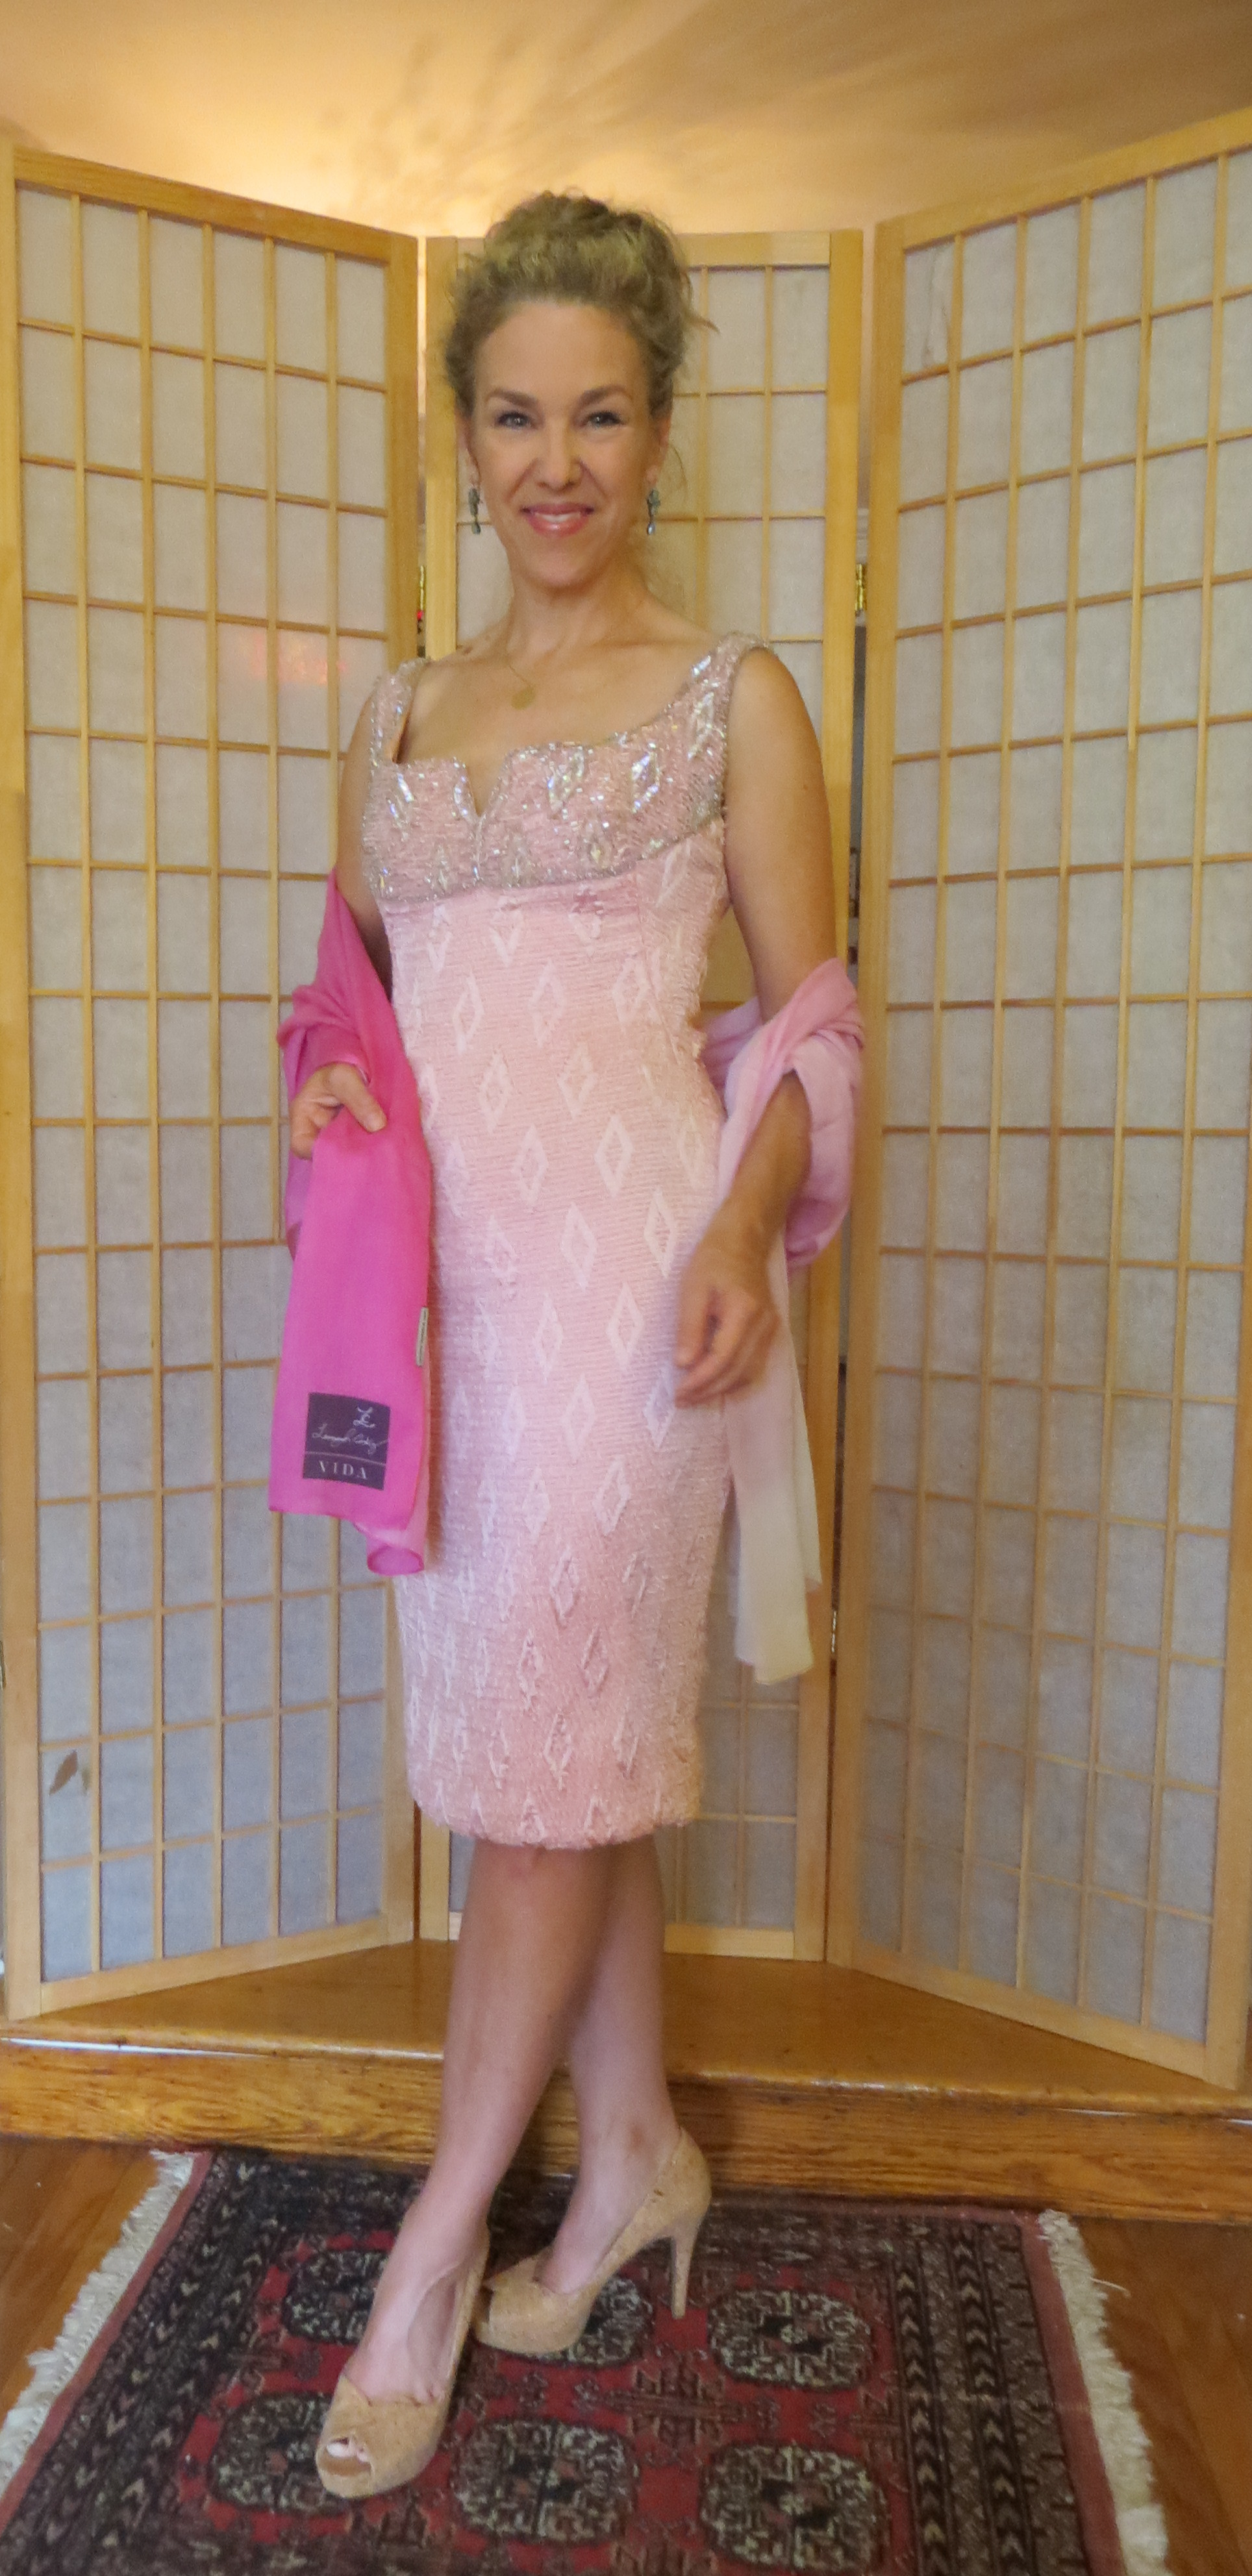
So, this little gem was $9.99… BUT, it was Wednesday, so it was 1/2 price! Yes!
I’m all in at $5 bucks. Sweet!
So what do you think of my Diamond in the Rough? Did I end up being Pretty in Pink? You be the judge!
My 40th birthday was September 15, 2001. As you might guess we had other things on our minds than celebrating my birthday. How about simply being alive? Counting your blessings not the candles on your cake? Anyway, you get the picture.
We scaled the party down and ended up having it in late October. It was a lot of fun and some folks even flew in for the festivities. Towards the end of the evening, after a few drinks and toasts and roasts we got to dancing. My jacket ended up tossed on a table which held a votive candle which caught it on fire and burned several holes in the sleeve and charred a few other spots.
I don’t know why, but I held on to it. (Well, some of you who know me well will never question why I kept it. I tend to keep just about everything. Hey, you never know!)
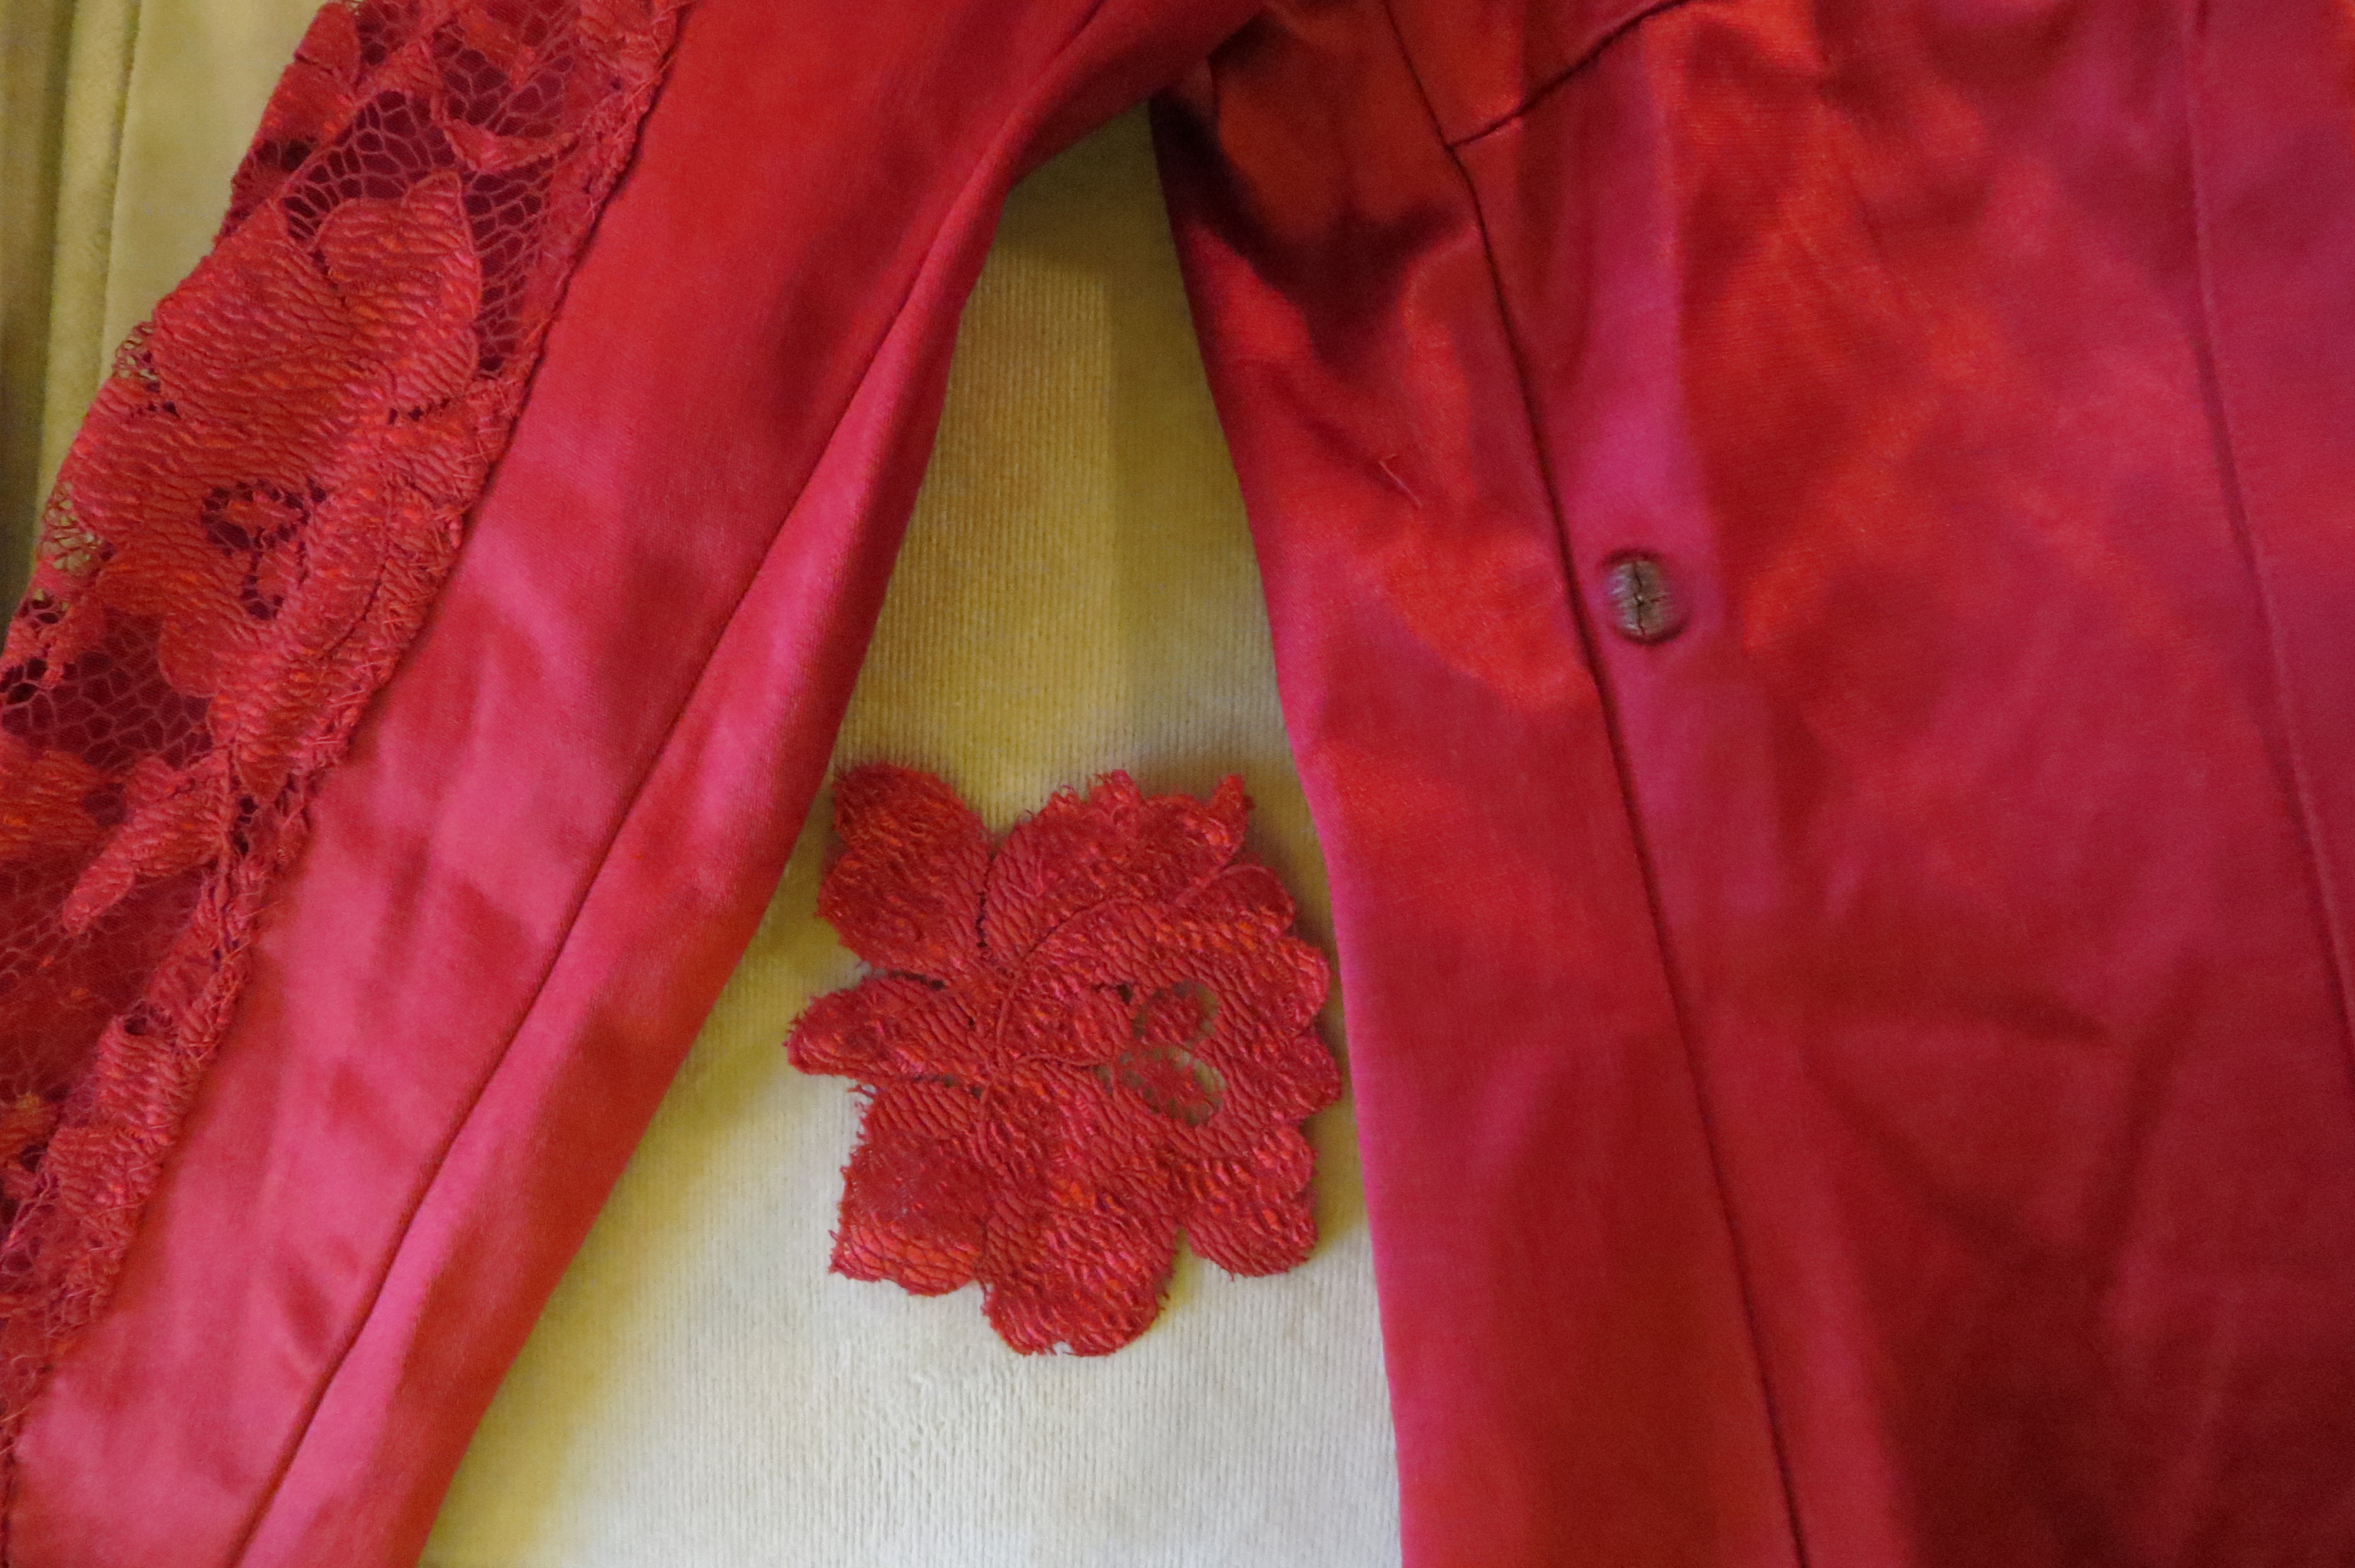
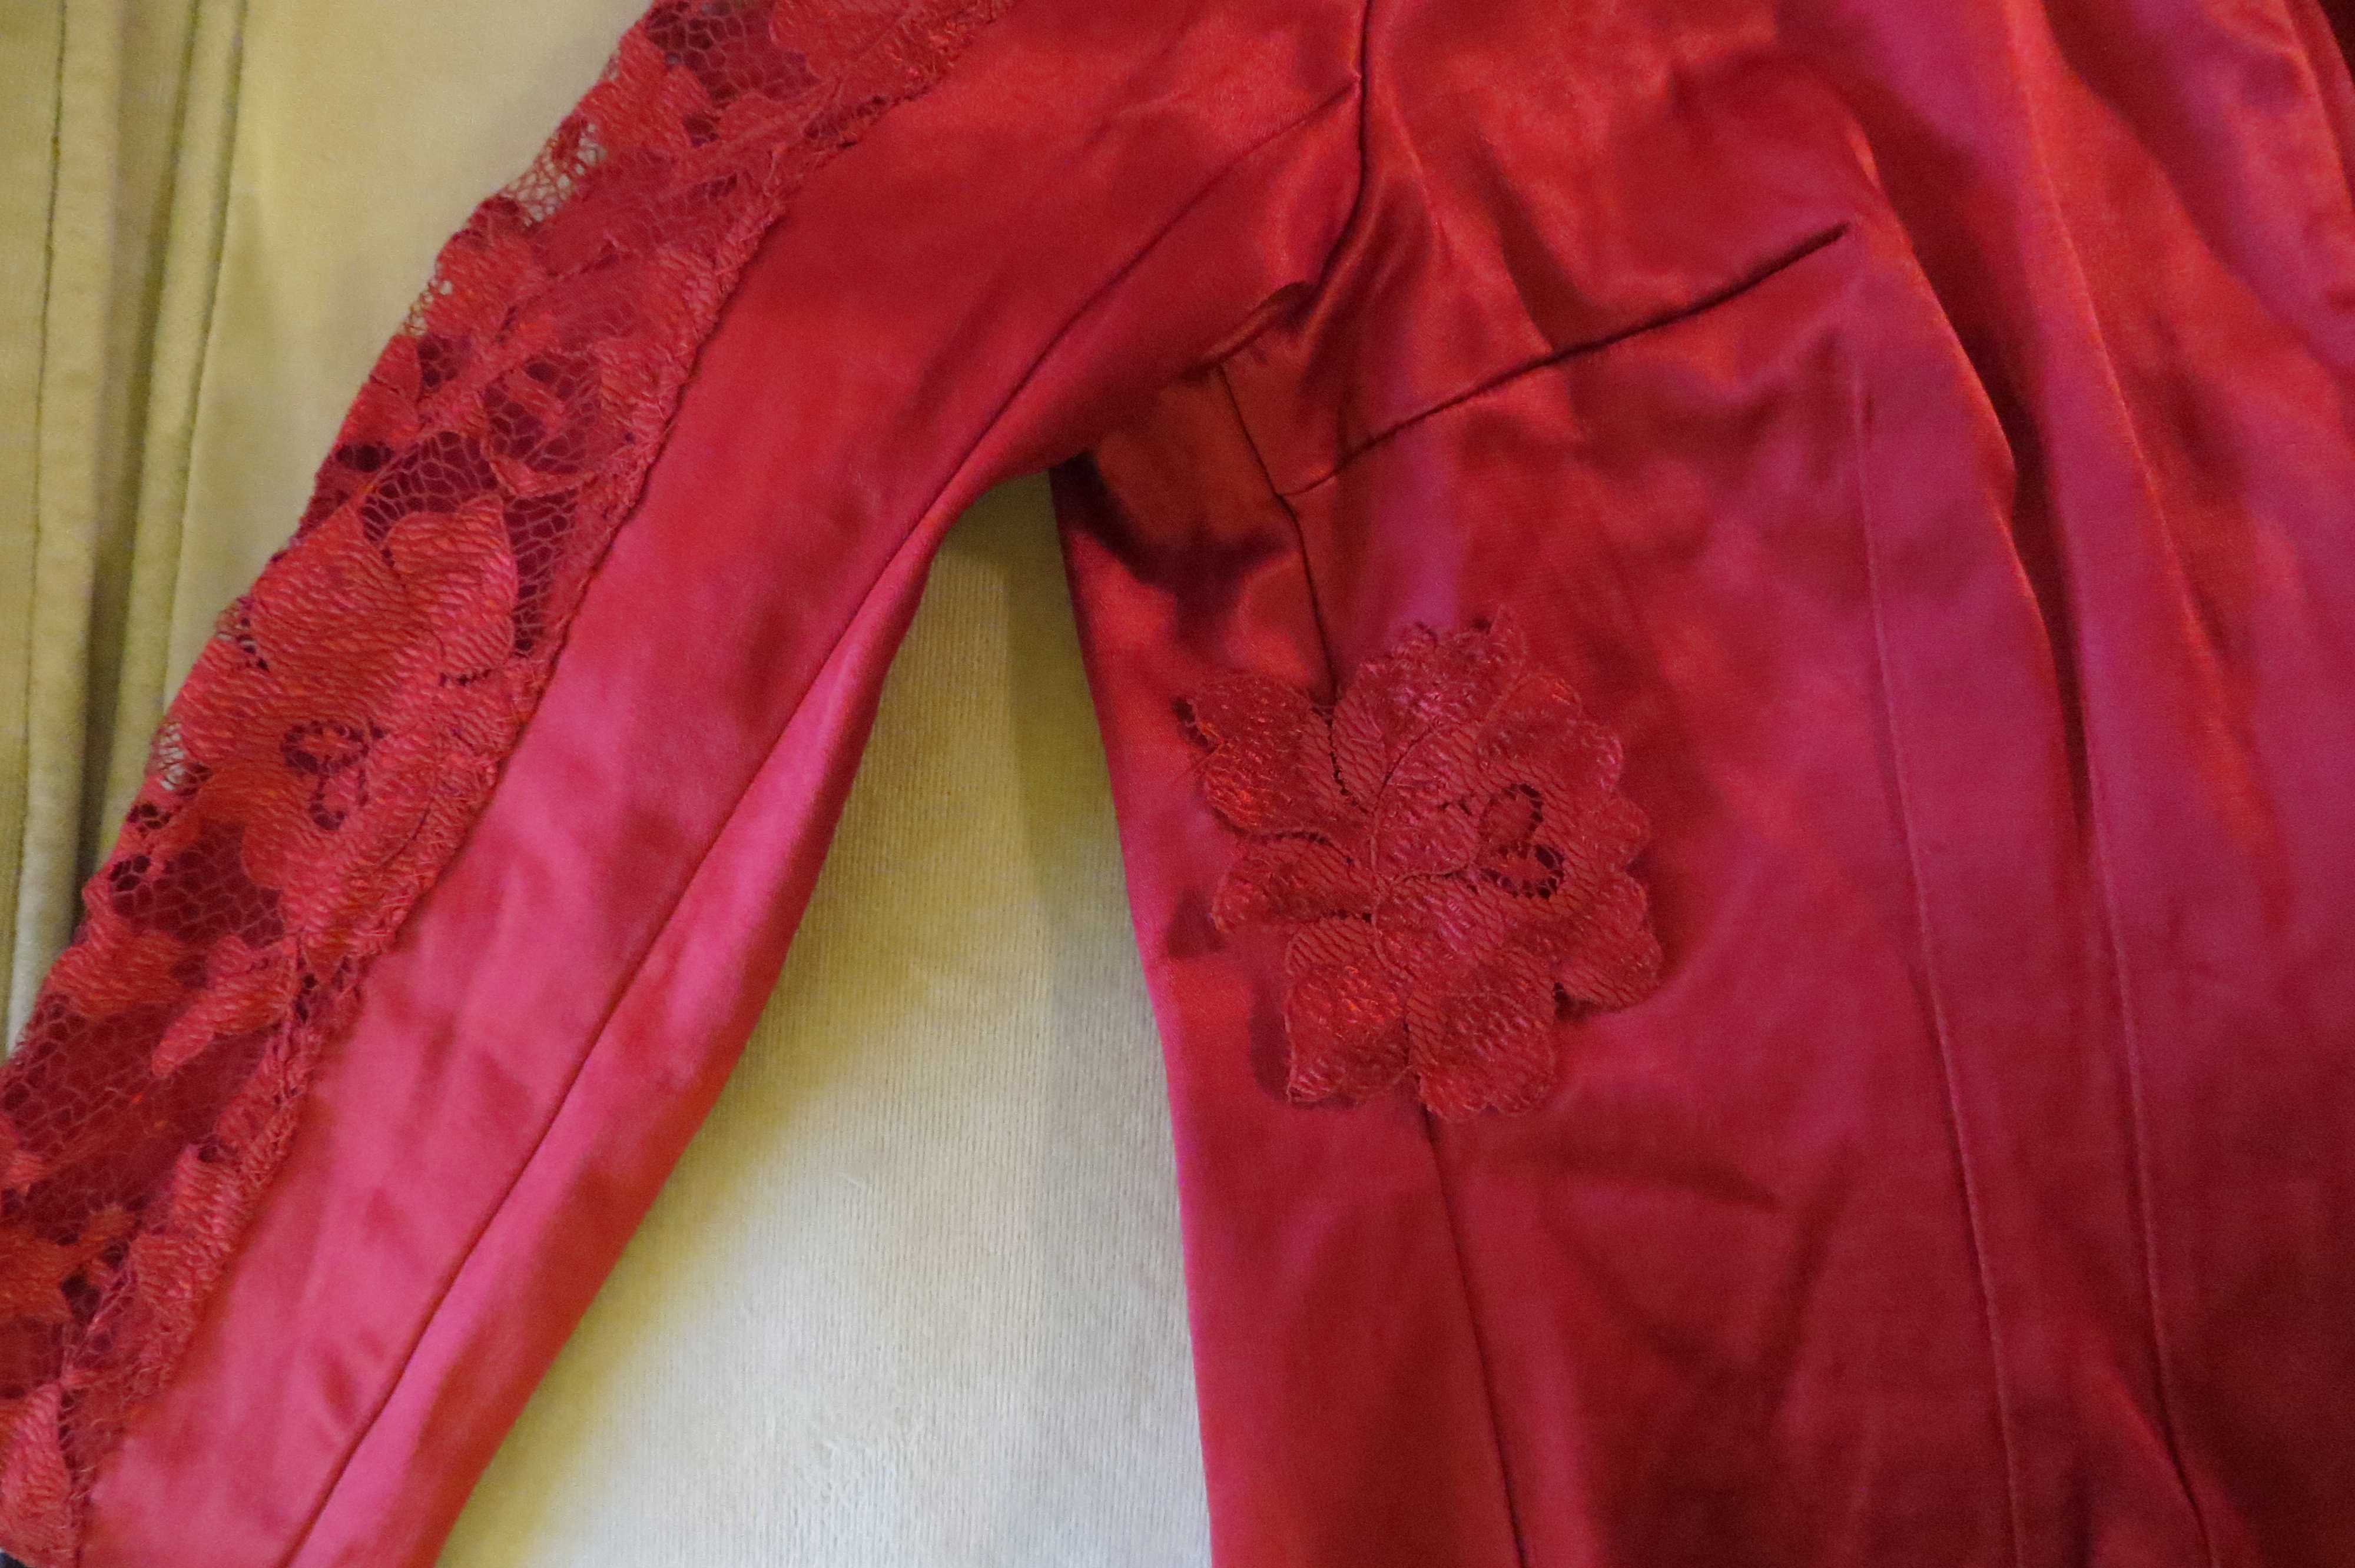
I dragged it out the other day. Humph. What to do? I happened to have a piece of red lace from a mask I made when I was Lady GaGa one Halloween. Pretty darned good match.
I used a seam ripper to open the seam at the shoulder. And then chopped off the burned part and did the same to the other perfectly good sleeve.
Then I cut a piece of the lace the same width as the bit I just chopped off. I sewed it onto the sleeve.
The charred spots I simply covered with a bit of lace.
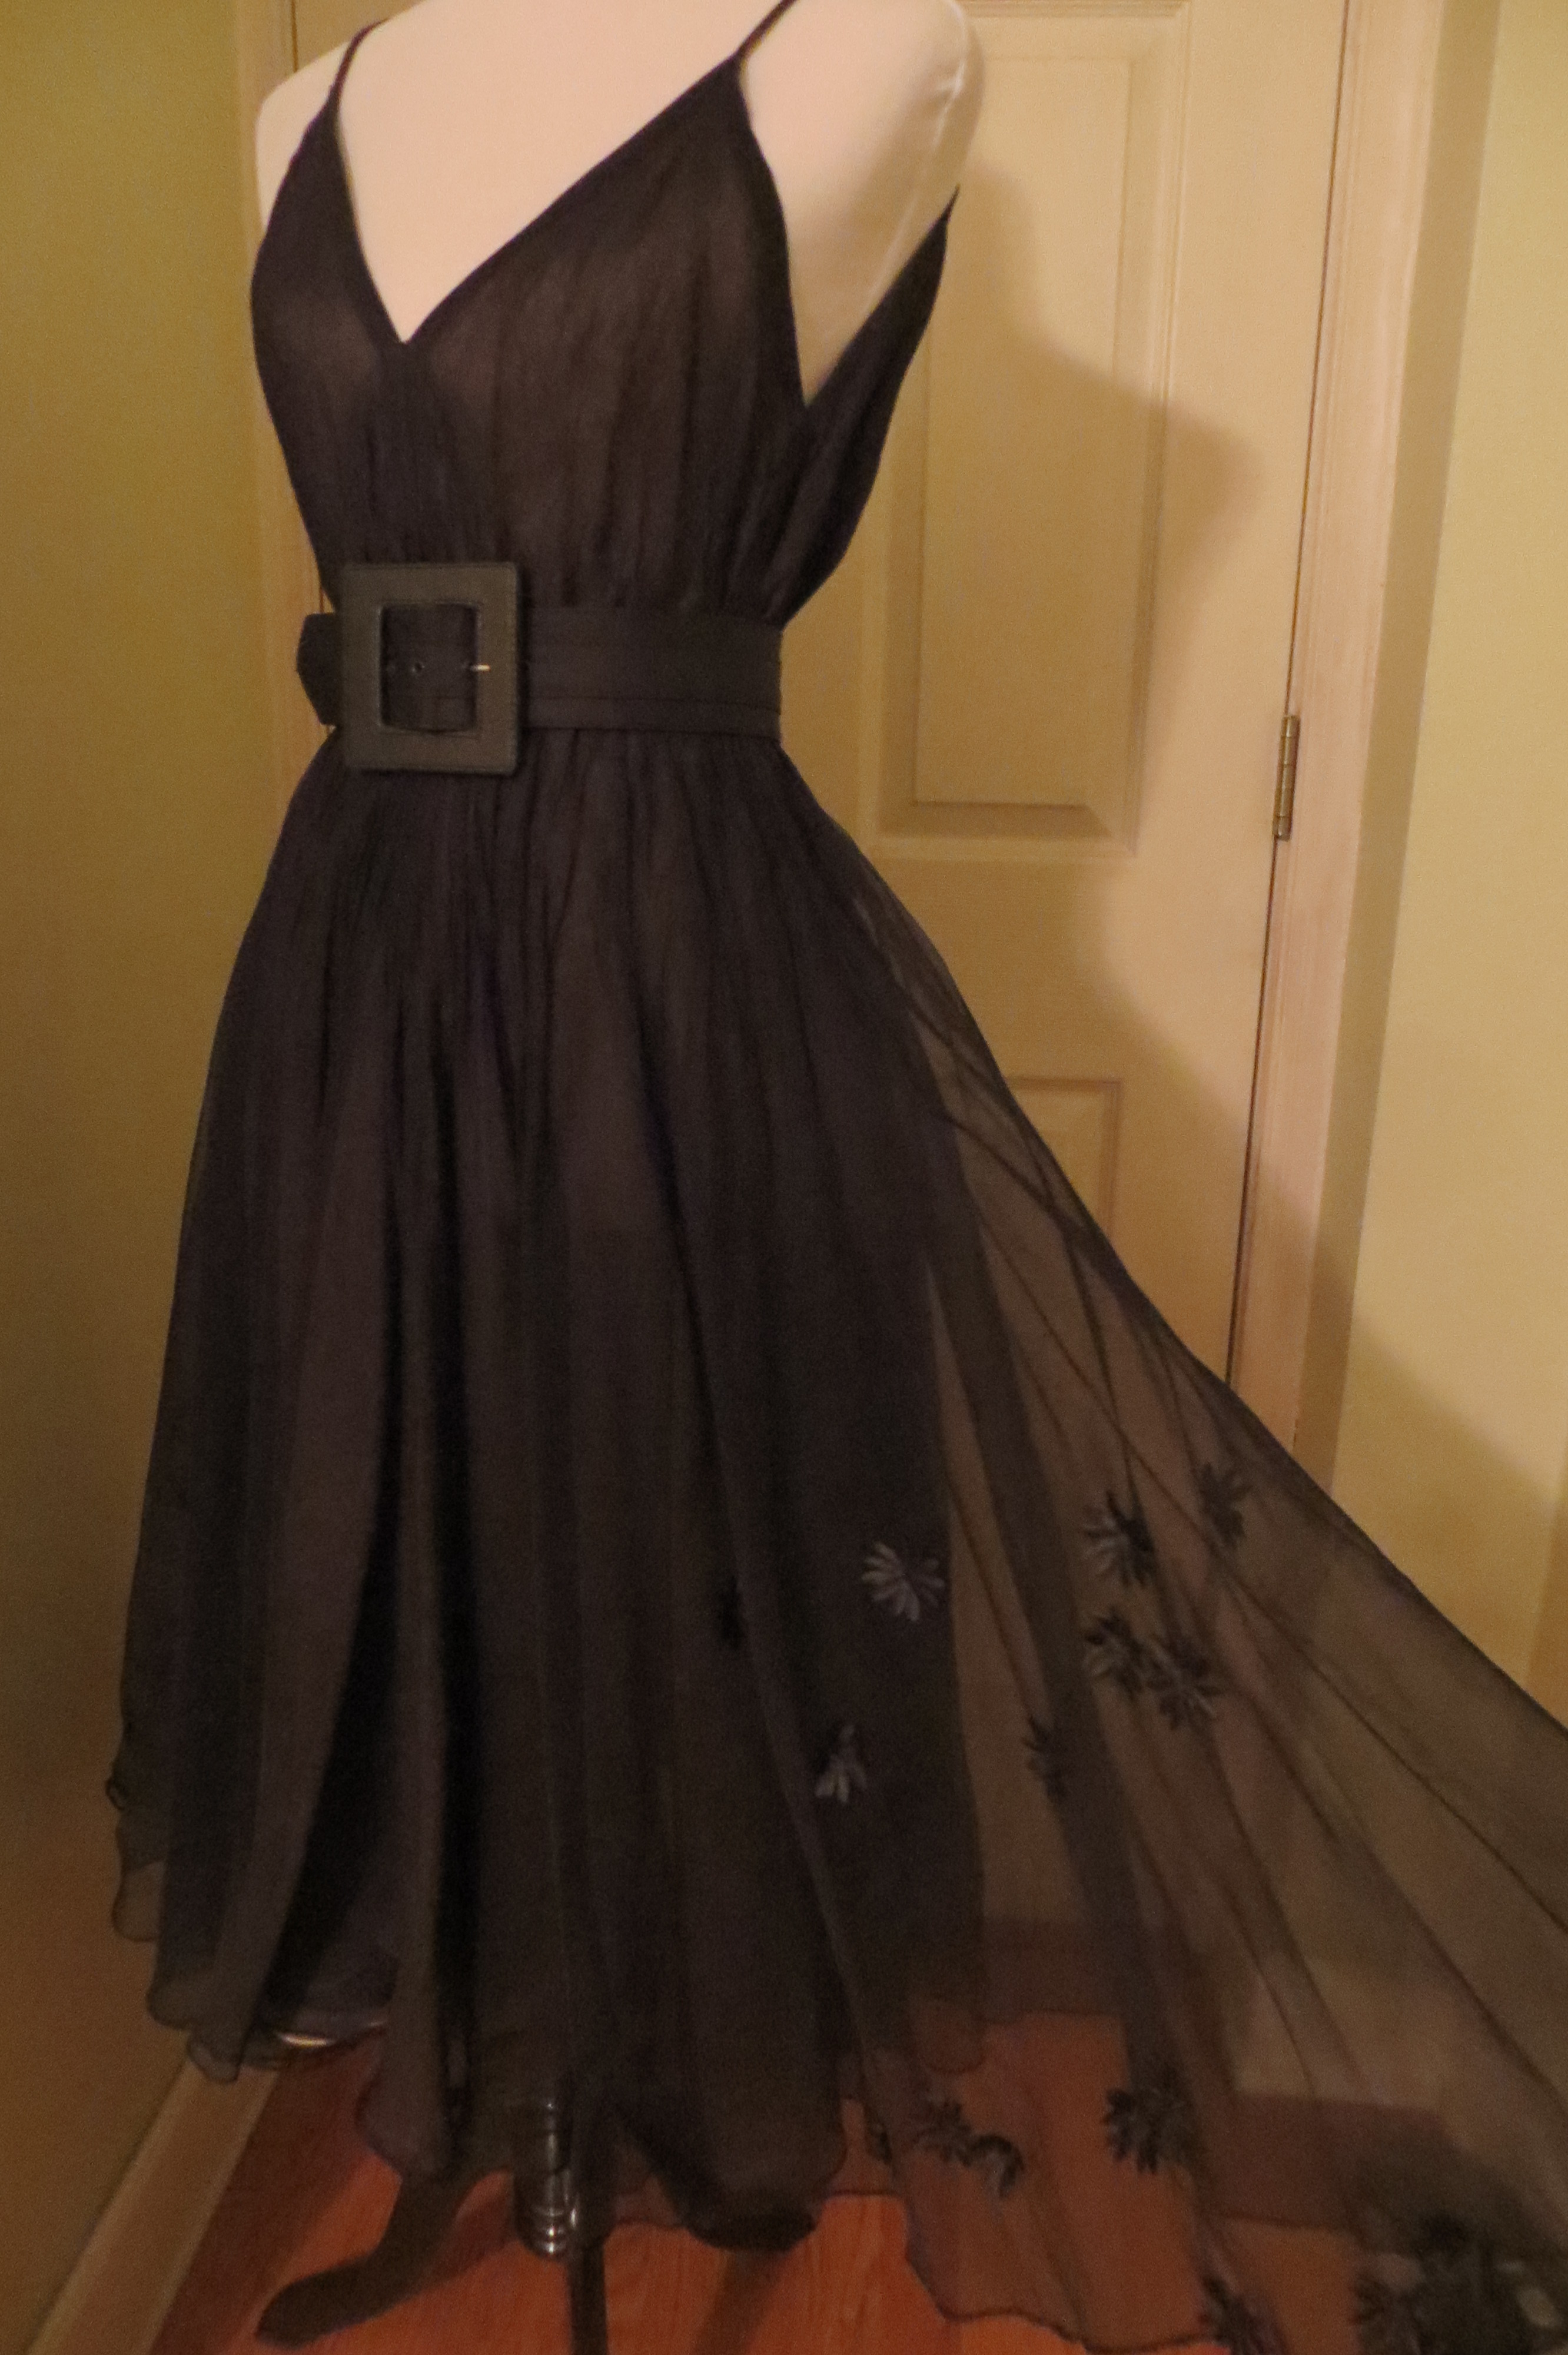
So, what could have been deemed unsalvageable, I saved with a bit of lace! This is an easy fix. If you have a favorite garment that has a stain, a pull, a hole, a rip, consider embellishing it by adding a bit of lace to cover the flaw, or some feathers, or (as I did on a black organza dress in an earlier post) sew some silk flowers over the holes. You just have to have a bit of imagination. And the best thing is, if it doesn’t work, you haven’t lost much!
So here is my “fixed” jacket. It cost me nothing as I had the bit of lace and already owned the jacket.
I have a good news!
The Dressmaker’s Duke is a finalist in the National Readers Choice Awards for both Best First Book and Best Historical. I am really thrilled! Writing can be such a solitary endeavor it is so lovely to get a bit of validation. The winners won’t be revealed till the end of July at the RWA (Romance Writers of America) National Convention, so fingers crossed!
Thanks for stopping by.
And if you haven’t checked out my book, please give it a try! Available at: amazon, B&N, iTunes
Also, I would love a review if you have not done so yet. Just go to Goodreads or Amazon click “write a review” and post! You don’t even have to use your real name!
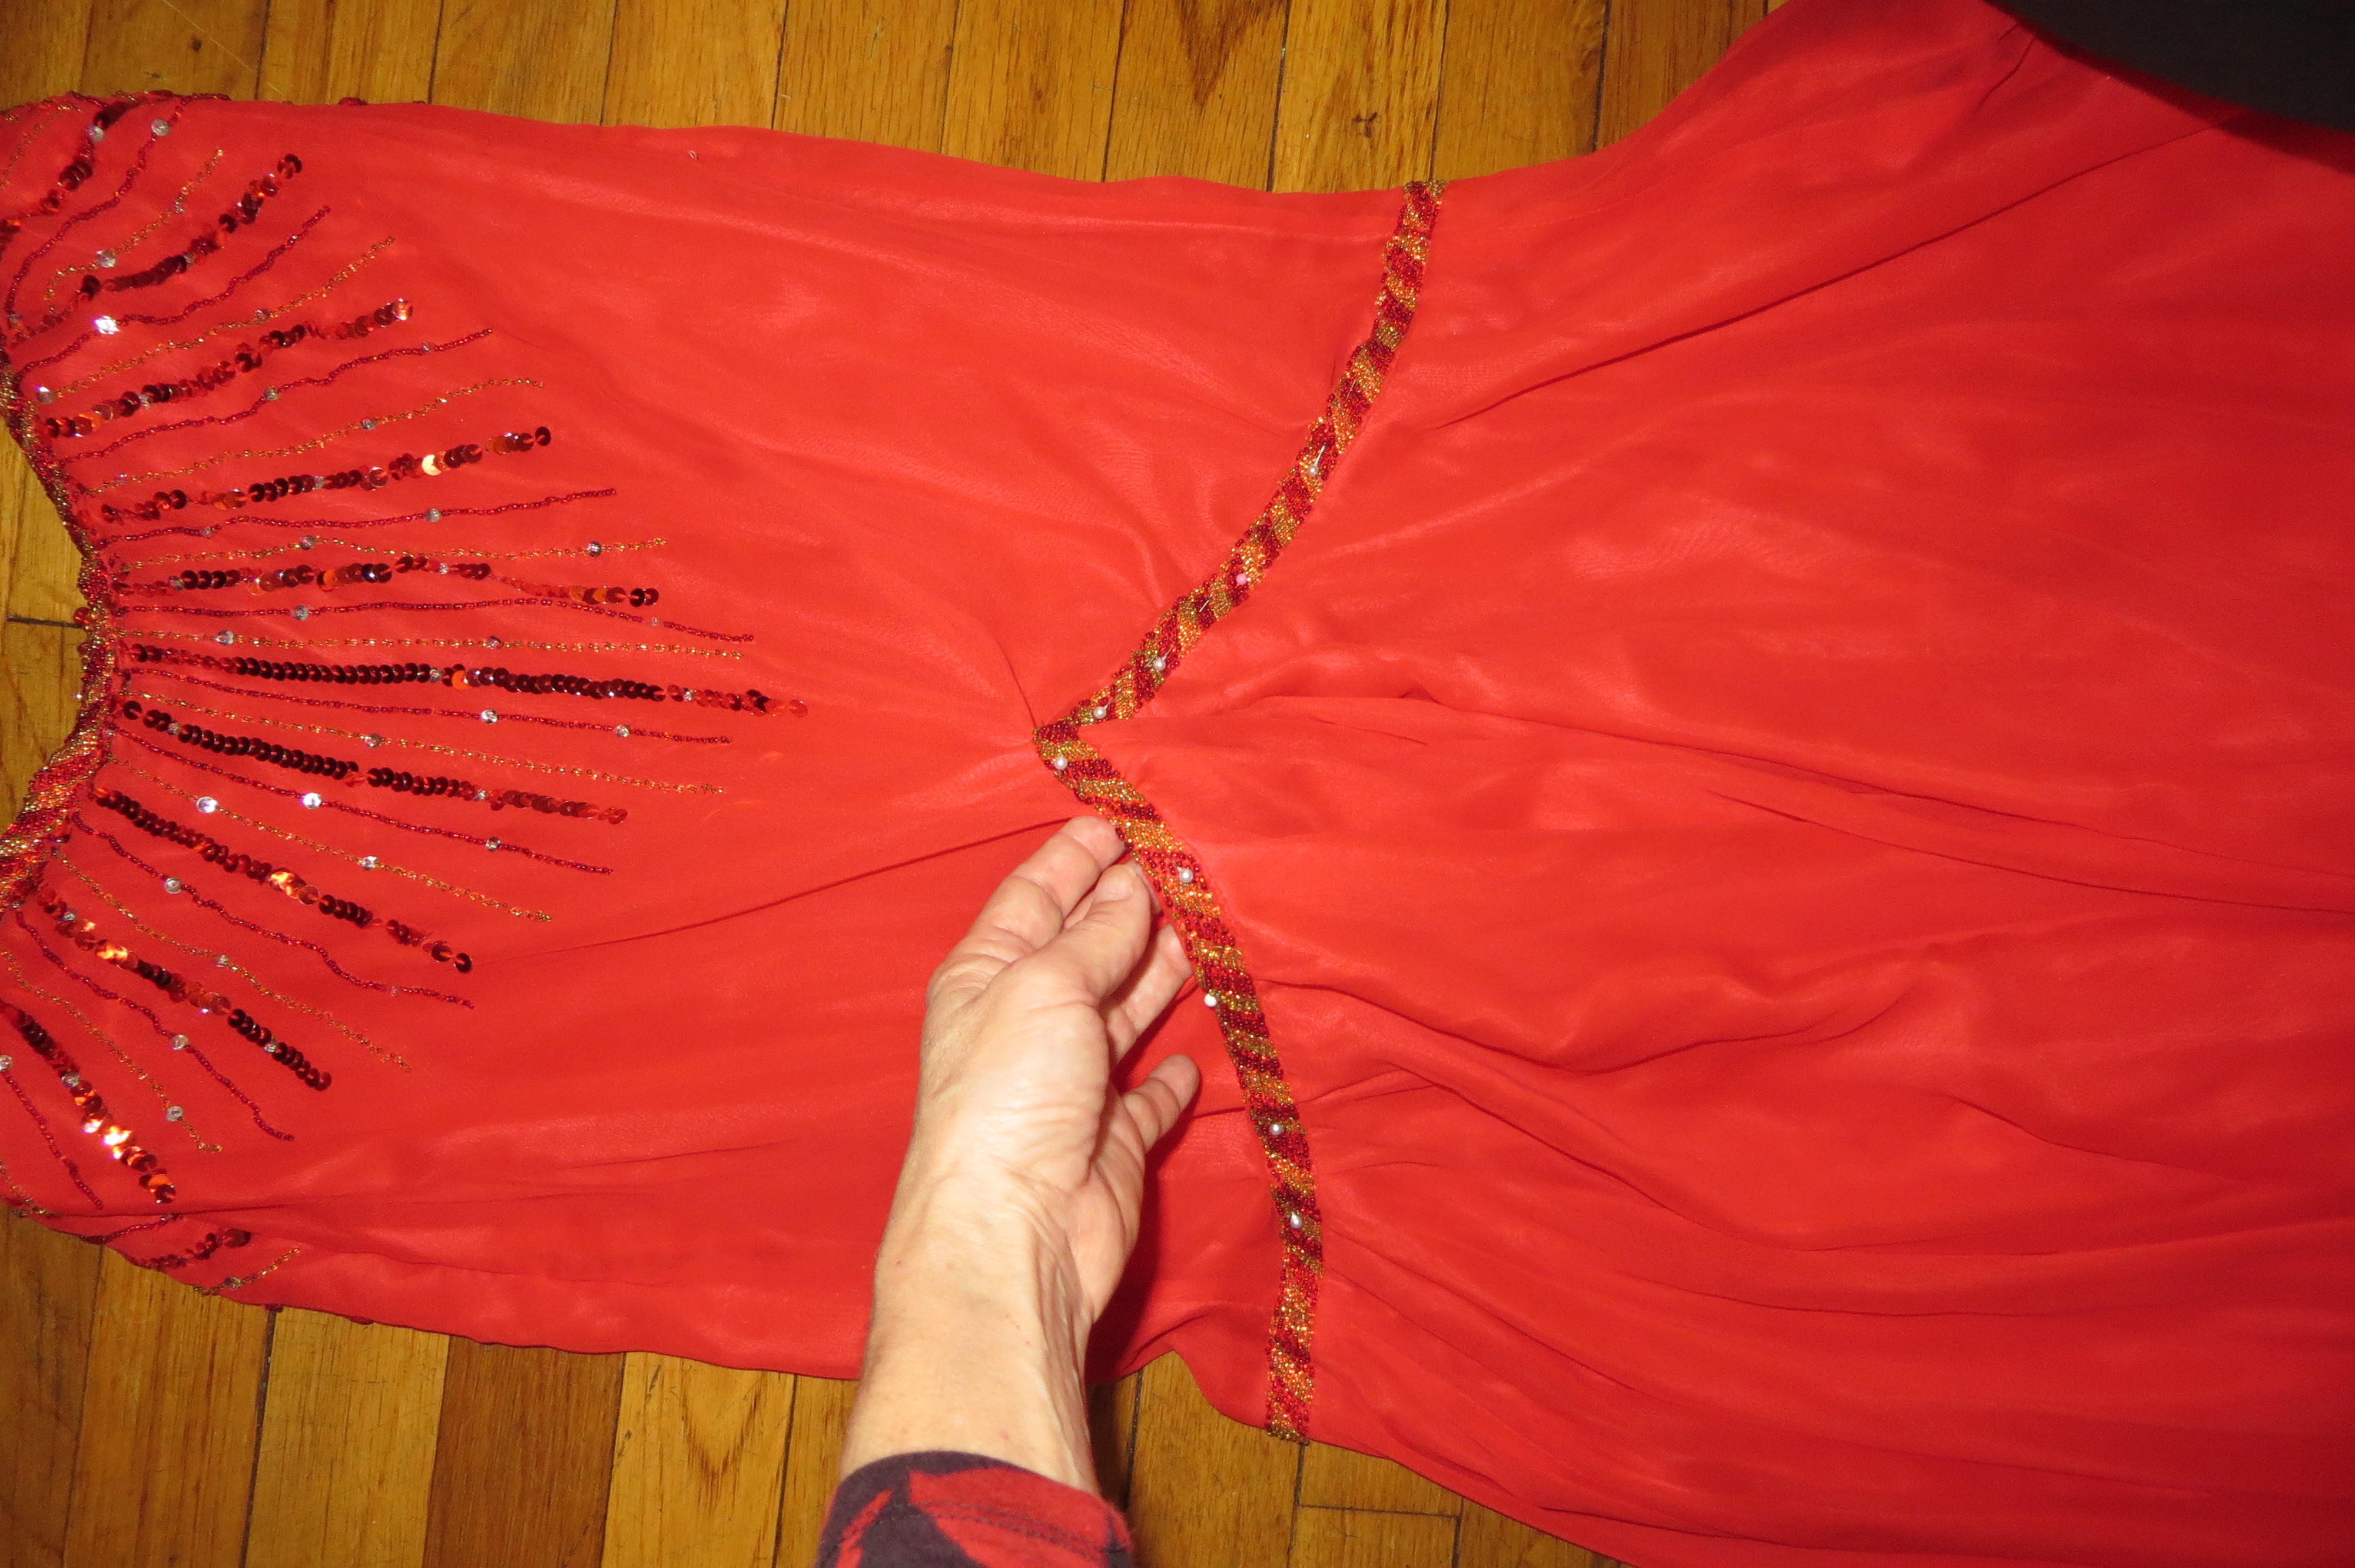
I unearthed this “little” beauty (as you can see its HUGE) from my church thrift store on 96th Street. It was $7. I honestly did not know WHAT I was going to do with this HOT MESS, but I liked the tomato color and it is %100 percent silk–the chiffon and the lining. (Silk moves so nicely.)
Here it is:
Yes, this gem has shoulder pads and could fit another half of me in it.
I thought about removing the pads, hacking it off at the beaded waistline, and calling it a day. But, that would be too easy. Cheating. So, I dropped the whole thing down to my waist and decided it would be a skirt.
I marked the sleeve to cut off. And sewed them up to form the side seam.
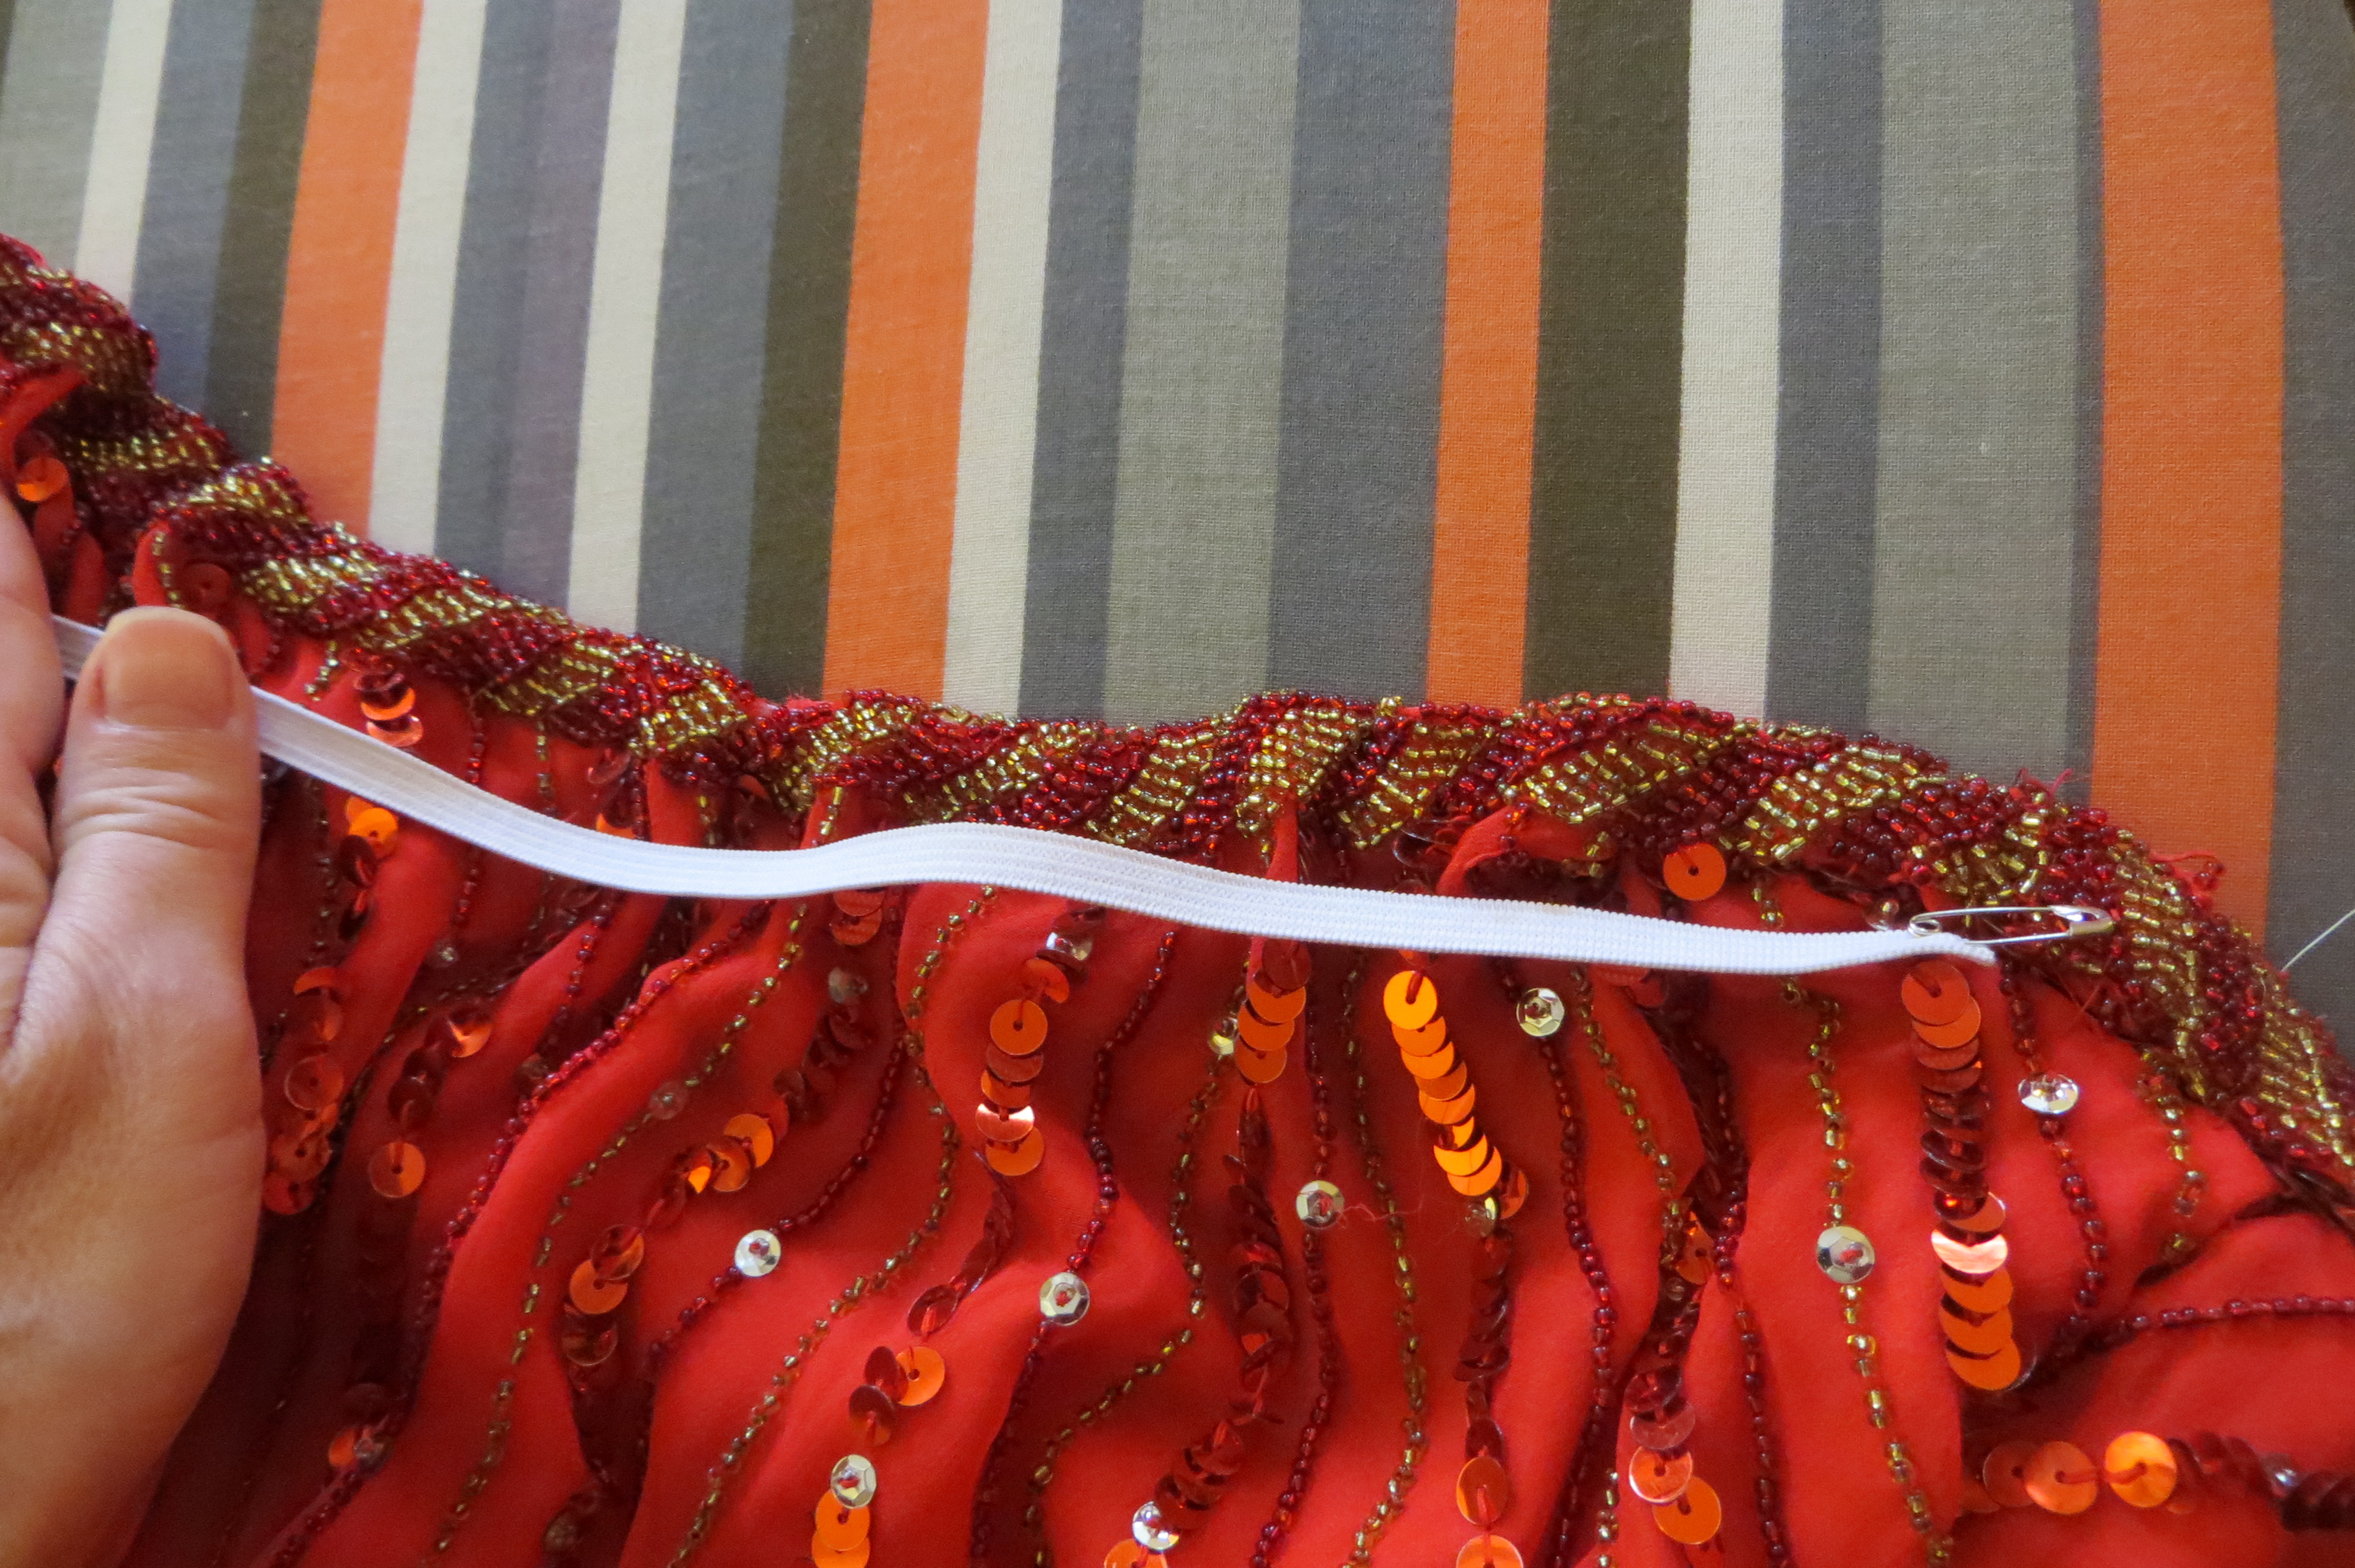
Next I ran a piece of elastic though the casingin the back to cinch it up and in a bit.
The skirt was too long. So I thought about chopping it off and hemming it-a LOT of work (the bottom of the skirt is nearly a full circle.)
Then I thought I’d cut it off and shred the bottom as a kind of funky hem. (Trick, on polyester and man-made fabrics, you can actually singe the bottom by running it quickly though a candle flame. You have to be even and fast, but not too fast. Tricky because you can burn a big hole in the garment.)
So I decide to do the LEAST amount of work and I simply picked up the front of the skirt at the beaded midline. This will do two things: 1. Save me time and 2. make a pretty and slimming line. Win Win!
I pin the new beading line and then just hand stitch it into place. Easy Peasy.
Now for the finished skirt. I didn’t use any other materials other than a piece of elastic. So I’m all in at a whopping $7 dollars!!!
First I paired it with (do you recognize the crop top from my previous post?? I just turned it around.) A tad revealing but surprisingly comfortable. Just hoping there are no wardrobe malfunctions!!
Next I paired it with a simple burnished Gold tank. (thanks Amy Scheibe! dear friend and author of, A Fireproof Home for the Bride!)
Then I tired a cream and gold top I had on hand (again from a thrift store.)
I thought I was done, but then, as I was taking the skirt off, I saw it might make a fun cocktail dress. I simply added a gold belt:
So, what do you think? Did I go from HOT MESS to On FIRE? Let me know!
Welcome to #4 Heavy Metal to Midriff Melodythis month’s~
I unearthed this “Treasure” at the Salvation Army on 96th Street.
They were just about to put it on the floor when I snagged it for a cool $24.99. Expensive for me, but I thought it just might be worth it. We’ll see…
The dress is obviously too BIG for me. So I decided to hack it up!
I thought making separate pieces would make the dress more wearable and more versatile. (Face it, that’s a WHOLE lot of BLING!)
So I looked for some inspiration~
Okey Dokey. I am inspired. (BTW, the gal on the lefts legs CANNOT be that LONG.)
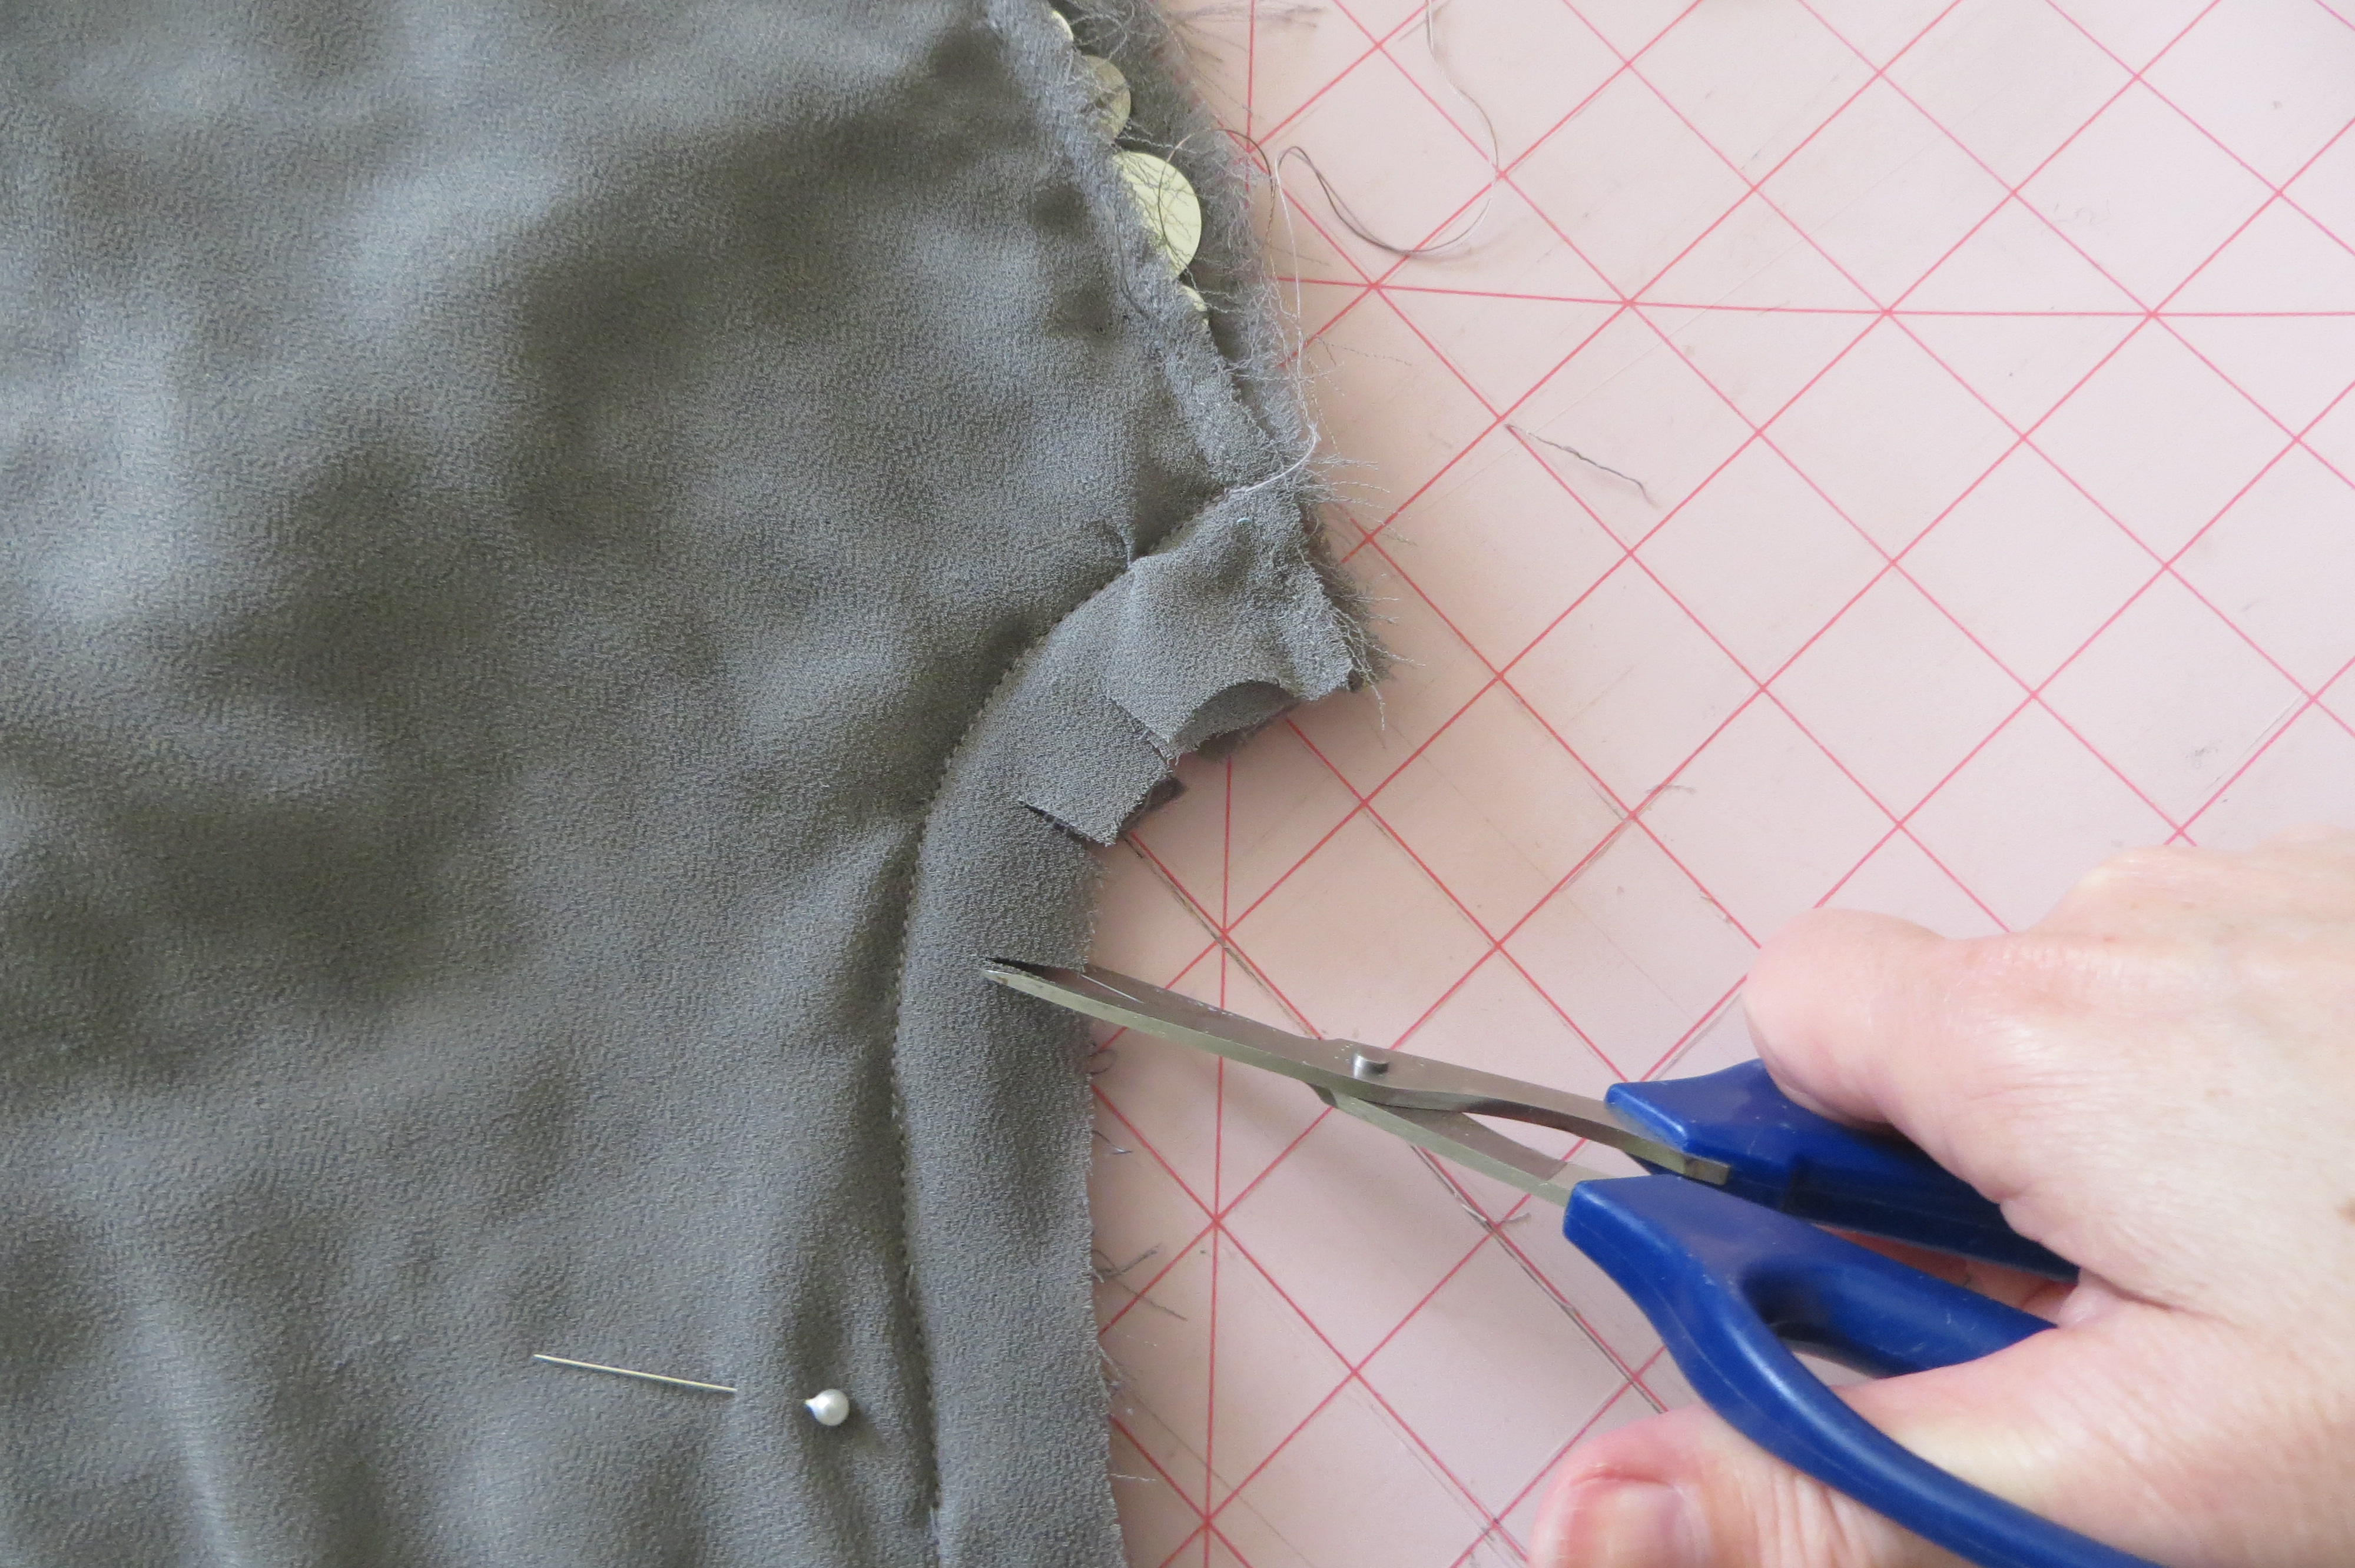
I begin with the crop top. I lay out the bodice and cut the sides to form “cap” sleeves, sew the side seams, remove the sequins in the selvage, and then clip the curve:
(*Any curved seam must be clipped in order to allow for movement and shape.)
Next I cut off extra fabric at the hem. Then I make a facing and sew it to the bottom edge, and hand stich the hem. I do this for the raw selvage on the armholes as well. Lastly, I cut off the ties at the shoulder and move them to the back bottom as a new closure. Finito!
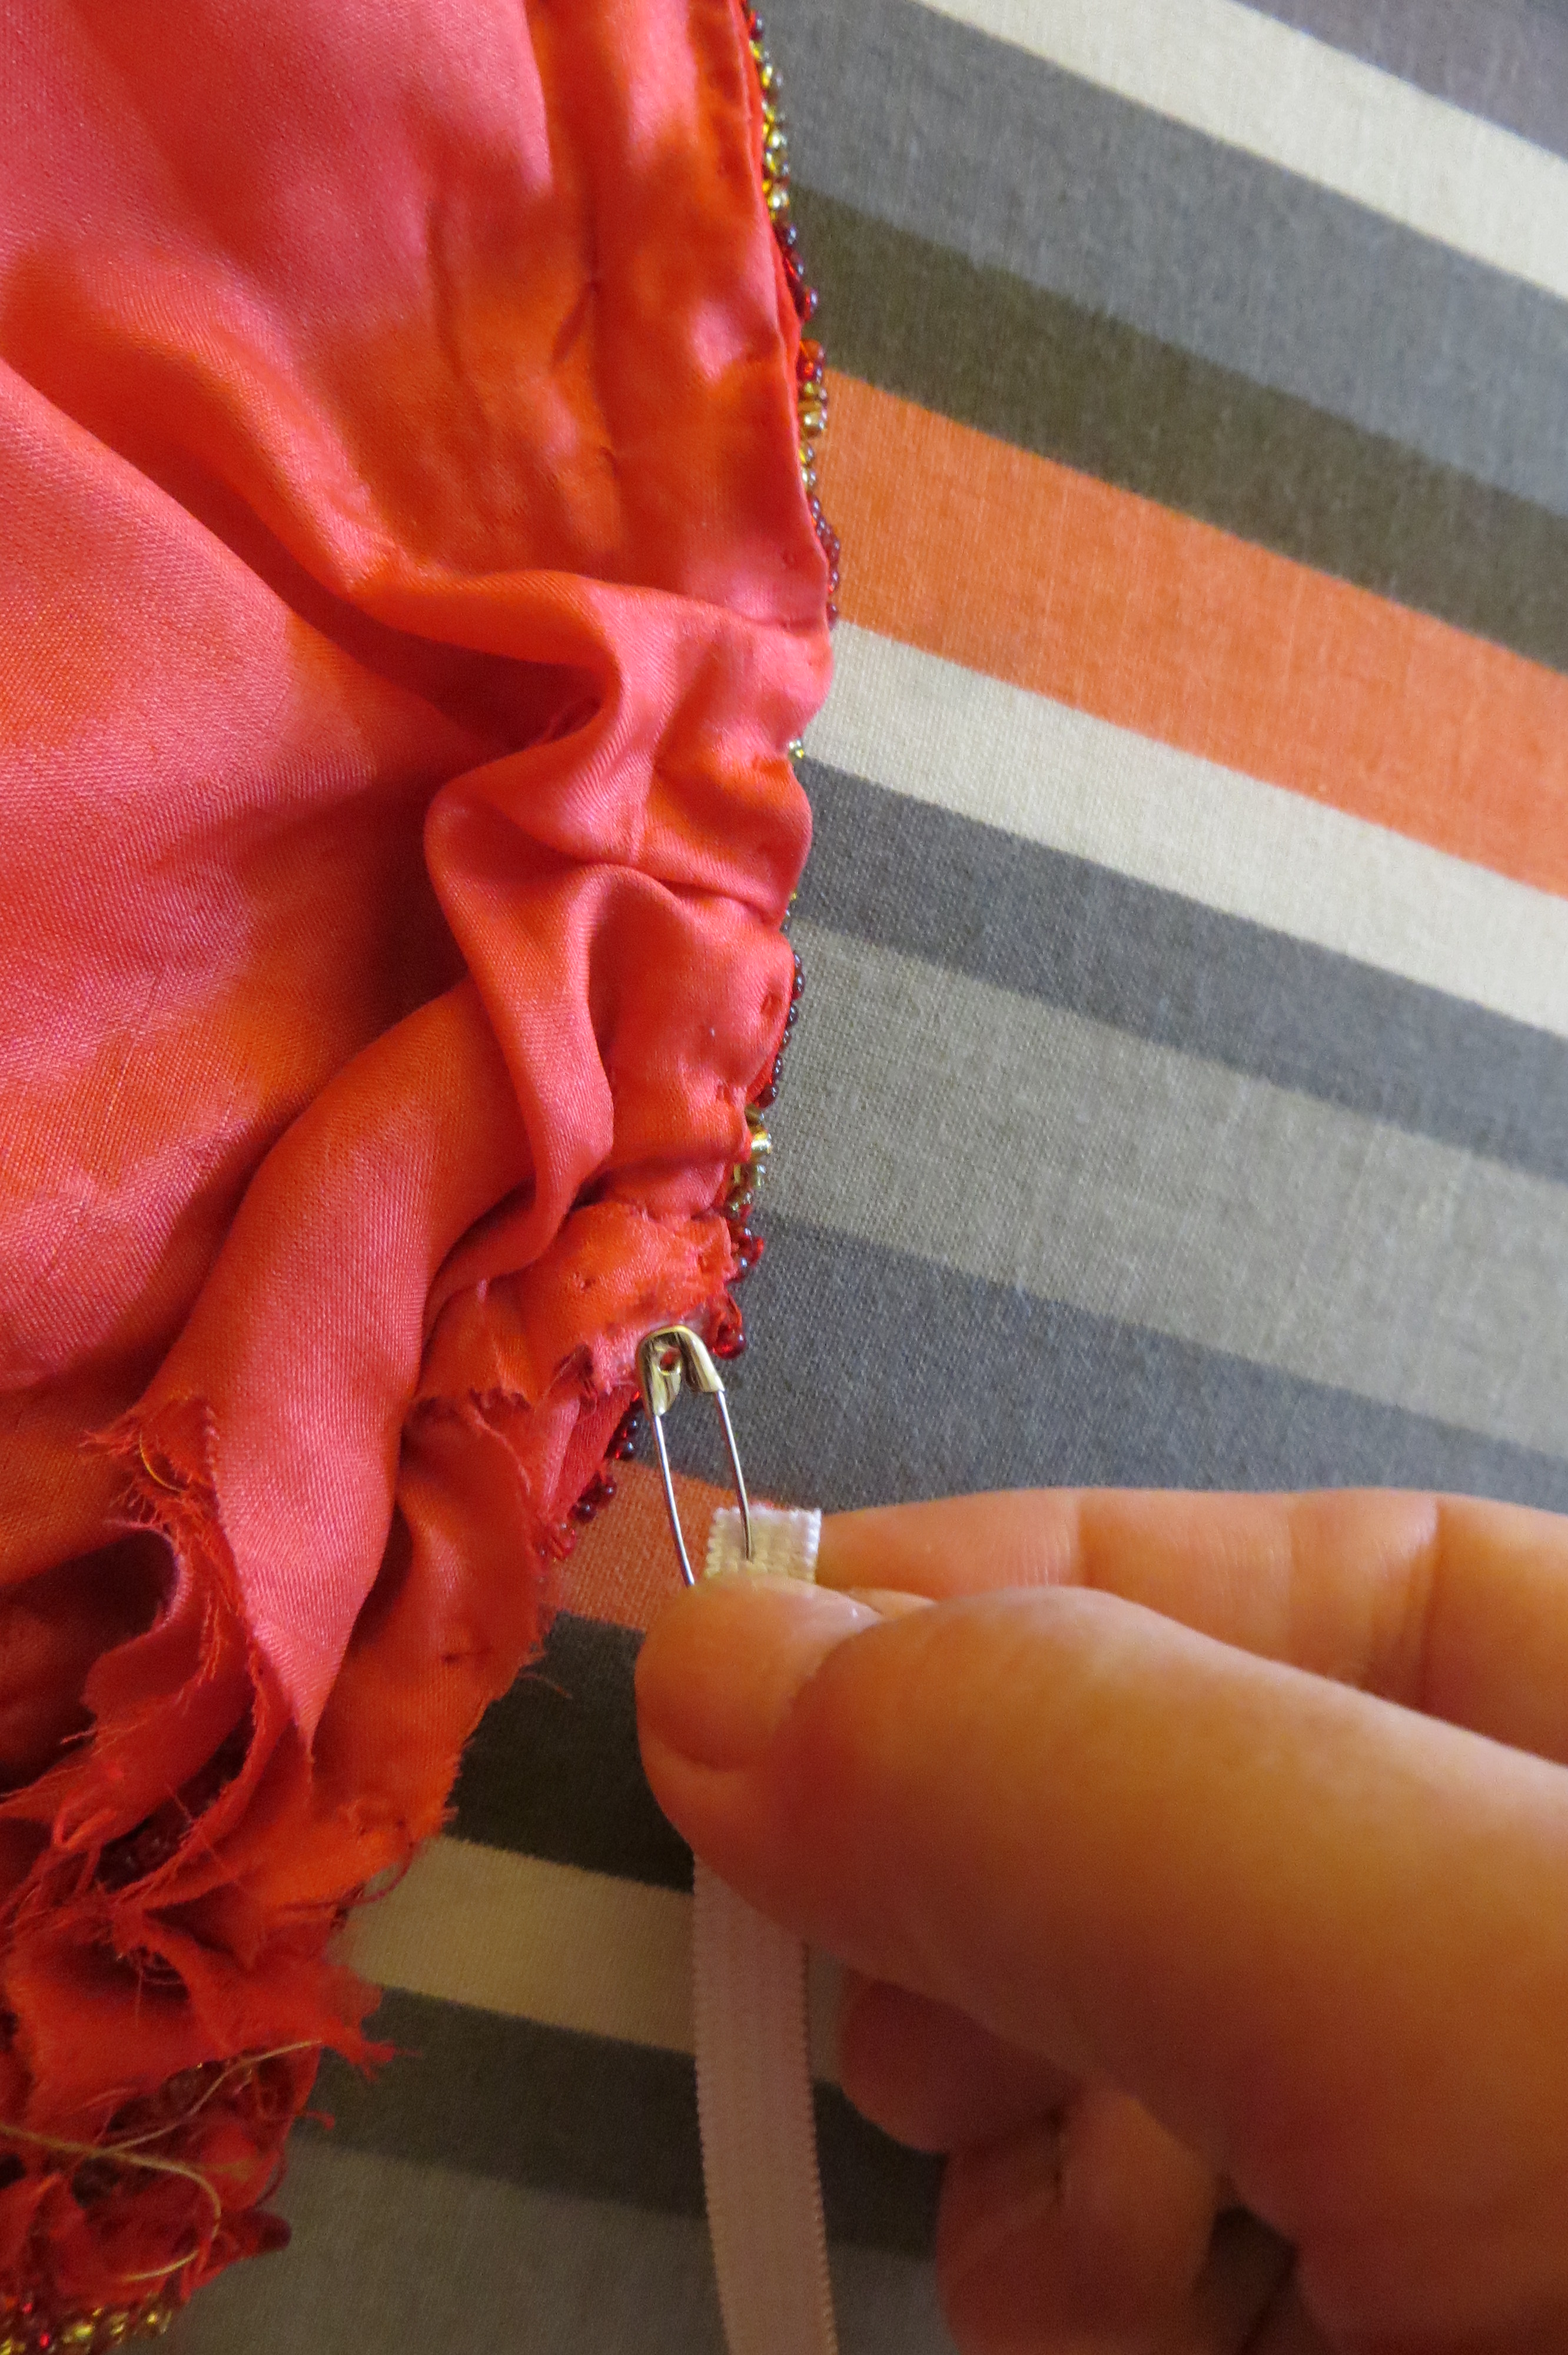
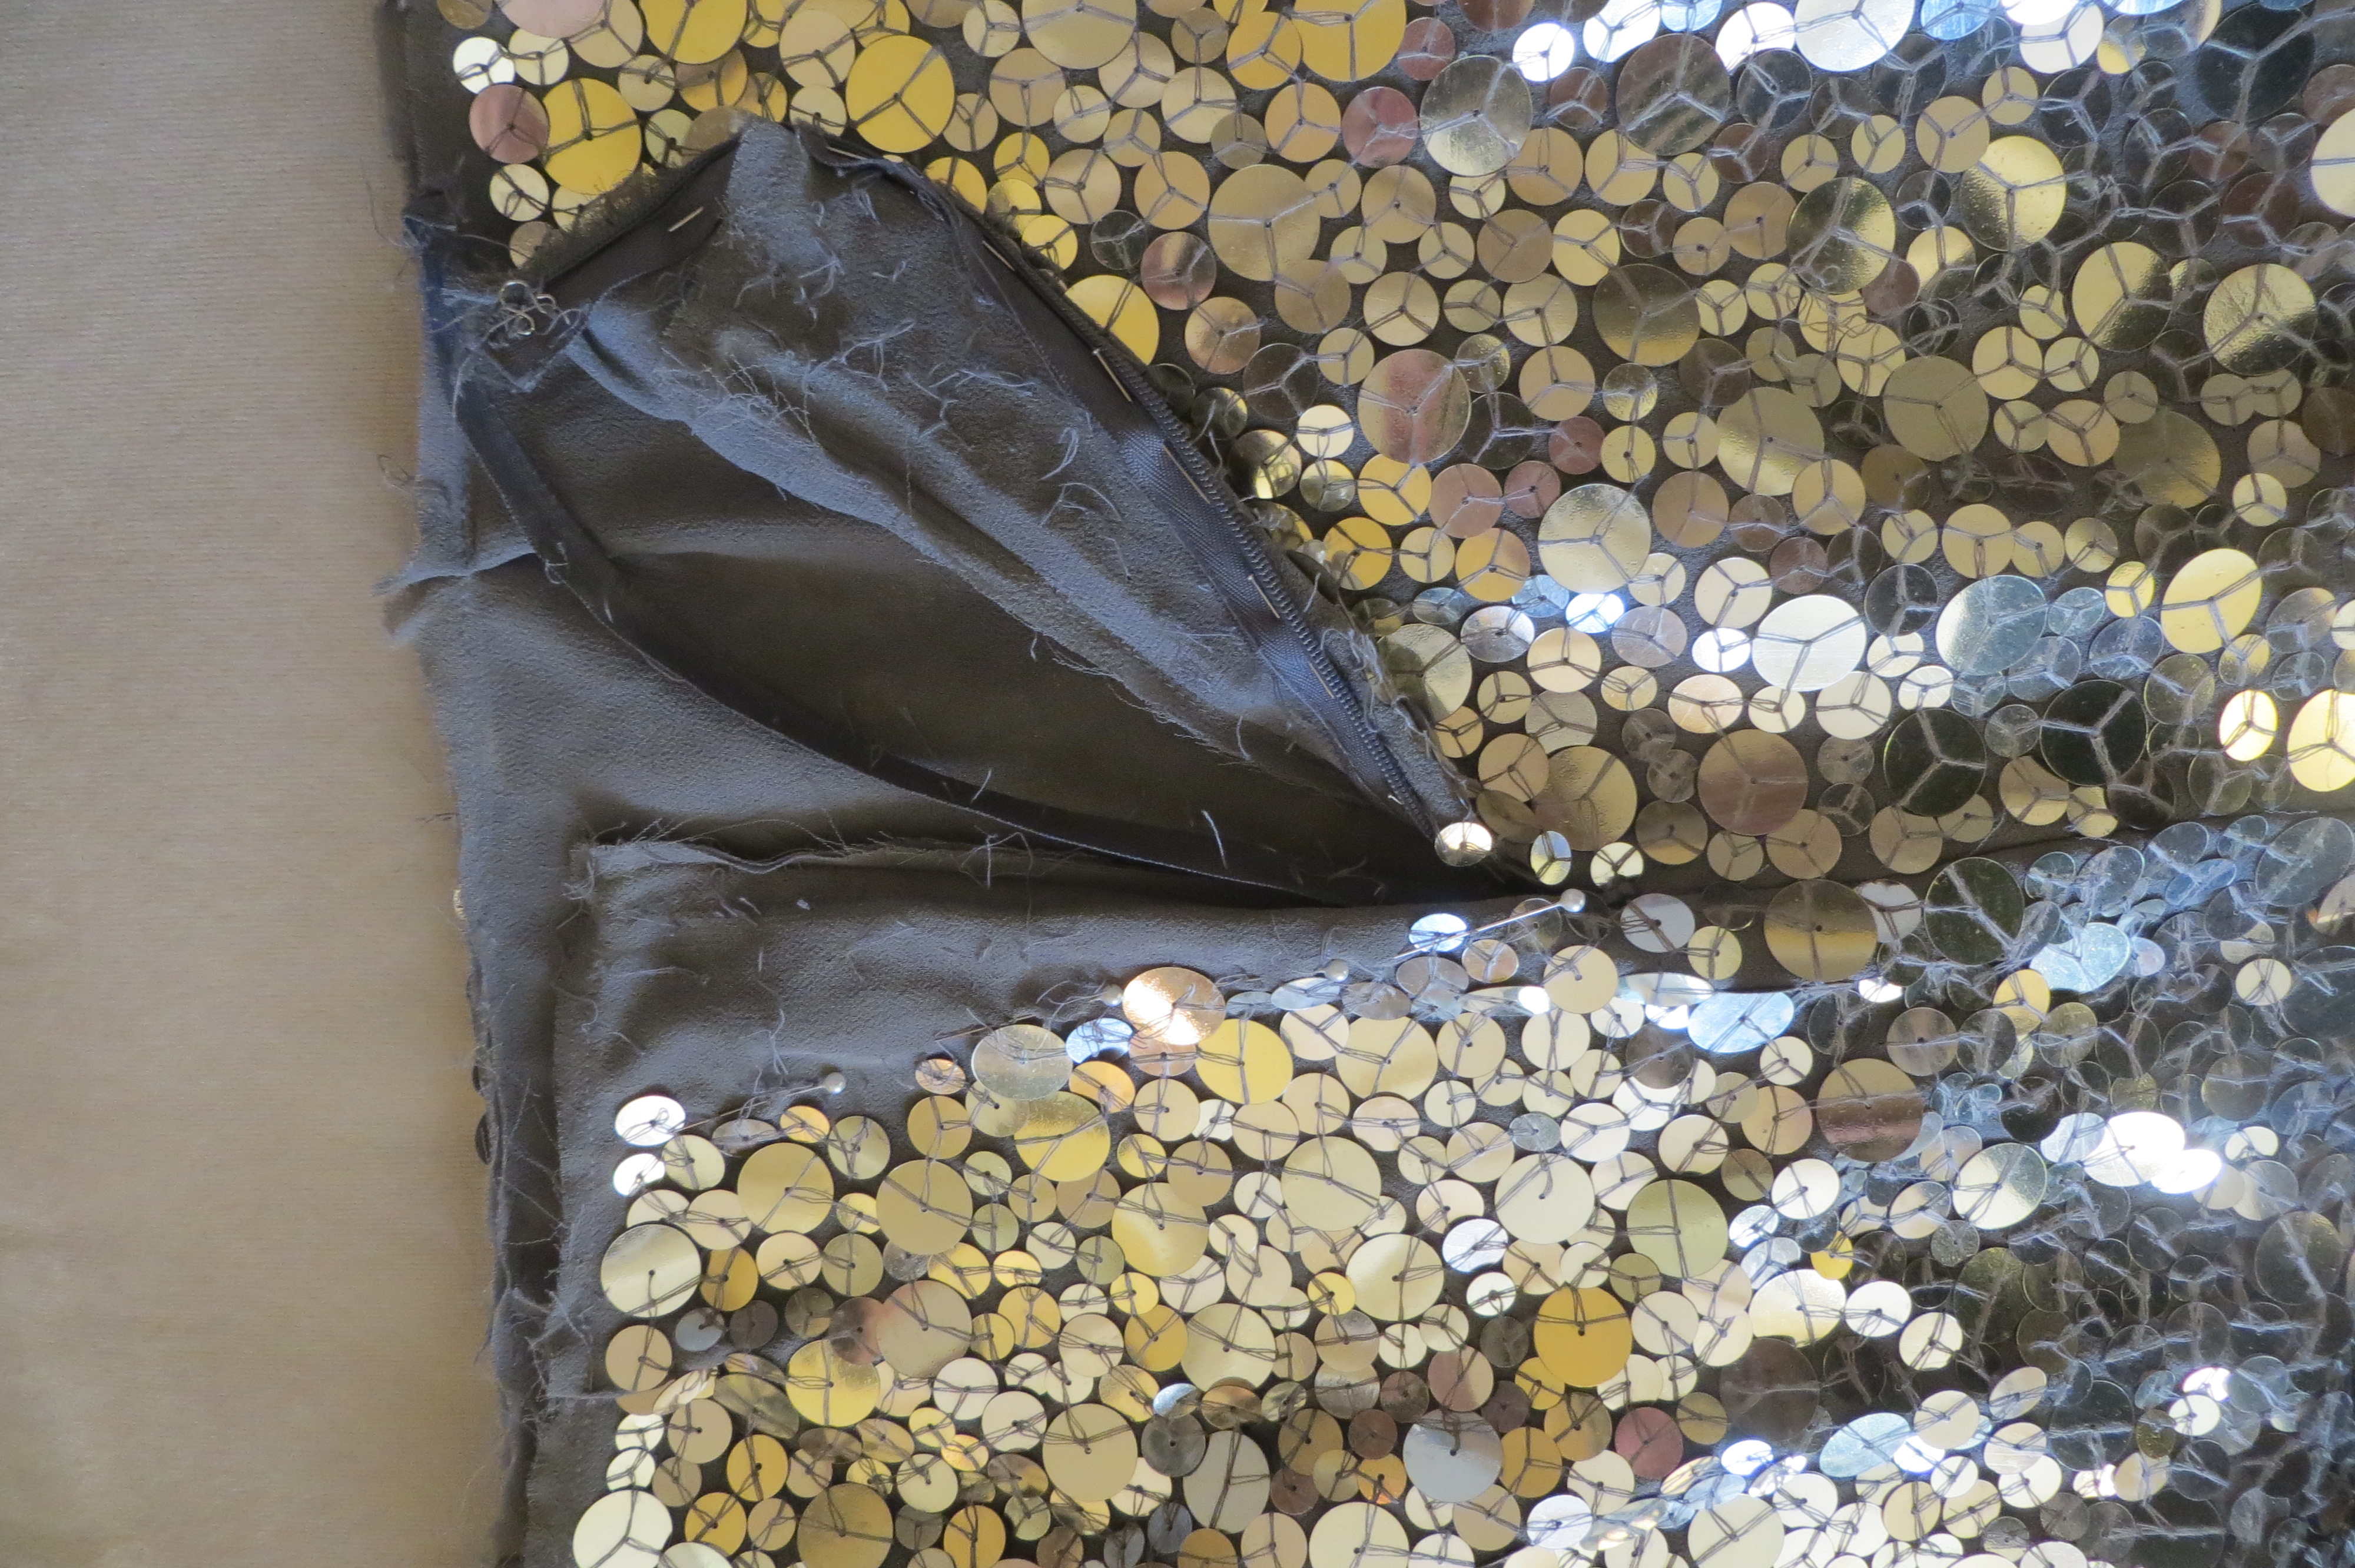
Now for the skirt. Again,–too big. So I rip out most of the zipper, and then remove the sequins that I will not need. I tack the zipper back in its new place and then sew. I also sew a facing into the waistband to finish that raw edge.
Hummm…I have extra pieces left over (the big dolman-type sleeves.) I can’t stand not to use them. So, I use one to make another handkerchief halter-like top.
My only purchase for this project was the dress, so I am all in at:
Dress………$24.99 (no tax)SWEET!Considering I made a skirt, a crop top, and a handkerchief top. (And I have another sleeve left over for something else.)
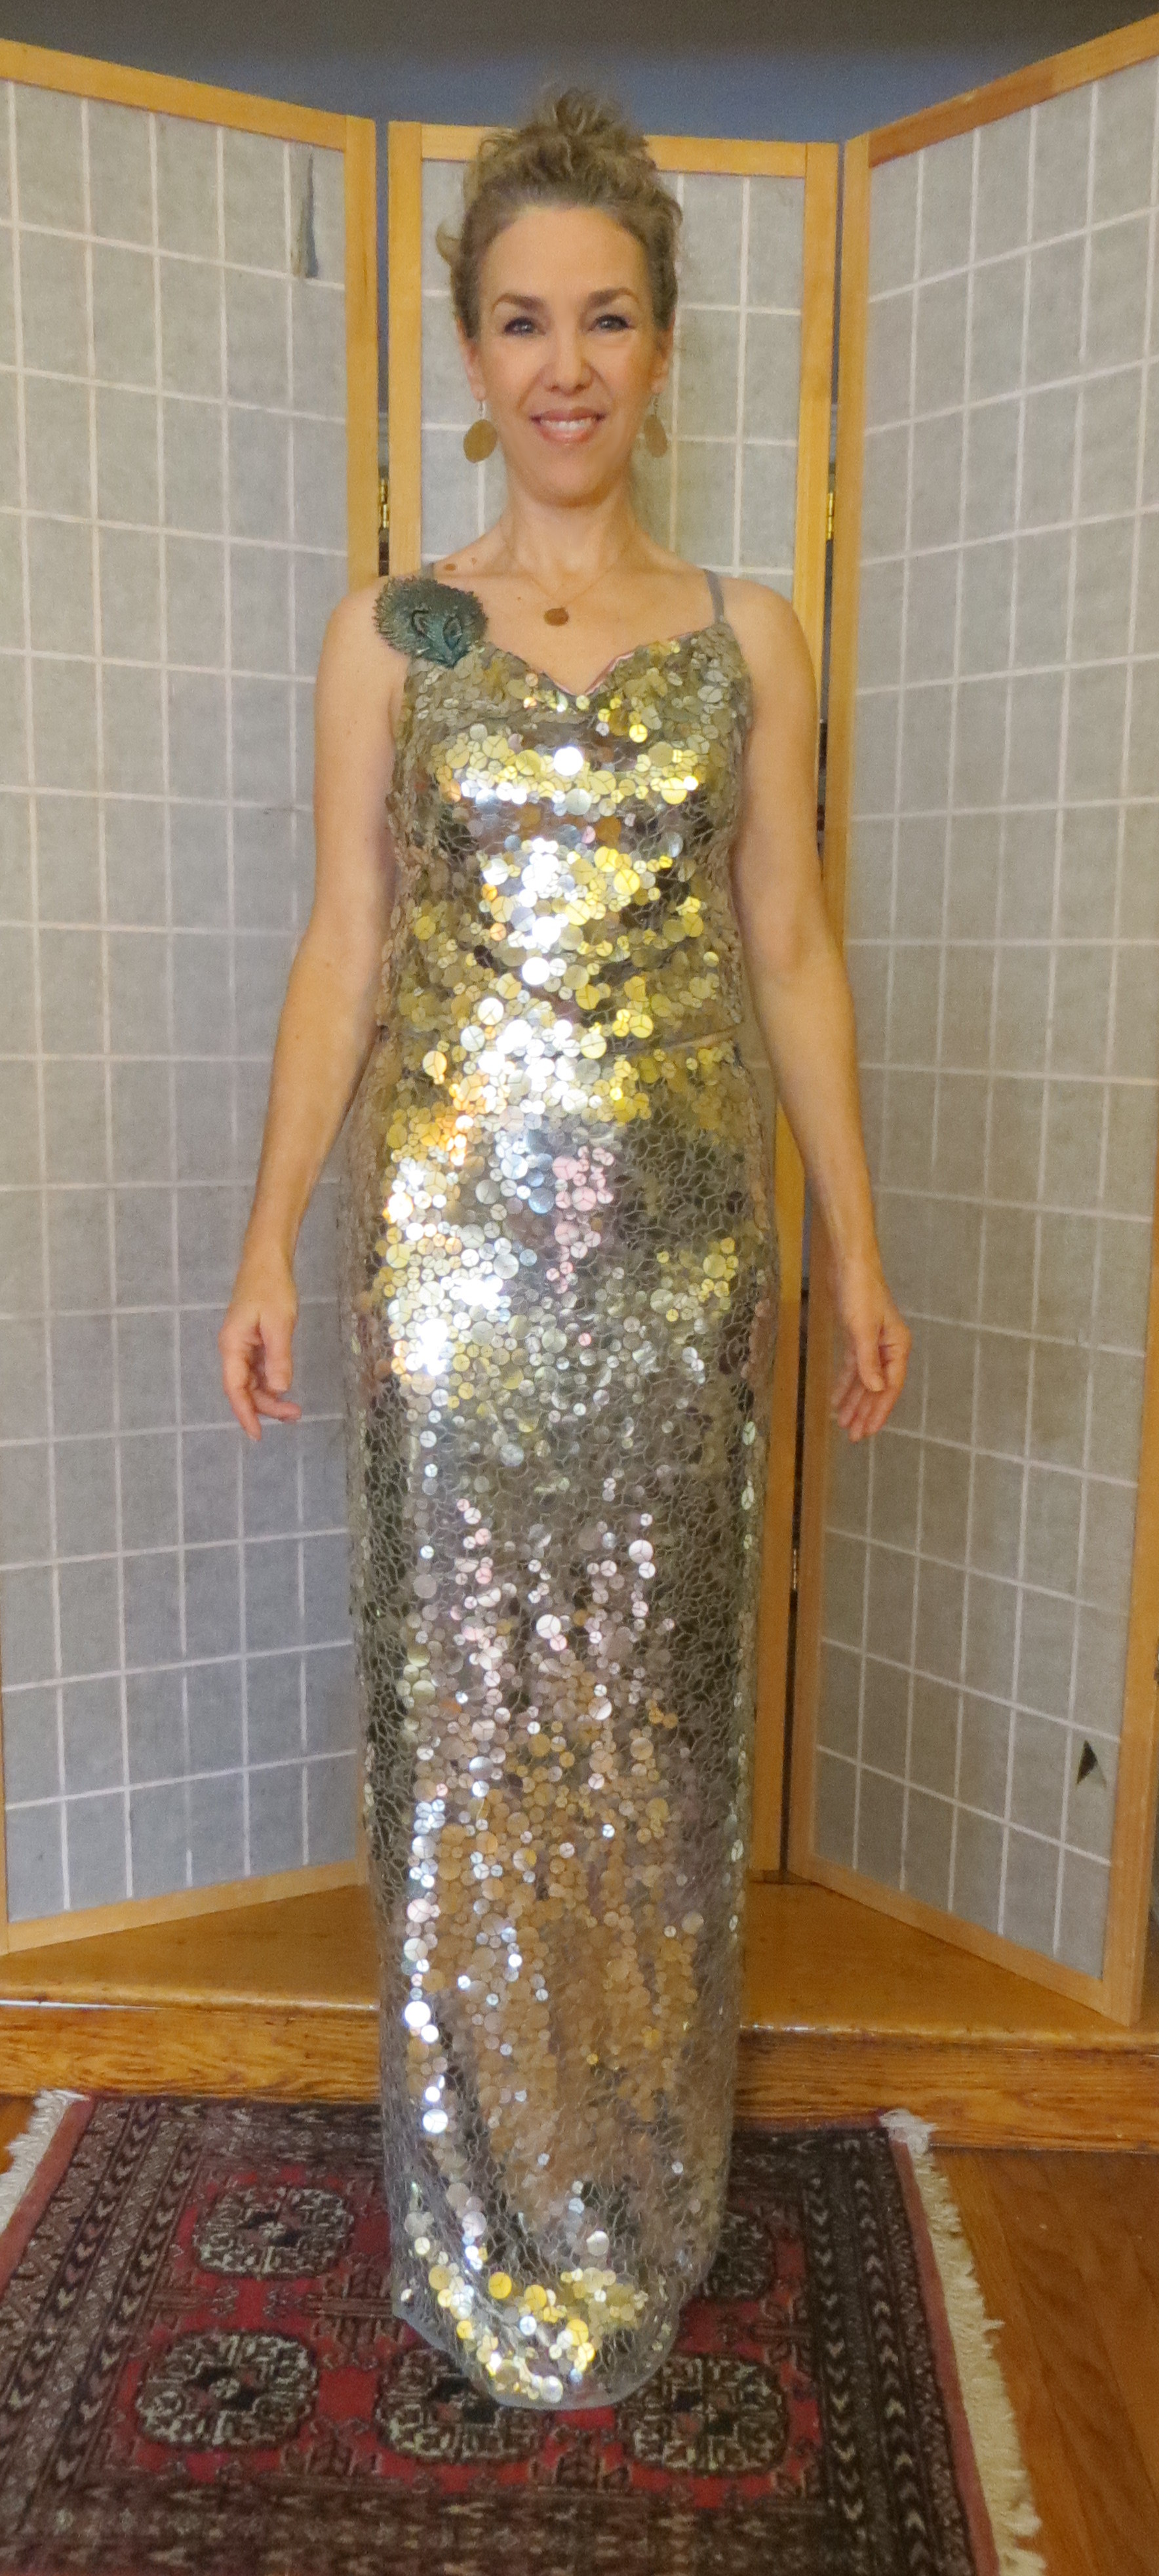
So, what do you think??
(remember, you can click on any photo to see it bigger. Just don’t go too big on the face!)
Crop Top
Handkerchief Top two ways: stretched (left) and draped (middle). (I added a peacock feather detail on the shoulder. It had originally been on a hair band.)
Simple Silk Blouse.
Now you all weigh in. Was I successful? If so, which look do you like best?
I’ll be featured on various blogs over these two weeks From February 23~ March 9th. Please stop by and take a gander. And remember The Dressmaker’s Duke (e-book) is ON SALE for .99 cents through March 3rd!
Today I am taking a 70’s (I think) bridal gown and reinventing it into a new 2015 evening gown.
Now, some of you may sigh and think, “Oh, to destroy someone’s wedding dress, how terrible.”
But, honestly, what can one do with a long, white gown that screams “Bridal”? Face it, you will never wear it again-that’s why I could pick it up at a thrift store for $14.99. Score one for me!
Here is my find~
I think it is slightly reminiscent of the gown Kate Middleton wore to marry her prince. OK, just Slightly. :o)
Initially I think I will try to turn it into a Regency gown ~ the time of The Dressmaker’s Duke. If I did I could keep it white and would not have the headache and possible failure of trying to dye the thing. But, I bought another wedding dress at the same time I bought this one and I think the other will be a better fit for the Regency gown project (coming soon). So I begin to look at this dress as something I can actually wear someday.
I decide to remove the sleeves (I will turn them into long evening gloves in another project.) And I take the shoulder seam out altogether, ripping it right up to the neckline.
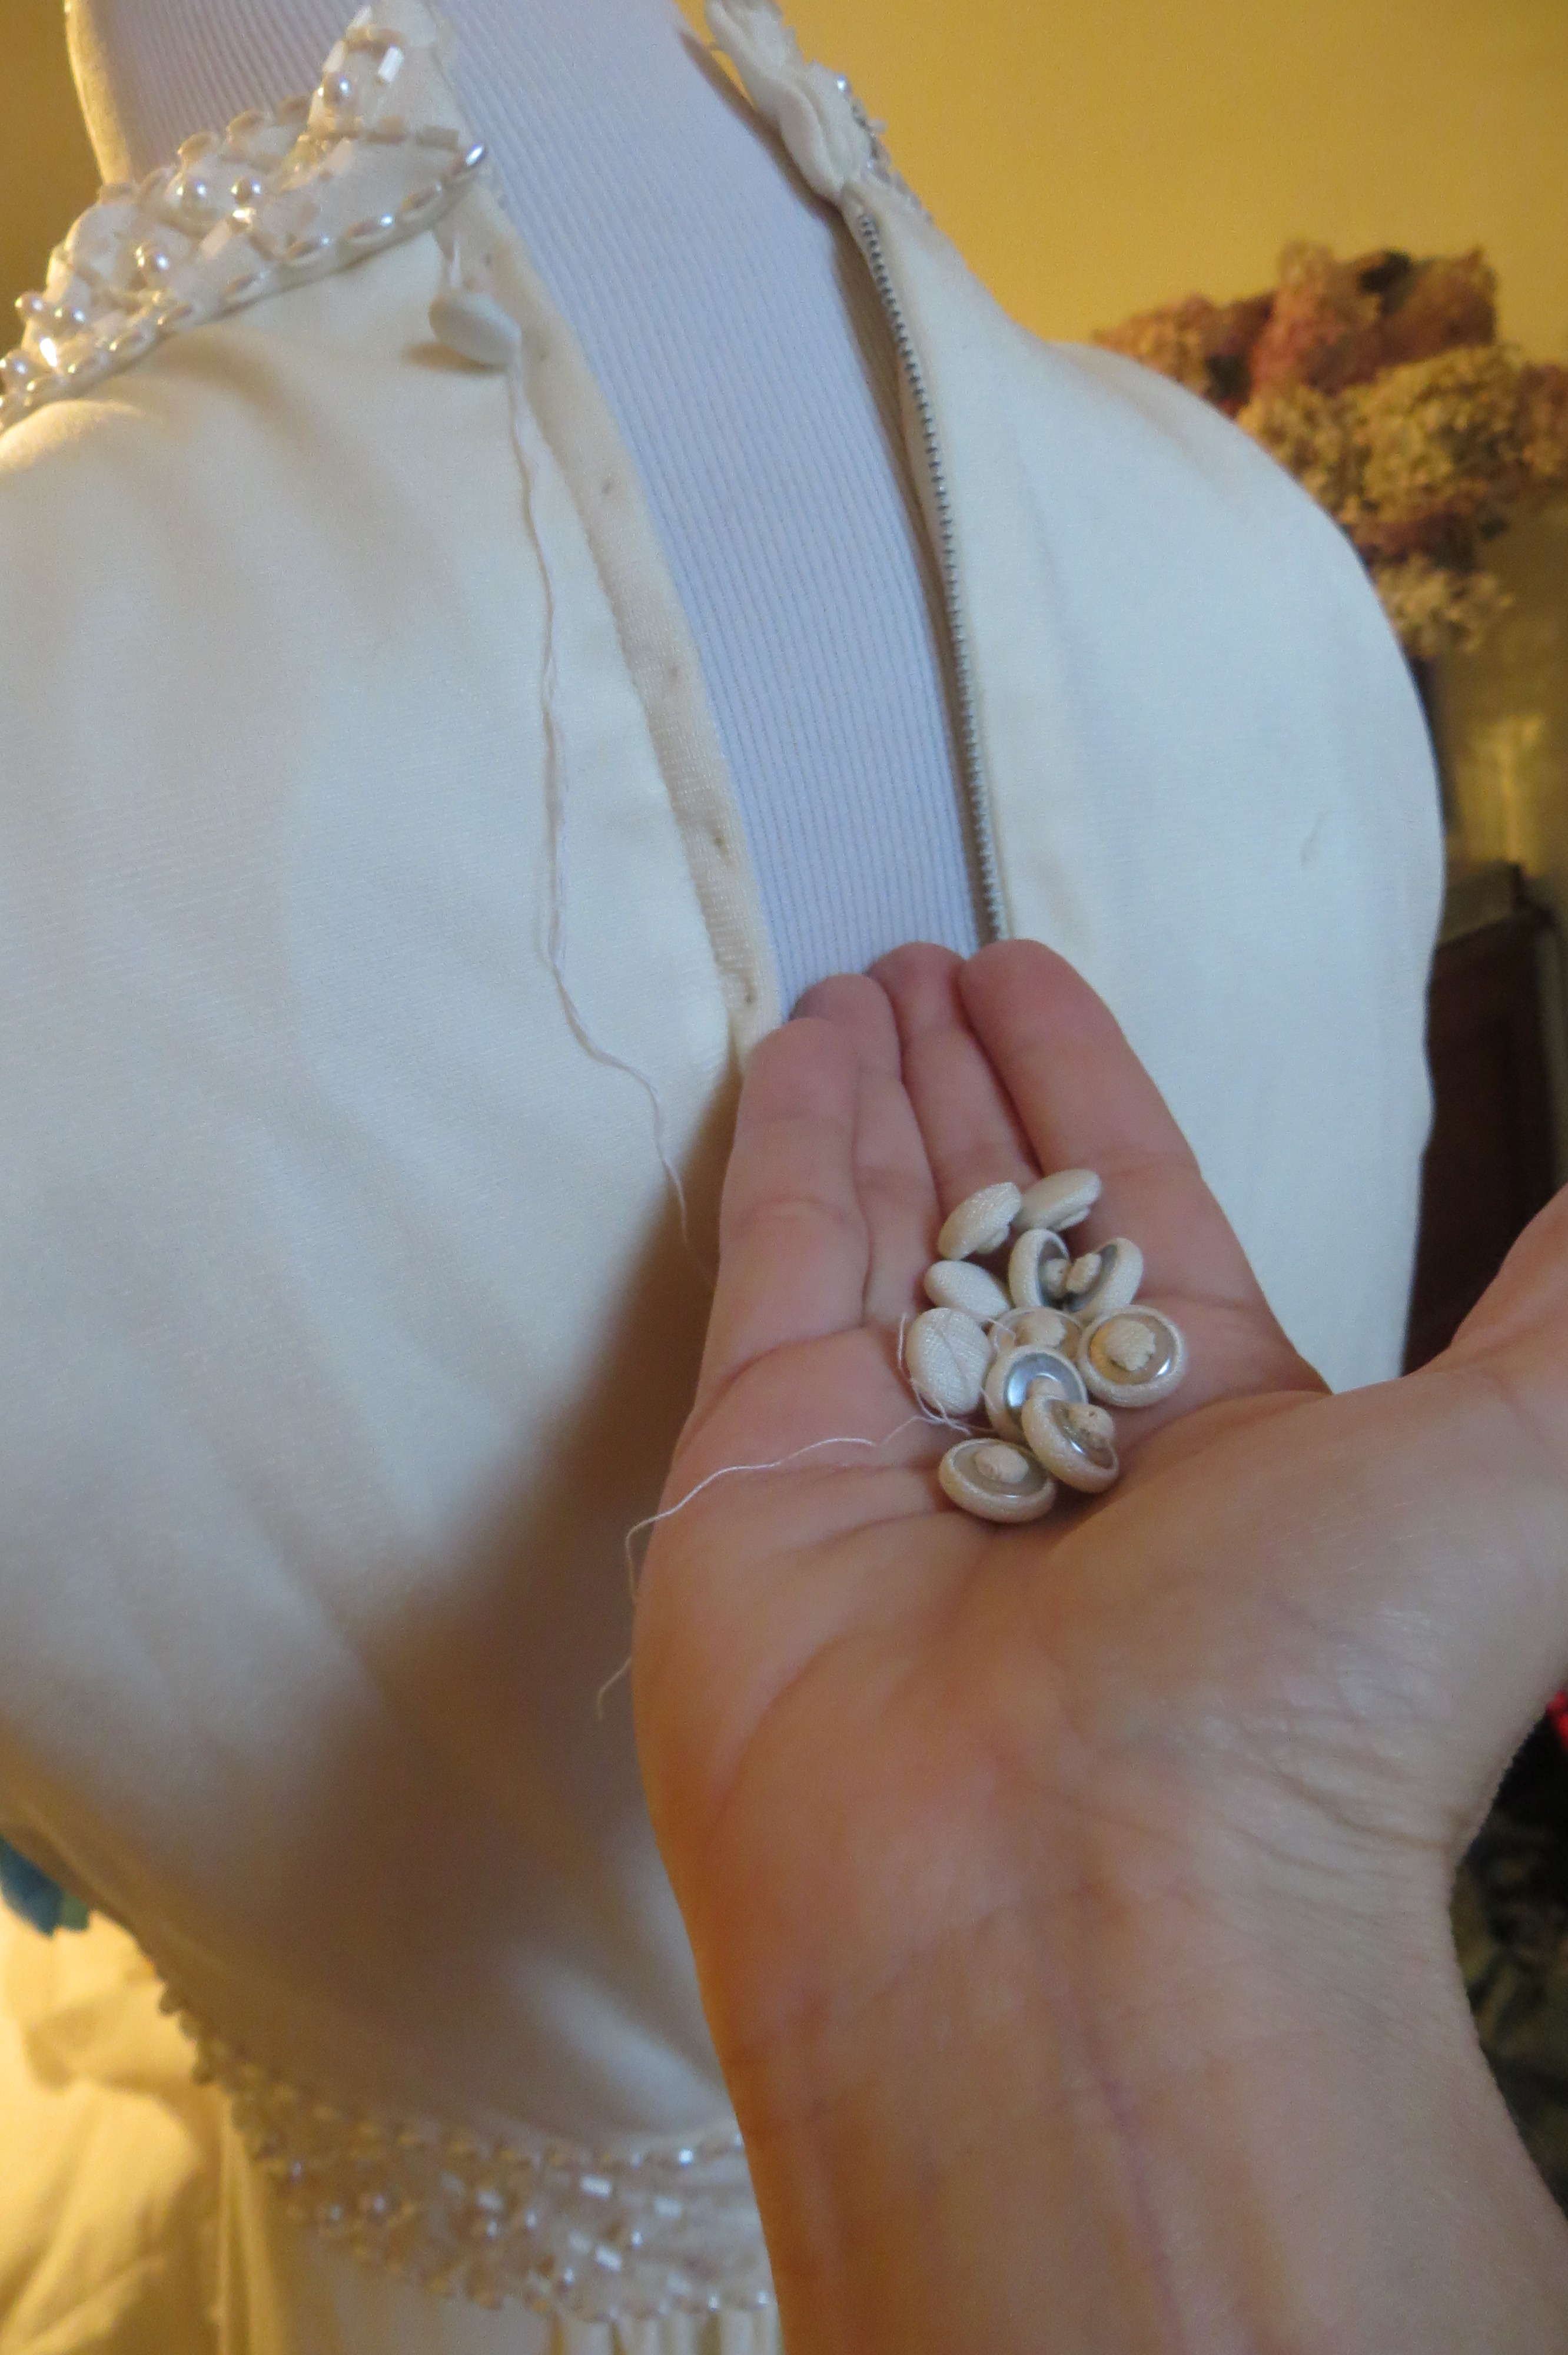
Next I remove all the buttons from the back and take out the zipper from the neckline to the waist embellishment. I decide I want the back to mimic the front with a slight “V” opening.
HOWEVER, it is still WHITE. Still very BRIDAL.
So, in for a penny, in for a pound, I decide to dye the dress. Fingers (and toes) crossed!
I am not sure what this dress is made of–something man-made for sure. I take a snippet of fabric from the selvage in a seam and see if it will take dye. It does, though when I rinse it becomes appreciably lighter.
In preparation for dying, I wash the dress, And I hack off some of the train. I think about cutting out the under slip, but decide to leave it. (FYI, The less fabric you have to dye, the better)
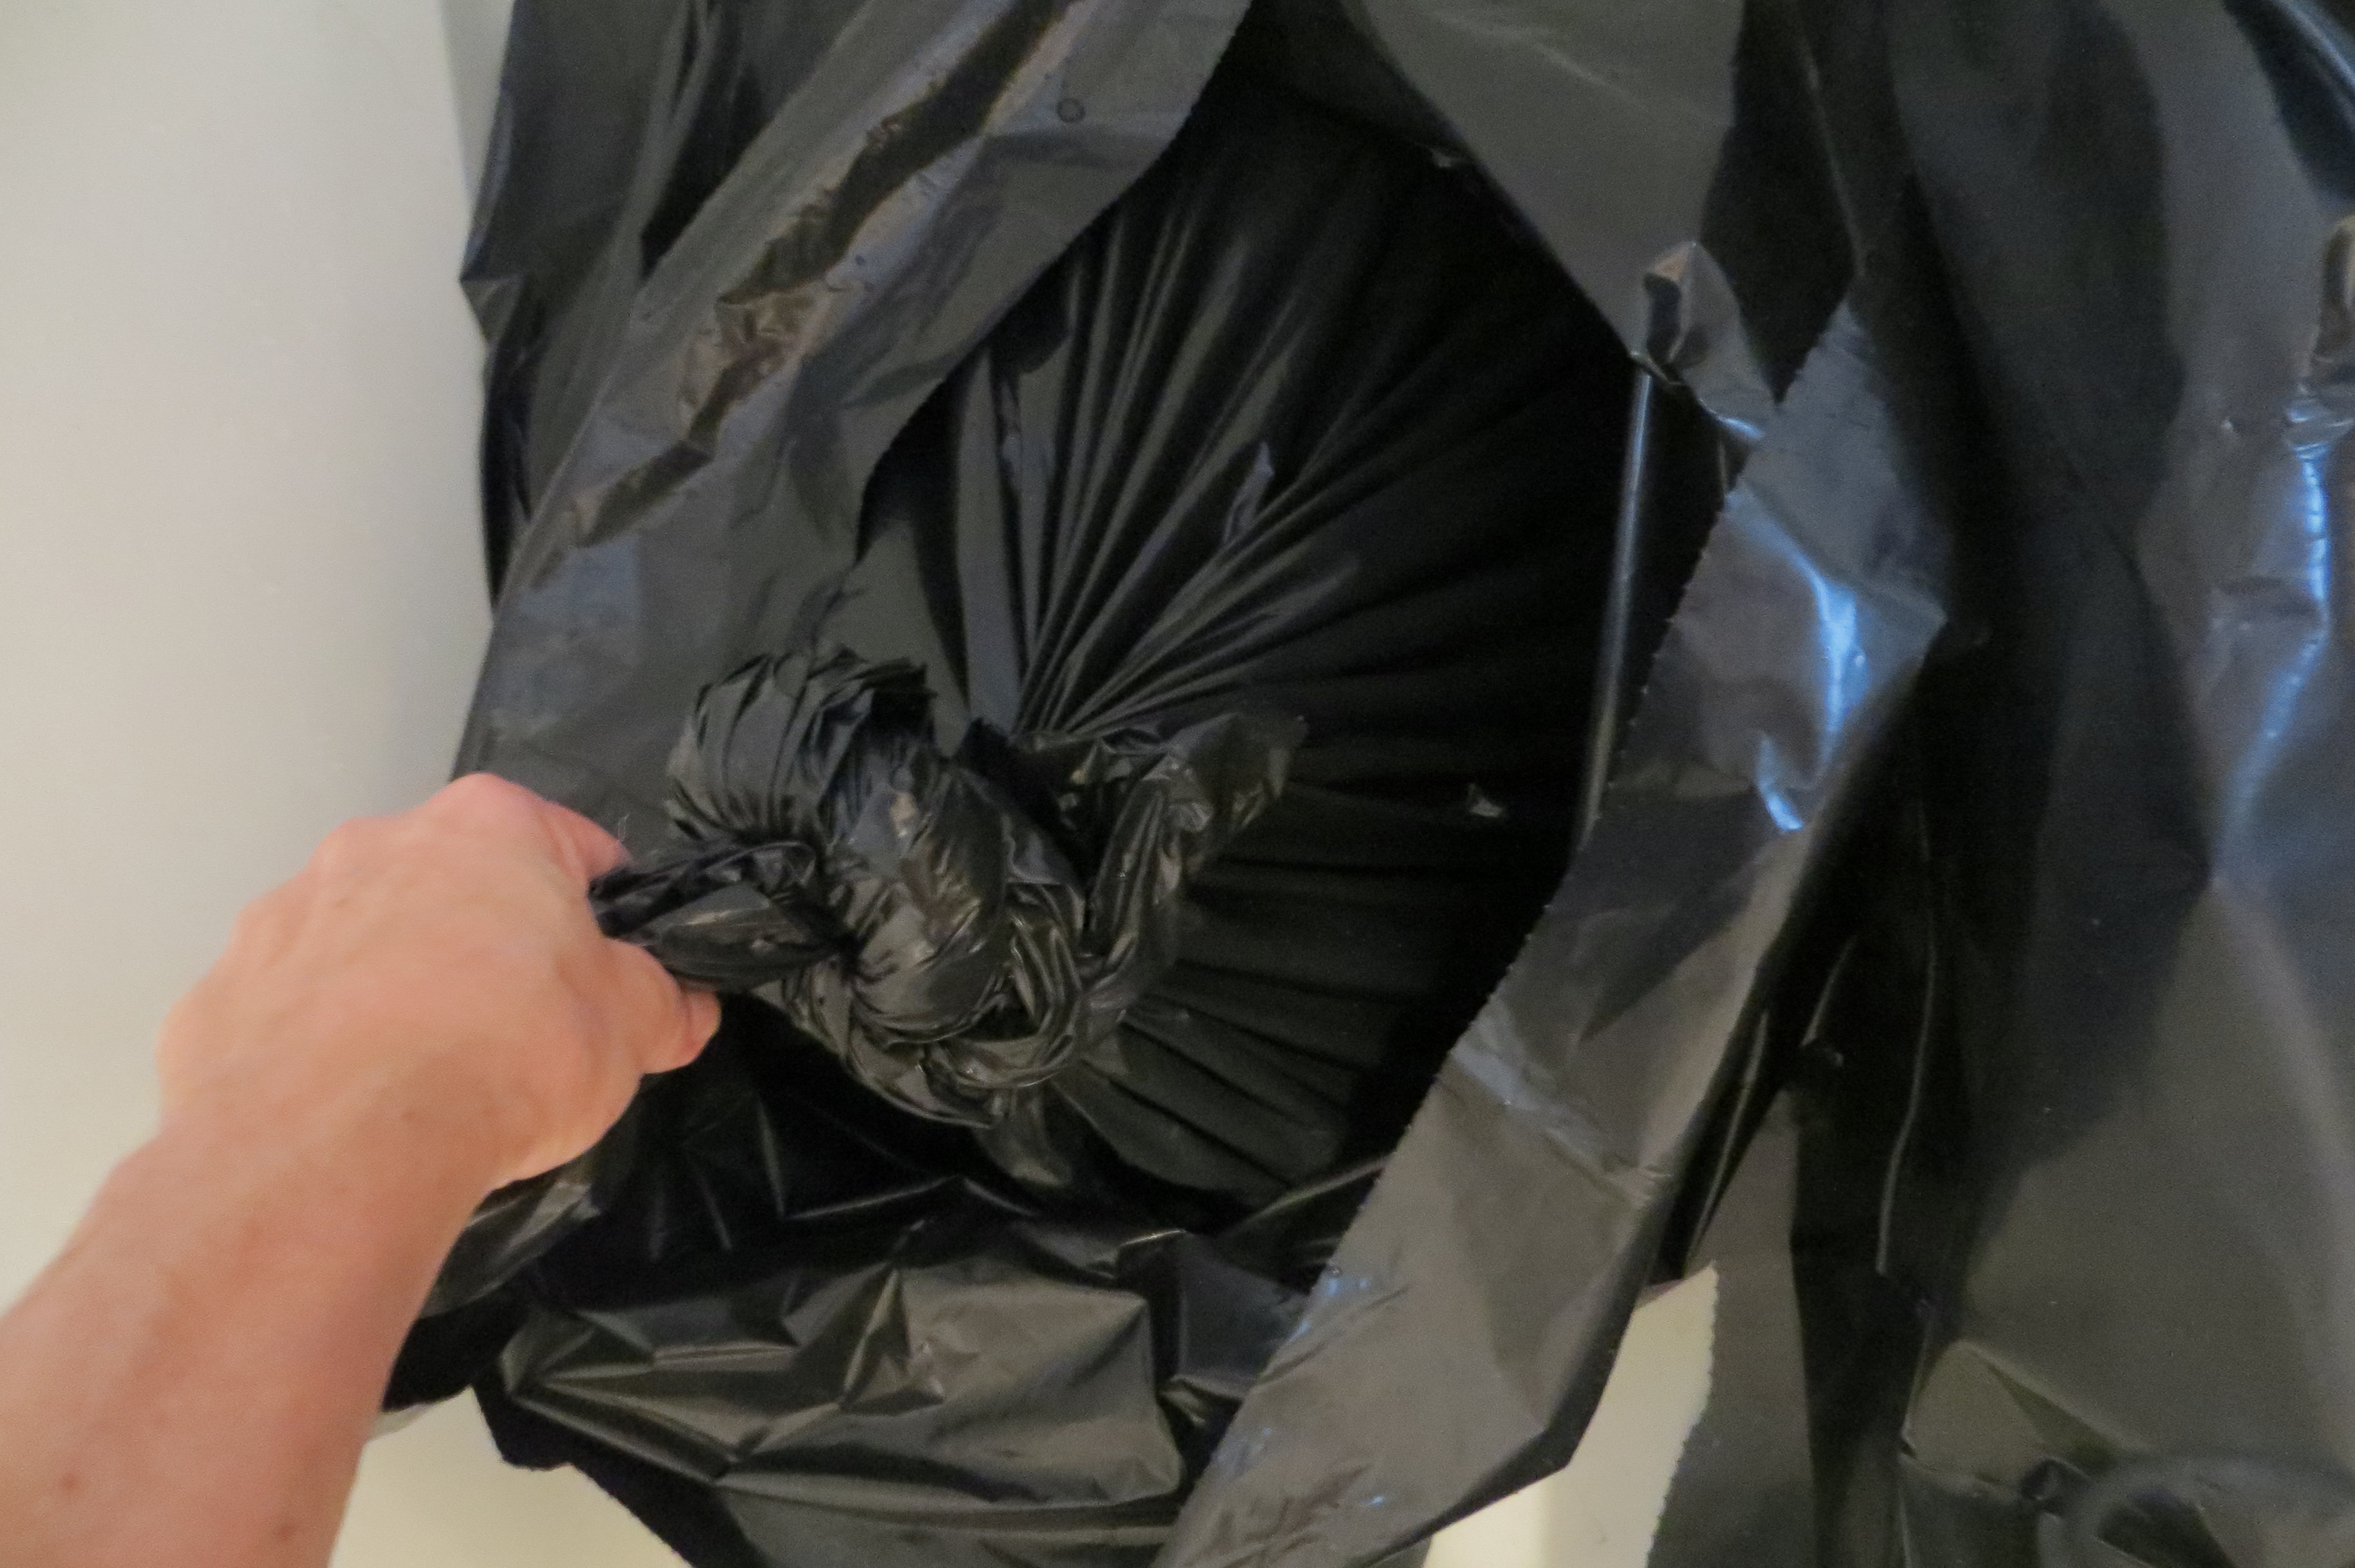
Using heavy duty trash bags, two bottles of teal and one of royal dye, a bottle of white vinegar, and very hot water, I prepare my dye bath in my bath tub.
Moment of truth! In goes the gown. I make sure it is saturated and then tie the bag up. I agitate the bag every so often so that nothing settles too long. I fill the tub around the bag with hot water and let it “cook” for several hours.
Real moment of truth… I pull the dress out of the bag. It looks pretty darn even!
I hang it on the shower head and let it drip into the trash bag. Then I notice something BAD. Sweat stains under the arm pits.
Ugh! OK, (I take a breath) and remind myself this is what makes these projects challenging. My mind begins to whirr with possible solutions.
I rinse the dress in cold water several times and let it dry.
Now the dreaded sweat stain. I could take fabric from the shoulder seam and “patch” the area, but this is too labor intensive and might be too bulky. I decide to split the side seam right down to the waist embellishment so that the armhole comes straight from the neck to the embellishment right under the bust. Much simpler since now there is no curve to deal with, and actually I think it looks better. This is a great example of a BAD thing that turns into a GOOD thing. (I LOVE when this happens.)
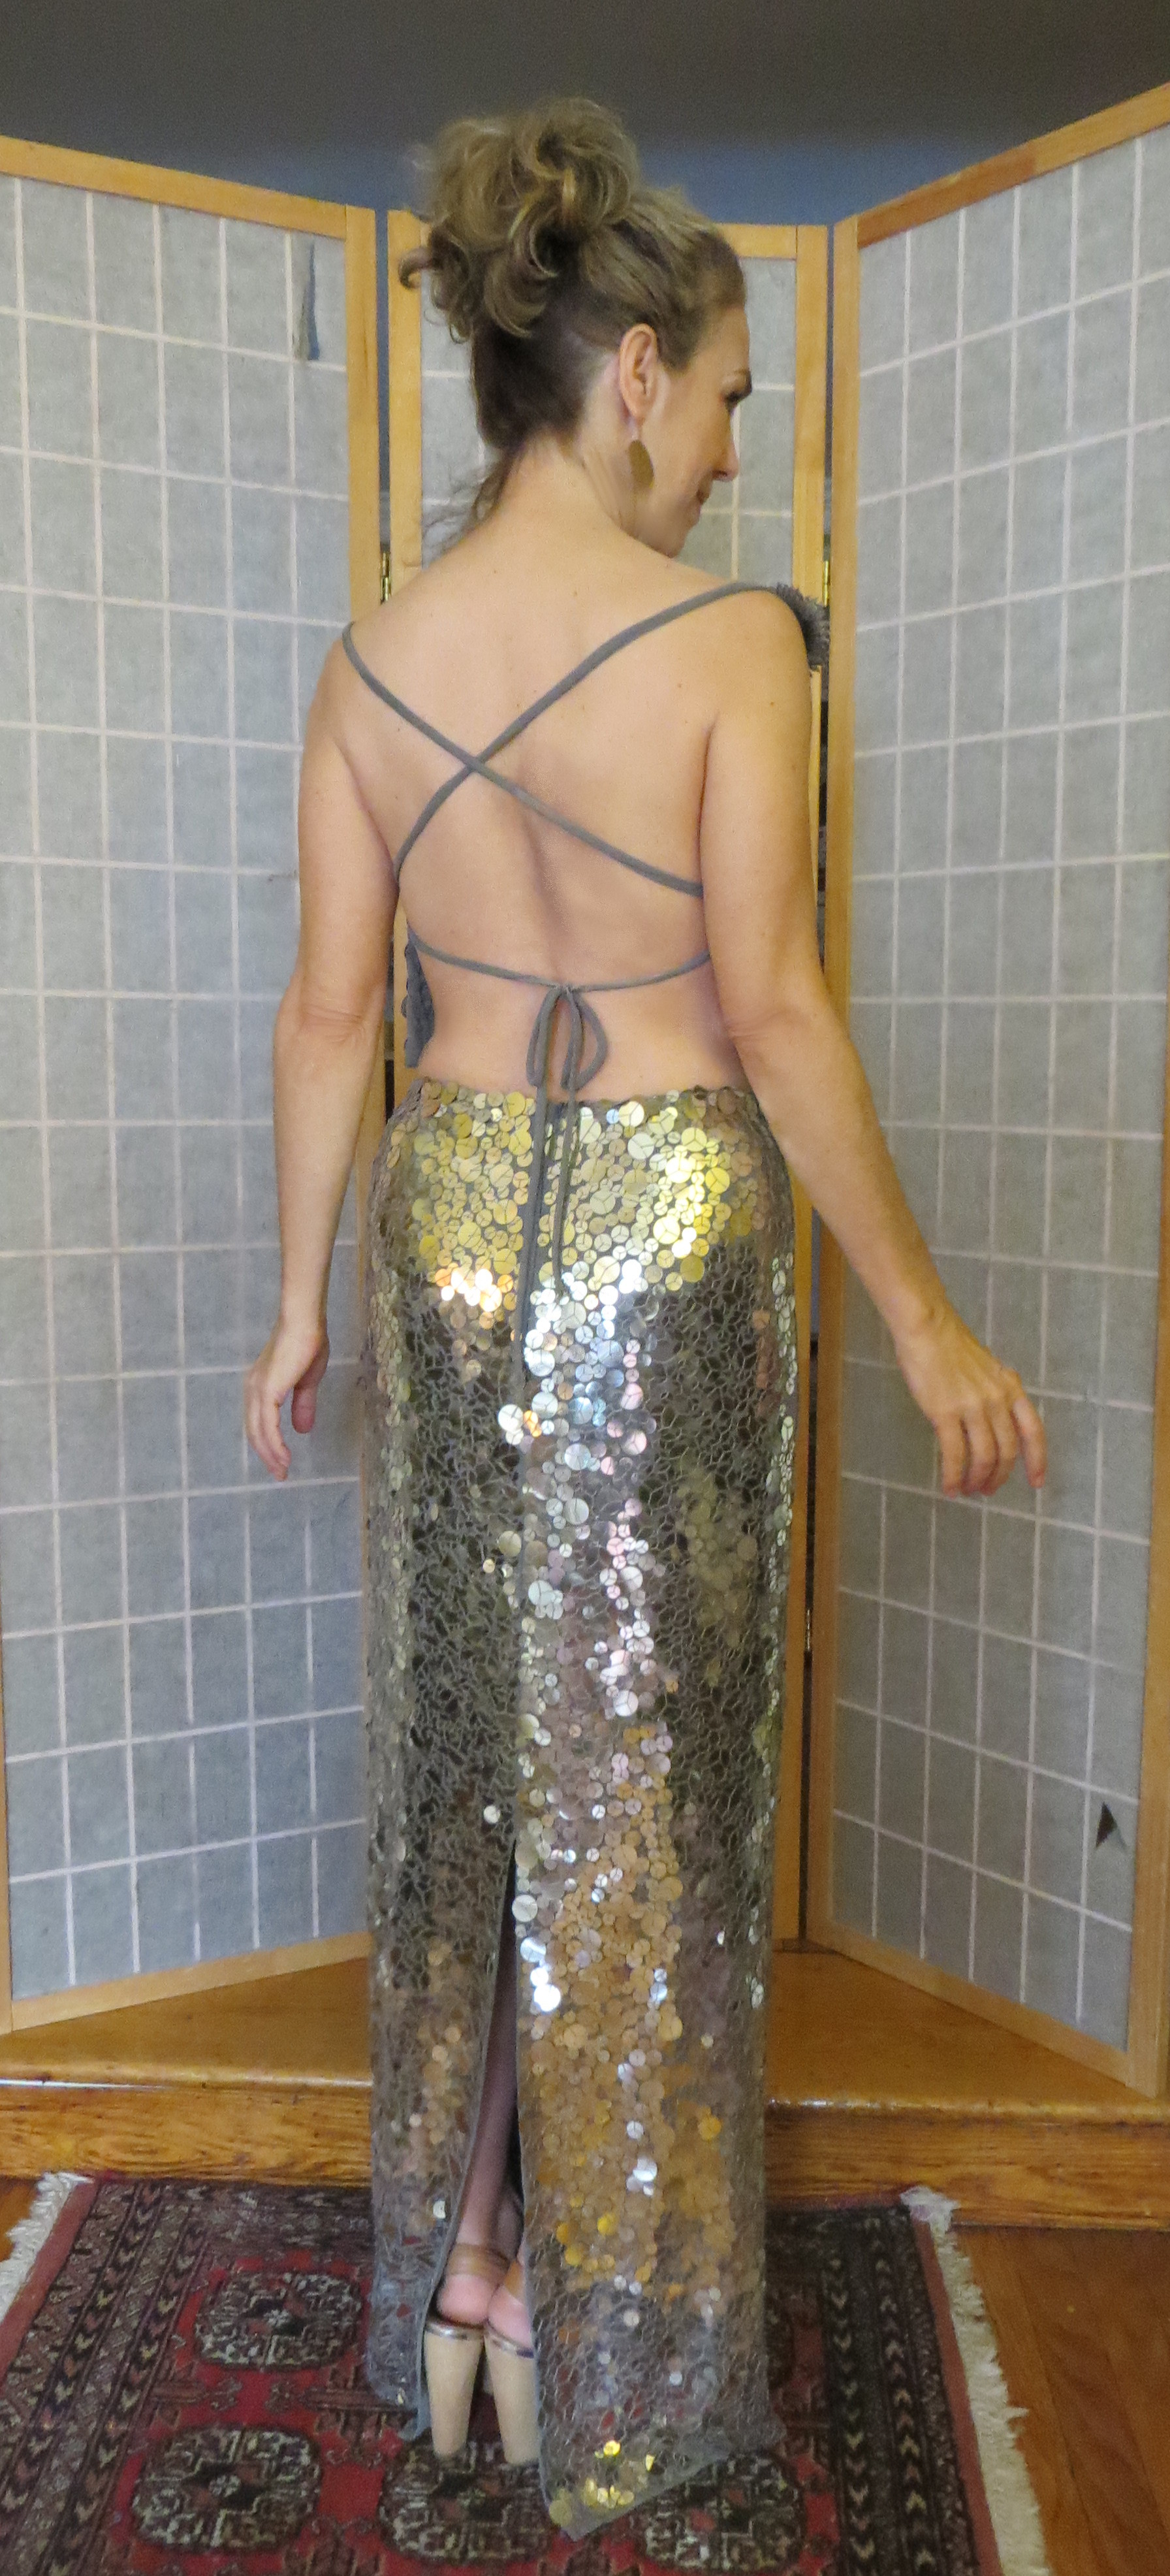
Then I hand stitch the new armholes and the “V” back.
I play around with some sort of embellishment at the hem line, (silver flower petals) but I really don’t think the dress needs it. There are no stains or flaws to cover up. (I have done this on the dress below. It looked as if a cat had gotten hold of it. Lots of pin-hole tears in the organza skirt. I simply sewed tiny silk flowers over every tear. Once again, A BAD thing made GOOD!
The $ Tally:
Dress: (less 25%) $14.99 ……………… $11.75 with tax
Dye: 3 bottles@ $3.99 ……………….$12.00
Total …………………………………………..$23.75
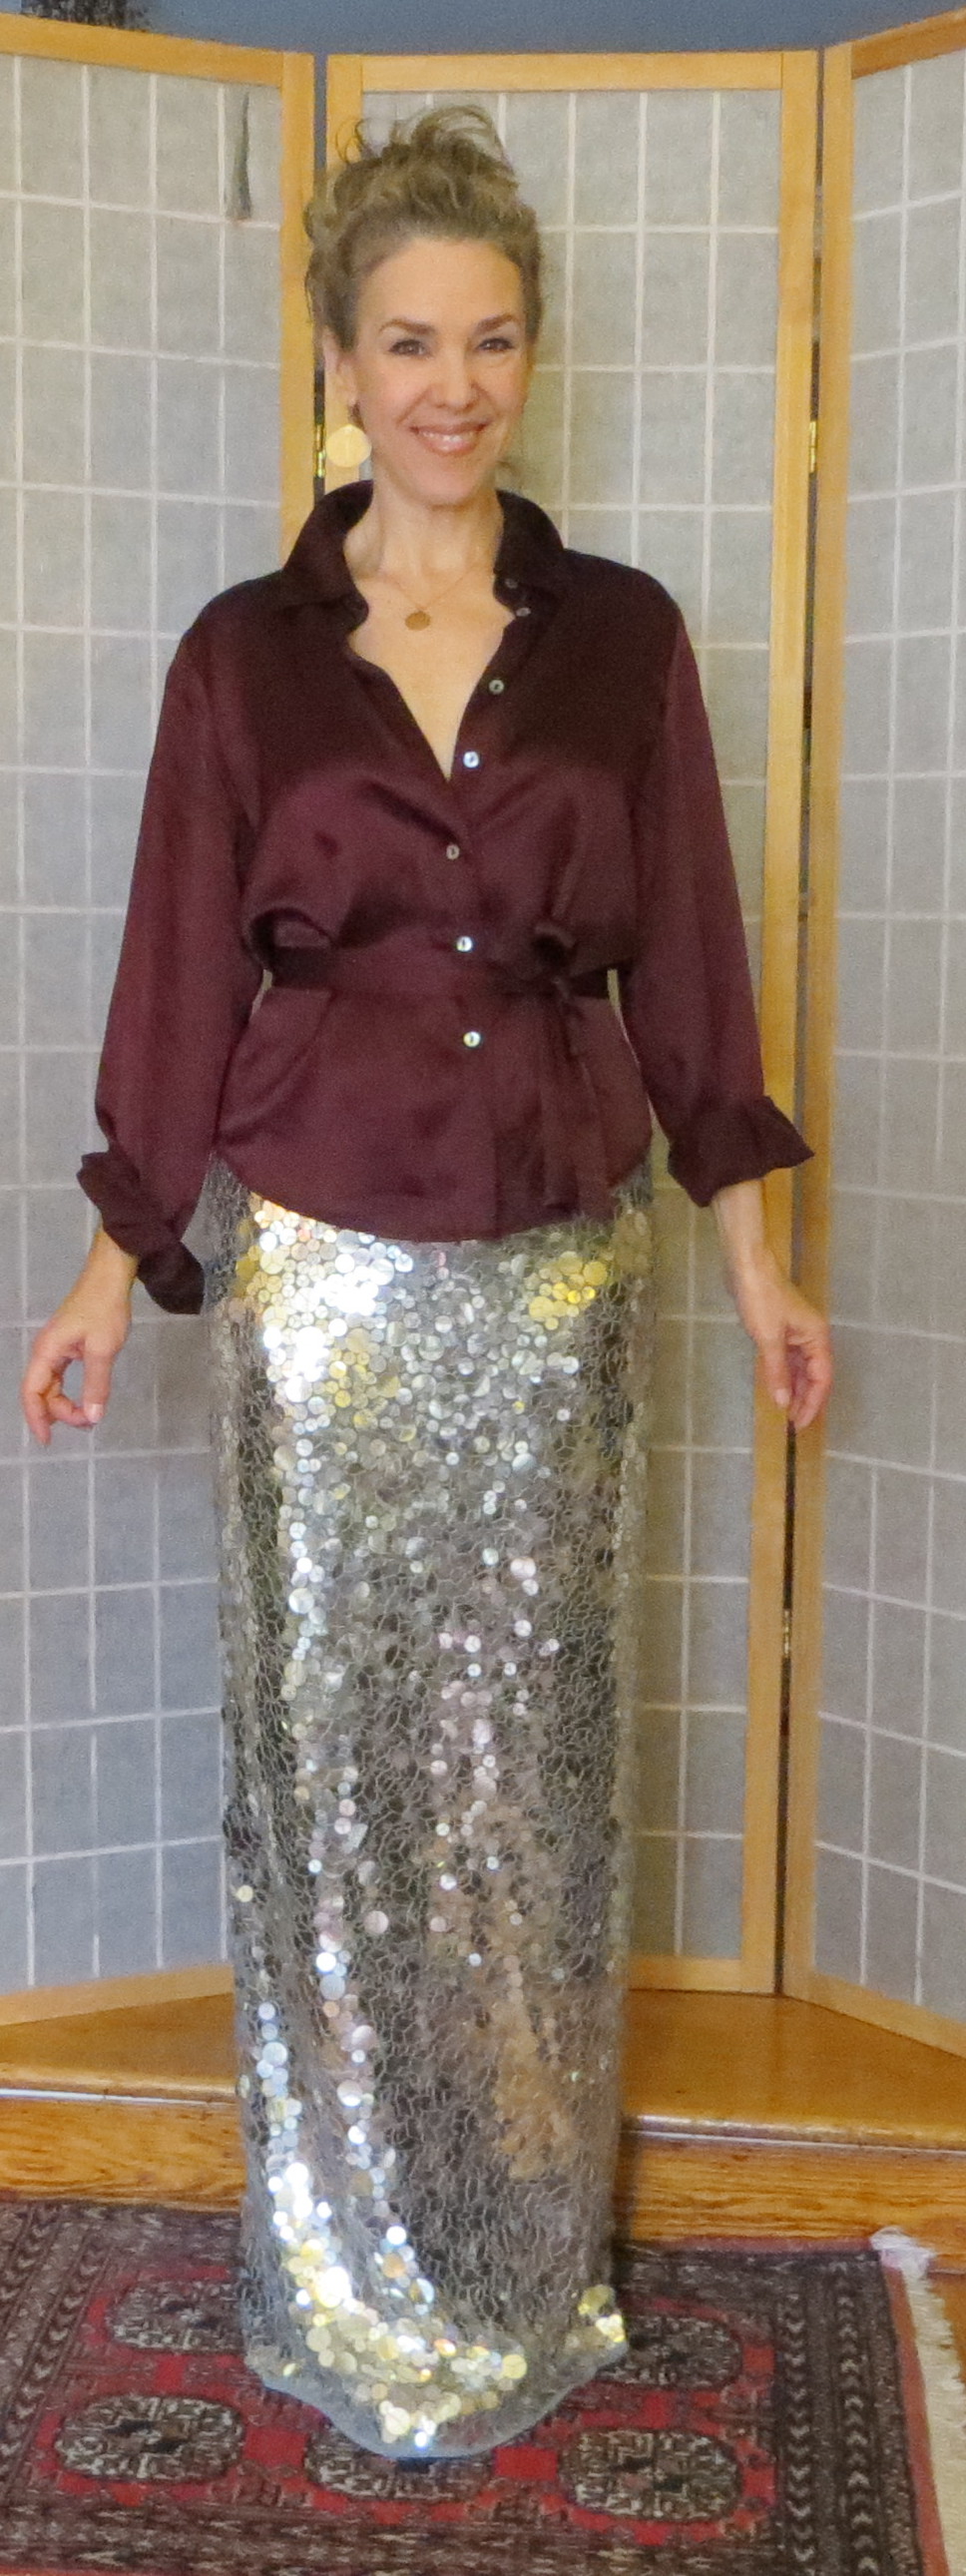
So, here is my finished dress! What do you think?
Thanks for stopping by!
BTW, The Dressmaker’s Dukewill be Five months old on February 26th! And starting on the 20th it will be on SALE for .99 cents!! But only for two weeks so please take advantage and pick one up or gift one to a friend!
Also, I have 93 reviews! Thanks to everyone who reviewed. I would love to get 100by the end of this month. So PLEASE, if you haven’t written a review, would you take a moment to do so? If you need help with posting, please give me a shout!